Unlocking the Secrets of Gratiola peruviana: A Propagation Primer
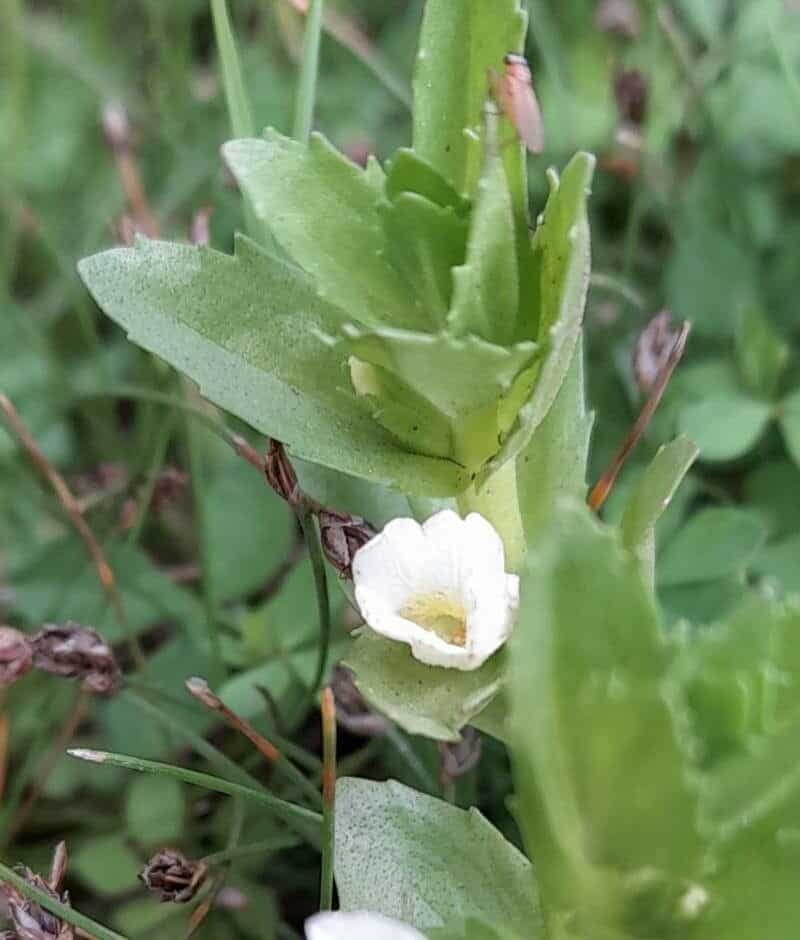
Gratiola peruviana, also known charmingly as the Peruvian Hedgehyssop, is a captivating plant boasting vibrant green foliage and charming tubular flowers that range from delicate white to a gentle blush pink. Native to South America, this semi-aquatic perennial thrives in moist, boggy environments and adds a touch of wild beauty to any garden pond or water feature.
While Gratiola peruviana can be a bit of a hidden gem in the gardening world, propagating this unique plant isn’t as complicated as its scientific name might suggest! Let’s dive into the different methods you can use to expand your Gratiola collection and enjoy its charm for seasons to come.
Method 1: Seed Starting – A Rewarding Challenge
Starting Gratiola peruviana from seed can be a bit trickier than other methods but is ultimately highly rewarding. Here’s what you need to know:
- Seed Collection: Collect ripe seed pods from established plants in late summer or early fall. Look for pods that are starting to dry and turn brown.
- Seed Preparation: Gently break open the pods and extract the tiny seeds. Soak them in warm water for 24 hours before sowing.
- Sowing: Use a seed starting mix specifically designed for water-loving plants. Scatter the seeds on the surface and gently press them in – do not bury them!
- Environment: Maintain high humidity by covering the tray with a humidity dome or plastic wrap. Place the tray in a bright location, but out of direct sunlight.
- Germination: Be patient! Germination can be erratic and may take anywhere from a few weeks to a couple of months.
- Transplanting: Once the seedlings have developed a few sets of true leaves, they can be carefully transplanted into individual pots filled with a moisture-retentive growing medium.
Method 2: Cuttings – Simple and Effective
Taking stem cuttings is generally the easiest and most reliable way to propagate Gratiola peruviana:
- Timing is Key: The best time to take cuttings is in the spring or early summer when the plant is actively growing.
- Selecting the Cuttings: Choose healthy, non-flowering stems. Ideally, the cuttings should be around 4-6 inches long.
- Preparing the Cuttings: Remove the lower leaves from the bottom inch or two of the stem, leaving 2-3 leaves at the top. You can dip the cut end into rooting hormone powder (optional) to encourage faster root development.
- Planting: Insert the cuttings into a pot filled with a moist, well-draining rooting medium. A mix of peat moss and perlite works well.
- Creating Humidity: Cover the pot with a clear plastic bag or a propagation dome to create a humid environment, crucial for rooting.
- Patience is a Virtue: Place the pot in a bright location out of direct sunlight and keep the soil consistently moist. Root development can take several weeks.
- Transplanting: Once the cuttings have developed a strong root system, they can be transplanted into individual pots or directly into your garden pond.
Additional Tips for Success:
- Using rainwater or distilled water throughout the propagation process can help prevent mineral buildup and promote healthier growth.
- Maintain a consistent temperature between 70-75 degrees Fahrenheit for optimal results.
- Be patient and don’t give up! Propagation can sometimes be a bit of trial and error, but with a little persistence, you’ll be enjoying the beauty of Gratiola peruviana in no time.
By following these guidelines and embracing the rewarding challenge of propagation, you can enjoy the unique grace of Gratiola peruviana in your own garden haven.