Unlocking the Secrets of the Australian Indigo: Propagation Techniques for Vibrant Gardens
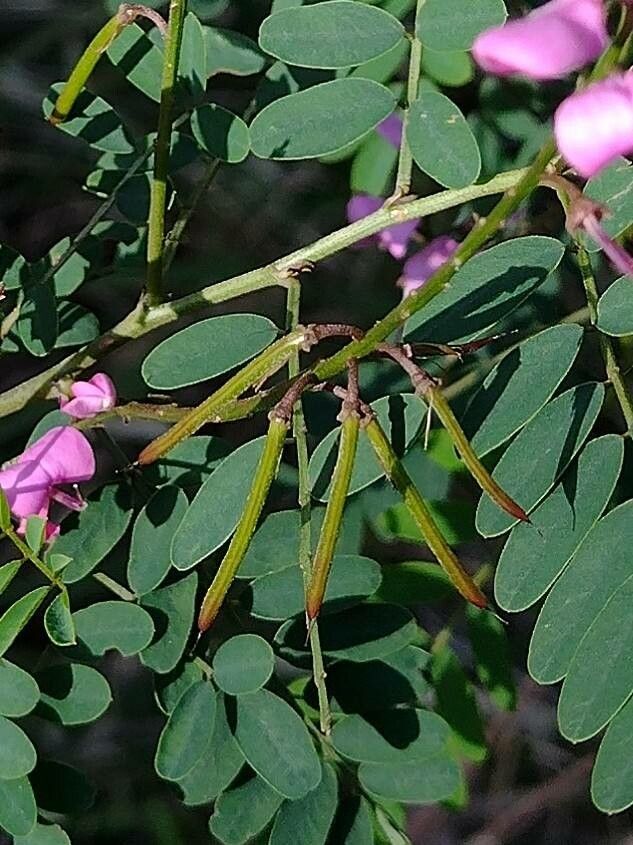
The Australian Indigo (Indigofera australis), with its stunning sprays of delicate purple-pink flowers and feathery foliage, is a true showstopper in any garden. Native to Australia, this hardy shrub adds a touch of whimsical beauty while attracting beneficial pollinators like bees and butterflies. But did you know that propagating your own Australian Indigo is surprisingly achievable, even for beginner gardeners?
This guide dives into the different methods of propagating Indigofera australis, giving you the tools to expand your garden with these gorgeous plants.
1. Growing from Seed: A Rewarding Challenge
While slightly more time-consuming, growing Australian Indigo from seed offers a deeply satisfying experience. Here’s how:
- Seed Collection: Harvest mature seed pods from an established plant in late summer or autumn. Allow the pods to dry completely before cracking them open to reveal the small, brown seeds.
- Scarification: To enhance germination rates, gently nick or rub the seed coat with sandpaper. This process, known as scarification, helps water penetrate the tough outer layer.
- Sowing the Seeds: Plant the seeds in a well-draining seed-raising mix, covering them lightly with soil. Keep the soil consistently moist but not waterlogged.
- Patience is Key: Germination can take anywhere from a few weeks to a few months. Be patient and provide gentle warmth and indirect sunlight.
2. Cuttings: A Faster Route to New Plants
Propagating from cuttings offers a quicker method for establishing new Australian Indigo plants. Here’s what you need to do:
- Timing is Everything: Take cuttings in late spring or early summer from healthy, non-flowering stems.
- Taking the Cuttings: Select stems that are around 10-15cm long and cut just below a leaf node (the point where a leaf emerges from the stem).
- Preparing the Cuttings: Remove the lower leaves from the cutting, leaving 2-3 leaves at the top. Dip the cut end in rooting hormone powder (optional but beneficial) to encourage root development.
- Planting the Cuttings: Plant the cuttings in a well-draining potting mix, burying at least one leaf node. Water thoroughly and maintain a humid environment by covering the pot with a plastic bag or using a propagator.
- Rooting Time: Cuttings typically take 4-8 weeks to develop roots. Once new growth appears, you can gradually acclimatize the plant to outdoor conditions before transplanting.
3. Layering: A Natural Approach
Layering is a less common but effective propagation method for Australian Indigo:
- Choosing a Stem: Select a low-growing, flexible stem on an established plant in spring.
- Preparing the Stem: Gently wound the underside of the chosen stem by making a small cut or scraping.
- Layering the Stem: Bend the wounded section of the stem down to the ground and bury it in the soil, securing it with a rock or landscape pin.
- Root Development: Keep the soil consistently moist. Roots will typically develop within a few months.
- Separation: Once the layered stem shows signs of new growth, it can be separated from the parent plant and transplanted.
Tips for Success:
- Regardless of the propagation method, using a well-draining potting mix is crucial for healthy root development.
- Australian Indigo thrives in sunny locations but appreciates some afternoon shade in hotter climates.
- These plants are relatively drought-tolerant once established but benefit from regular watering during their first year.
By following these simple steps, you can unlock the secrets of Australian Indigo propagation and enjoy these breathtaking blooms for years to come. So, roll up your sleeves, get propagating, and prepare to transform your garden with the vibrant hues of the Australian Indigo!