Igniting the Crimson Glow: A Guide to Propagating Xanthostemon Ruber
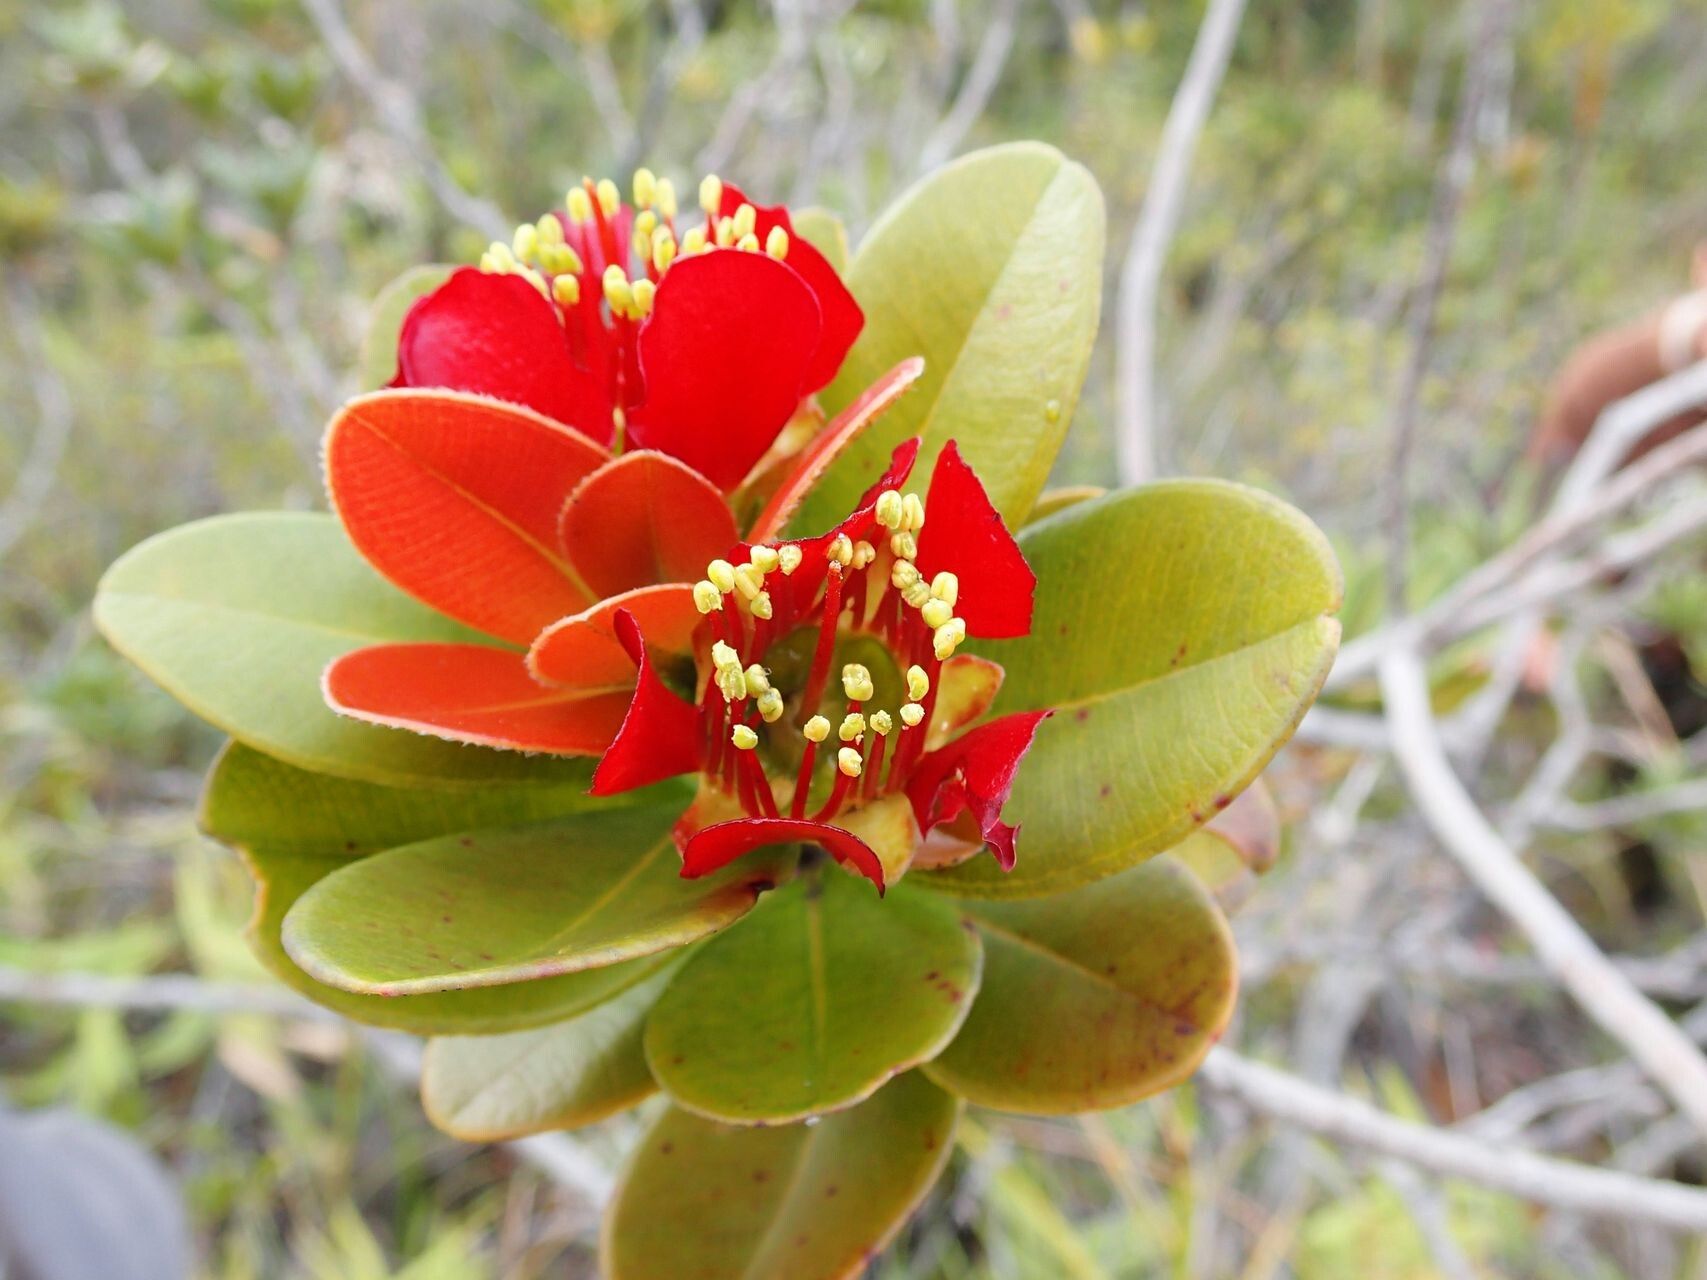
The Xanthostemon ruber, also known as the Crimson Bottlebrush, is a showstopper in any garden. Native to Australia, this evergreen shrub explodes with vibrant red bottlebrush-like blooms, attracting nectar-loving birds and envious glances from neighbors. While readily available in nurseries, there’s a special satisfaction to propagating your own Xanthostemon ruber. Fear not, budding horticulturalists, for this guide will equip you with the know-how to successfully cultivate new life from this crimson beauty.
Two Roads to Propagation
Xanthostemon ruber can be propagated through two main methods: seeds and cuttings. Each technique has its own pros and cons, allowing you to choose the one that best suits your gardening style and resources.
1. The Seed Route: Embracing Patience
Propagating from seed offers a rewarding experience, albeit a slow one. Here’s how:
- Seed Collection: Gather mature seed capsules from an existing Xanthostemon ruber. These capsules are woody and contain numerous small seeds.
- Seed Preparation: Gently crush the capsules to release the seeds. No need for any special treatment – these seeds are ready to go!
- Sowing the Seeds: Use a well-draining seed raising mix and sprinkle the seeds on the surface. Cover them lightly with a thin layer of mix.
- Warmth and Moisture: Place the seed tray in a warm, sunny location. Keep the soil consistently moist but not waterlogged.
- Germination: Be patient, young padawan. Germination can take anywhere from a few weeks to a few months.
- Transplanting: Once the seedlings are large enough to handle, transplant them into individual pots.
Pros:
- Cost-effective: Collecting seeds from existing plants is inexpensive.
- Genetic Diversity: Seed propagation can lead to variations in flower color and plant habit.
Cons:
- Time-Consuming: Germination can be slow, and it takes longer for seed-grown plants to flower.
2. The Cutting Edge: A Quicker Path
If you desire a faster route to blossoming glory, cuttings are the way to go:
- Timing is Key: Take cuttings in the morning during the cooler months, ideally from spring to early autumn.
- Selecting the Cuttings: Choose healthy, semi-hardwood stems that are around 4-6 inches long. Ideally, take cuttings from new growth.
- Preparing the Cuttings: Remove the leaves from the bottom two inches of the stem. Make a clean cut just below a leaf node.
- Hormone Boost: Dip the cut end in rooting hormone powder to encourage root development.
- Planting the Cuttings: Plant the cuttings in a well-draining potting mix. A mix of peat moss and perlite works well.
- Creating a Humid Environment: Cover the cutting with a plastic bag or use a propagator to maintain humidity.
- Root Development: Keep the soil consistently moist. Root development typically takes 4-8 weeks. You’ll know it’s working when new growth emerges.
- Transplanting: Once rooted, transplant the cuttings into individual pots.
Pros:
- Faster Results: Cuttings mature quicker than seedlings and will flower sooner.
- Clonal Propagation: Cuttings will inherit the exact characteristics of the parent plant.
Cons:
- Lower Success Rate: Not all cuttings will successfully root.
Nurturing Your Crimson Success
Whether you choose seeds or cuttings, follow these tips to ensure your Xanthostemon ruber thrives:
- Well-Drained Soil: These beauties despise soggy roots. Choose a well-draining potting mix and ensure good drainage in the garden.
- Sunlight is Key: Place your Xanthostemon ruber in a sunny spot, ideally with at least 6 hours of direct sunlight per day.
- Watering Wisdom: Water regularly during the growing season but avoid overwatering. Allow the soil to dry slightly between waterings.
- Pruning Power: Prune after flowering to maintain shape, encourage bushier growth, and promote more abundant blooms.
With a little patience and care, you’ll enjoy the brilliant crimson display of your very own Xanthostemon ruber. So, gather your gardening gloves, choose your propagation path, and get ready to witness nature’s fiery dance unfold in your own backyard.