Unlocking the Secrets of Atractylis Serratuloides: A Propagation Guide
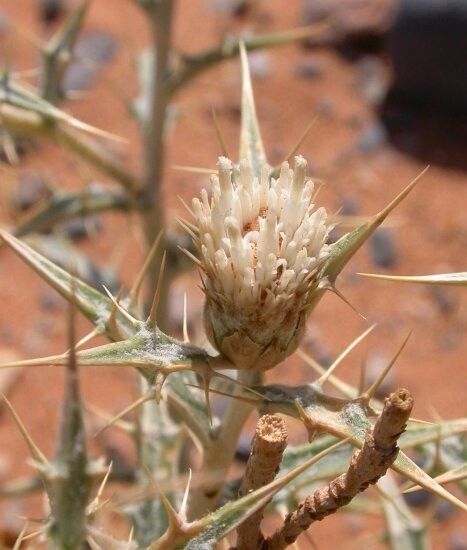
Atractylis serratuloides, also known as the Thistle-leaved Atractylis, is a captivating plant native to the Mediterranean region. With its spiky, silvery-green foliage and charming, thistle-like blooms, it adds a touch of wild beauty and textural intrigue to any garden.
While readily available in established nurseries, propagating Atractylis serratuloides yourself offers a rewarding experience for both novice and seasoned gardeners. This guide will delve into the two main methods of propagation:
1. Seed Propagation: Embracing the Element of Surprise
Propagating from seed brings an element of surprise, as Atractylis serratuloides exhibits natural variation in its offspring. This method, while requiring a touch more patience, offers the possibility of unique plant characteristics:
- Timing is Key: Sow seeds in early spring, ideally indoors, 6-8 weeks before the last expected frost.
- Sowing with Care: Use a well-draining seed starting mix, scattering seeds thinly and covering lightly with a fine layer of vermiculite or soil.
- Creating the Ideal Environment: Provide consistent moisture, warmth (around 70°F or 21°C), and bright, indirect light.
- Nurturing Growth: Germination typically takes 2-4 weeks. Once seedlings develop a few true leaves, transplant them into individual pots.
- Harden Off and Plant Out: Gradually acclimate seedlings to outdoor conditions before permanently planting them in the garden after the last frost.
2. Basal Cutting Propagation: Ensuring Clone Success
For ensuring consistent characteristics, basal cuttings offer a reliable method:
- The Right Time and Tools: Take cuttings in late spring or early summer using a sharp, sterilized knife or pair of pruning shears.
- Selecting the Cuttings: Aim for healthy, non-flowering shoots at the base of the plant. Each cutting should be around 3-4 inches long with a clean cut just below a leaf node.
- Preparing for Propagation: Remove the lower leaves, leaving only a few at the top. Dip the cut end in rooting hormone (optional, but recommended for faster and more successful rooting).
- Planting the Cuttings: Insert the prepared cuttings into a well-draining potting mix, ensuring the leaf nodes are buried.
- Providing Optimal Conditions: Keep the cuttings consistently moist and warm (around 70°F or 21°C). Indirect light is best during the rooting process.
- Transplanting with Care: After 4-6 weeks, gently tug on the cuttings. Resistance indicates successful rooting, and you can then transplant them into individual pots or directly into the garden.
Important Considerations for Success:
- Atractylis serratuloides thrives in full sun to partial shade and well-drained soil.
- Once established, it’s relatively drought-tolerant but benefits from occasional watering during dry periods.
- This hardy plant is generally resistant to pests and diseases.
Propagating your own Atractylis serratuloides allows you to enjoy the satisfaction of nurturing new life and expands your garden’s beauty with minimal effort. Whether you choose seed or basal cutting propagation, both methods offer a rewarding journey for gardeners of all levels!