Unlocking the Secrets of Nidularium Viridipetalum: A Propagation Guide
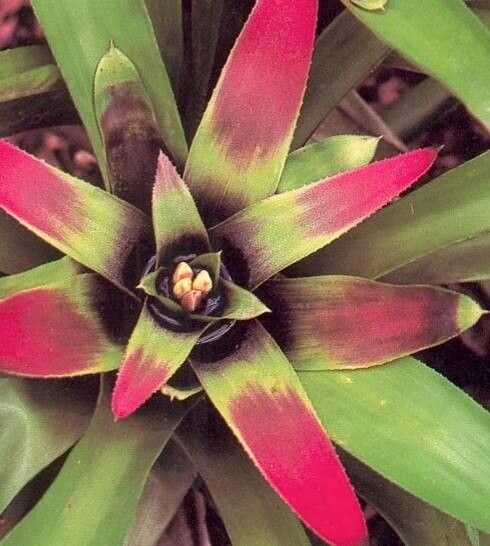
Nidularium viridipetalum, with its stunning rosette of stiff leaves and vibrant flower bracts, is a bromeliad variety that can bring a touch of the exotic to any home. While relatively low-maintenance, many enthusiasts find propagating their Nidularium viridipetalum to be a rewarding experience. So, whether you’re looking to expand your plant collection or share the joy of these botanical beauties with friends, this guide will equip you with the knowledge to propagate your Nidularium successfully.
Understanding the Life Cycle of Nidularium Viridipetalum
Before embarking on your propagation journey, it’s crucial to grasp the life cycle of this intriguing bromeliad. Unlike many plants that readily produce seeds, Nidularium viridipetalum propagates primarily through offsets, also referred to as “pups.”
After flowering, the mother plant gradually declines, but not before producing these pups at its base. These miniature replicas are clones, carrying the exact genetic makeup of the parent plant. Once these offsets develop a substantial root system of their own, they can be separated and potted individually.
Two Propagation Techniques: Choosing Your Path
1. Pup Removal: This method, often favored for its straightforwardness, involves carefully separating the offsets from the mother plant.
Timing is Key: Ideally, wait until the pups are at least one-third the size of the mother plant and possess a well-developed root system. This usually occurs several months after the mother plant has finished blooming.
Gentle Separation: Using a clean, sharp knife or pair of shears, carefully detach the pup from the mother plant, ensuring that you retain as many of the pup’s roots as possible.
- Potting the Pups: Plant the separated pups in well-draining bromeliad potting mix, ensuring the base of the plant sits slightly above the soil line. Water thoroughly and provide bright, indirect light.
2. Division: This method, slightly more advanced than pup removal, involves dividing a mature clump of Nidularium into smaller sections.
Careful Extraction: Gently remove the entire clump from its pot.
Division with Precision: Using a clean, sharp knife, carefully divide the clump into sections, ensuring each section has a healthy amount of roots and leaves.
- Potting the Divisions: Plant each division in well-draining bromeliad potting mix, ensuring the base sits slightly above the soil line. Water thoroughly and provide bright, indirect light.
Essential Tips for Propagation Success
Sharp and Clean Tools: Always use sterilized, sharp tools to minimize the risk of infection to both the pups and the mother plant.
Optimal Potting Mix: A well-draining, slightly acidic potting mix designed for bromeliads or orchids is ideal.
Light is Right: Provide bright, indirect light for the newly potted pups or divisions. Avoid direct sunlight, which can scorch their delicate leaves.
Watering Wisdom: Water when the top inch of the soil feels dry. Avoid overwatering, which can lead to root rot.
- Patience is a Virtue: It may take several weeks for the newly potted Nidularium to adjust and establish themselves. Be patient and provide consistent care, and you’ll be rewarded with thriving new plants.
Propagating your Nidularium viridipetalum is a rewarding way to expand your collection and ensure the continuation of these enchanting plants. By following these steps and tips, you’ll be well on your way to enjoying the beauty of Nidularium for years to come!