
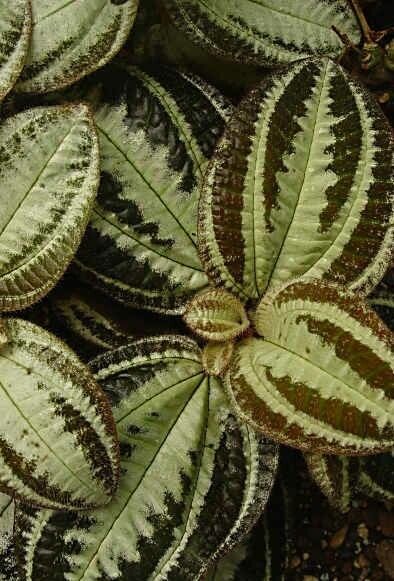
Unveiling the Secrets of Propagation: How to Multiply Your Bertolonia Marmorata
The Bertolonia marmorata, with its mesmerizingly patterned leaves, is a sight to behold. Native to the Brazilian rainforests, this tropical beauty can bring a touch of exotic elegance to your indoor garden. If, like many lucky owners, you find yourself captivated by its charm and want to expand your collection (who wouldn’t?), then learning how to propagate this gem is the next step. Luckily, propagating a Bertolonia marmorata is relatively simple and rewarding.
Here’s a comprehensive guide to help you multiply your “jewel” of a plant:
Understanding the Basics: Two Effective Methods
Bertolonia marmorata can be propagated through two primary methods:
- Stem Cuttings: This is the most common and arguably easiest method.
- Division: Ideal when repotting a mature, well-established plant.
Method 1: Taking Stem Cuttings
- Timing is Key: Spring and early summer, when the plant is actively growing, offer the highest chances of success.
- Tools of the Trade: You’ll need a sharp, clean pair of pruning shears or scissors, a small pot (around 4 inches), a well-draining potting mix, and optionally, rooting hormone.
- Making the Cut: Choose a healthy stem with at least two nodes (the small bumps where leaves emerge). Using your clean shears, cut just below a node. The cutting should be about 3-4 inches long. Remove the lower leaves, leaving only a couple at the top.
- Rooting Hormone (Optional): Dipping the cut end in rooting hormone can encourage faster root development, but it’s not strictly necessary.
- Planting the Cutting: Fill your pot with moist potting mix. Create a small hole with your finger or a pencil and gently insert the bottom part of the cutting into the mix. Ensure the bottom node is buried.
- Creating a Humid Environment: Cover the pot with a clear plastic bag or use a humidity dome to create a mini greenhouse. This helps maintain moisture and encourages rooting.
- Patience is a Virtue: Place your cutting in a bright location, away from direct sunlight. Keep the soil consistently moist but not waterlogged. New growth within a few weeks indicates successful rooting. You can then remove the plastic covering.
Method 2: Division
- The Right Time: Opt for this method when repotting your Bertolonia marmorata in spring.
- Gentle Separation: Carefully remove the plant from its pot. You’ll notice natural divisions, with each section having its own roots and leaves. Gently pull these sections apart.
- Potting the Divisions: Plant each division in a pot slightly smaller than the original, using a well-draining potting mix. Water thoroughly and provide indirect sunlight.
Nurturing Your New Plants
Once your Bertolonia marmorata cuttings or divisions are established, it’s essential to provide them with the right conditions to thrive:
- Light: Bright, indirect light is best. Avoid direct sunlight, which can scorch the delicate leaves.
- Water: Keep the soil consistently moist, but avoid overwatering. Allow the top inch of soil to dry out between waterings.
- Humidity: Bertolonia marmorata loves humidity! Regular misting, using a pebble tray, or placing a humidifier nearby can help replicate their natural environment.
- Fertilizer: Feed your plants with a balanced liquid fertilizer diluted to half strength every 4-6 weeks during the growing season (spring and summer).
Witnessing the Beauty Multiply
Propagating your own Bertolonia marmorata is an incredibly satisfying experience. With a little patience and the right care, you can soon enjoy a collection of these stunning plants, adding a touch of the rainforest’s magic to your home. Happy propagating!