Unveiling the Secrets of Propagating the Exquisite Didymocarpus Pedicellatus
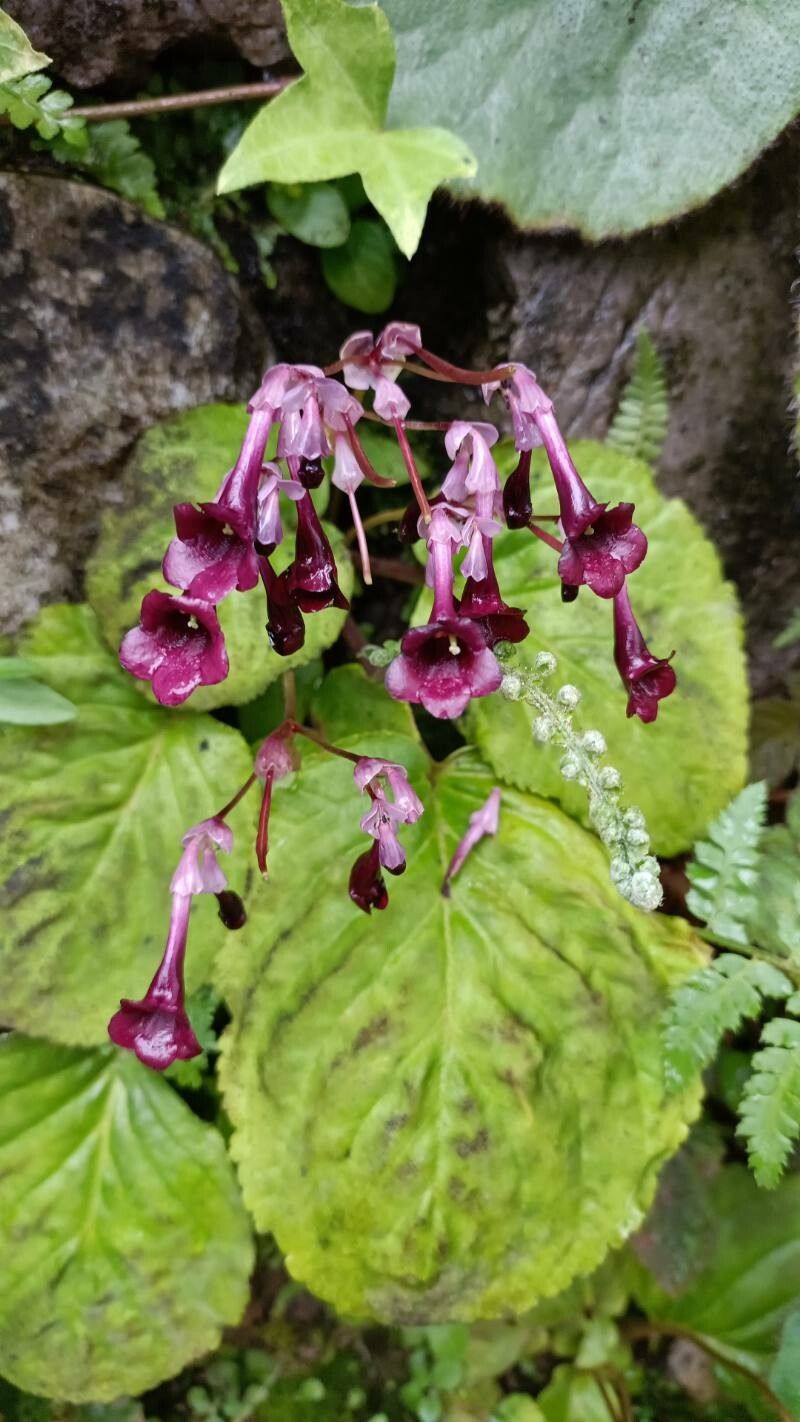
The Didymocarpus pedicellatus, with its vibrant flowers and lush foliage, is a sight to behold. Native to the Himalayas, this captivating plant, also known as the “Bearded Gesneriad” or “Trailing Rock Violet”, is becoming increasingly popular among indoor gardening enthusiasts. However, finding readily available plants can be a challenge. That’s where propagation comes in!
This comprehensive guide unveils the secrets of propagating Didymocarpus pedicellatus, empowering you to expand your collection and share the joy of this botanical gem.
Understanding the Basics
Didymocarpus pedicellatus can be propagated through two primary methods:
- Seed Propagation: This method involves sowing seeds collected from mature seed pods. While rewarding, it can be a more time-consuming process with variable success rates.
- Stem Cuttings: This method involves taking cuttings from healthy stems and encouraging them to develop roots. It is generally faster and yields more reliable results.
Method 1: Seed Propagation
- Seed Collection: Collect mature seed pods from a healthy Didymocarpus pedicellatus plant. The pods are typically elongated and turn brown when ripe.
- Seed Extraction: Gently open the pods to extract the tiny, dust-like seeds. Handle them with care as they are extremely small.
- Sowing: Prepare a seed tray or pot with a well-draining seed starting mix. Sprinkle the seeds evenly over the surface, pressing them lightly without burying them.
- Misting & Covering: Mist the soil surface gently with a spray bottle and cover the container with a humidity dome or plastic wrap to create a warm, humid environment.
- Light & Temperature: Place the container in a brightly lit location, but out of direct sunlight. Maintain a consistent temperature of around 70-75°F (21-24°C).
- Germination: Germination can take several weeks to a couple of months. During this time, ensure the soil remains consistently moist but not waterlogged.
- Transplanting: Once the seedlings have developed a few sets of true leaves, carefully transplant them into individual pots filled with a well-draining potting mix.
Method 2: Stem Cuttings
- Taking Cuttings: Using a clean, sharp knife or pruning shears, take cuttings about 3-4 inches long from healthy, non-flowering stems. Make the cut just below a leaf node.
- Preparing the Cuttings: Remove the lower leaves from the cutting, leaving 2-3 leaves at the top. You can dip the cut end in rooting hormone powder (optional) to encourage root development.
- Planting: Insert the cuttings into a pot filled with a well-draining potting mix or a mixture of peat moss and perlite. Moisten the medium around the cutting.
- Humidity & Light: Cover the pot with a clear plastic bag or a humidity dome to maintain high humidity levels. Place the pot in a brightly lit location, out of direct sunlight.
- Root Development: The cuttings should develop roots within 4-6 weeks. Gently tug on the cuttings to check for resistance, indicating root formation.
- Transplanting: Once the roots are established, transplant the cuttings into individual pots filled with a well-draining potting mix.
Essential Tips for Success
- Always use sterile tools and clean containers to prevent the spread of diseases.
- Provide the right humidity levels, light, and temperature for optimal growth.
- Be patient; propagation can take time, and success is not always guaranteed.
By following these guidelines, you can unlock the secrets of propagating Didymocarpus pedicellatus and enjoy the beauty of this remarkable plant for years to come. So, roll up your sleeves, start propagating, and let your green thumb shine!