Unlocking the Secrets of Brewer’s Sedge Propagation: A Guide to Multiplying Your Meadow Beauty
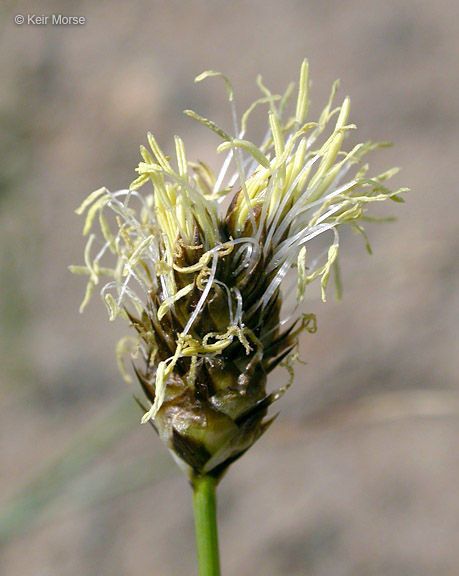
Brewer’s sedge (Carex breweri), with its elegant, cascading foliage and attractive seed heads, is an increasingly popular choice for adding texture and visual appeal to gardens and landscapes. This low-maintenance, clump-forming sedge not only thrives in a variety of conditions but is also surprisingly easy to propagate, allowing you to expand your collection or share this beautiful plant with friends.
Two Paths to Propagation: Division and Seed
For Brewer’s sedge, you have two primary methods of propagation at your disposal: division and seed. Let’s delve into the details of each method:
1. Division – The Tried and True Approach:
Division is the most common and arguably the easiest way to propagate Brewer’s sedge. It involves separating a mature plant into smaller sections, each with its own roots and shoots. Here’s how to do it:
- Timing is Key: The best time for division is during the cooler months, either in early spring as new growth emerges or in the fall.
- Digging Deep: Carefully dig up the entire clump of sedge, ensuring you get a good portion of the root system.
- Divide and Conquer: Using a sharp, clean knife or garden spade, divide the clump into smaller sections. Each section should have a healthy bunch of roots and several shoots.
- Replanting: Replant the divisions at the same depth they were originally growing, spacing them around 12-18 inches apart to allow for future growth.
- Water Wisely: Water thoroughly after planting and keep the soil consistently moist, but not waterlogged, until the plants are established.
2. Seeds – A More Adventurous Route:
Propagating Brewer’s sedge from seed is a more time-consuming process but offers a rewarding experience for those seeking a challenge:
- Collecting Seeds: Seed heads mature in late summer to early fall. Collect them when they turn brown and start to dry out.
- Cleaning and Storing: Carefully remove the seeds from the seed heads and allow them to dry completely. Store them in a cool, dry place until you’re ready to sow.
- Sowing Time: You can sow seeds directly outdoors in the fall or start them indoors in late winter.
- Sowing Technique: If sowing directly outdoors, sprinkle the seeds on prepared soil and lightly rake them in. For indoor sowing, use a seed-starting mix and cover the seeds lightly with a thin layer of soil.
- Patience is Paramount: Germination can be slow and erratic, sometimes taking several weeks or even months. Keep the soil consistently moist and provide ample light.
Nurturing Your New Sedges:
Regardless of the propagation method you choose, providing the right growing conditions is crucial for success:
- Sun or Shade? Brewer’s sedge thrives in partial shade to full sun, making it a versatile choice for different areas of your garden.
- Soil Matters: Well-drained soil that retains some moisture is ideal. Amending heavy clay or sandy soils with compost before planting can improve drainage and fertility.
- Watering Wisdom: While this sedge is relatively drought-tolerant once established, regular watering during its first growing season is essential.
Propagating Brewer’s sedge is easier than you might think. Whether you choose the reliable method of division or embark on the adventure of seed starting, you’ll be rewarded with a plethora of these stunning plants to grace your garden and beyond. So, go forth, propagate, and enjoy the beauty and versatility of Brewer’s sedge!