Unlocking the Secrets of Escallonia Pulverulenta Propagation: Grow Your Own Floral Oasis
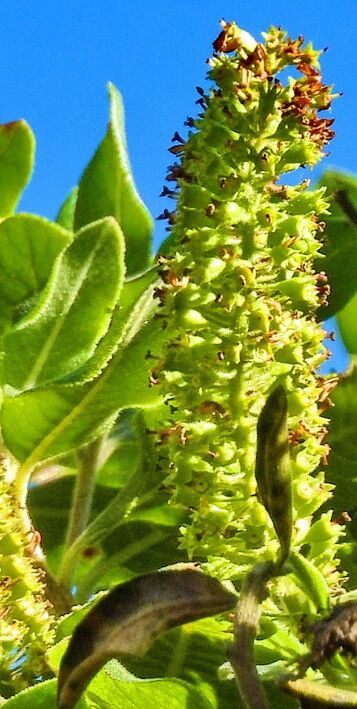
Escallonia pulverulenta, with its evocative name and even more captivating appearance, is a garden treasure waiting to be discovered. This evergreen shrub, native to Chile, boasts glossy green leaves and charming clusters of delicate white flowers that attract hummingbirds and butterflies alike. While finding this beauty in your local nursery might be a challenge, propagating Escallonia pulverulenta at home is a rewarding endeavor that even novice gardeners can achieve.
Ready to welcome this graceful plant into your garden? Let’s delve into the two most effective methods of propagation:
1. Taking Cuttings: A Step-by-Step Guide to Success
Propagating from cuttings is the most popular method for Escallonia pulverulenta, offering quicker results than growing from seeds. Follow these steps to maximize your success rate:
- Timing is Key: Take semi-ripe cuttings in late summer or early fall. This means choosing stems that are firm but still flexible.
- Choosing the Right Cuttings: Look for healthy side shoots that are about 4-6 inches long. Using clean, sharp pruning shears, make a cut just below a leaf node.
- Prepare the Cuttings: Remove the lower leaves from the cutting, leaving only a few at the top. Dip the cut end in rooting hormone powder to encourage root development.
- Planting and Care: Plant the cuttings in small pots filled with a well-draining seed starting mix. Water thoroughly and cover the pots with a clear plastic bag or a propagator lid to maintain humidity.
- Patience is a Virtue: Place the pots in a warm, bright location out of direct sunlight. It may take several weeks for the cuttings to root. You can test for root development by gently tugging on the cutting; resistance indicates roots have formed.
- Transplanting to Larger Pots: Once the roots are well-established, usually after 8-12 weeks, transplant the cuttings into larger pots filled with quality potting mix.
2. Starting from Seeds: A Test of Patience and Dedication
While relatively uncommon, you can propagate Escallonia pulverulenta from seeds. This method requires more patience and might not guarantee the same results as cuttings, but it offers a unique sense of accomplishment.
- Seed Collection: Collect mature seed capsules from the plant in late summer or fall. Allow the capsules to dry completely before extracting the tiny seeds.
- Sowing the Seeds: Plant the seeds in seed trays filled with a seed starting mix. Sprinkle a thin layer of vermiculite over the seeds to retain moisture.
- Providing Ideal Conditions: Water gently and cover the tray with a clear plastic lid or wrap to create a humid environment. Place the tray in a bright location out of direct sunlight.
- Germination Time: Be patient, as germination can be erratic and may take several weeks or even months.
- Transplanting Seedlings: Once the seedlings have developed a couple of true leaves, carefully transplant them into individual pots filled with well-draining potting mix.
Caring for Your Newly Propagated Escallonia Pulverulenta
Regardless of the propagation method you choose, young Escallonia pulverulenta plants need consistent care:
- Watering: Water deeply but infrequently, allowing the soil to dry out slightly between waterings.
- Sunlight: Place your plant in a location that receives at least 6 hours of sunlight daily.
- Fertilizing: Feed with a balanced fertilizer every 4-6 weeks during the growing season.
- Pruning: Prune lightly after flowering to maintain its shape and encourage bushier growth.
With a little patience and care, you can successfully propagate your own Escallonia pulverulenta and enjoy years of its delicate beauty in your garden. The satisfaction of nurturing a plant from its earliest stages adds a whole new dimension to the joys of gardening.