Unveiling the Secrets of Mahogany Fern Propagation: A Step-by-Step Guide
The Mahogany Fern (Didymochlaena truncatula), with its captivating two-toned fronds reminiscent of mahogany wood, is a sought-after beauty for indoor and shaded outdoor spaces. While acquiring one is rewarding, learning to propagate it elevates the experience to another level. Fortunately, unlocking the secrets of Mahogany Fern propagation is easier than you might think.
This guide dives into two effective methods, ensuring your journey to multiplying your fern collection is a success.
Method 1: Spore Propagation – A Journey of Patience and Reward
For those who appreciate the magic of nature unfolding, spore propagation is the way to go. Here’s how to embark on this fascinating journey:
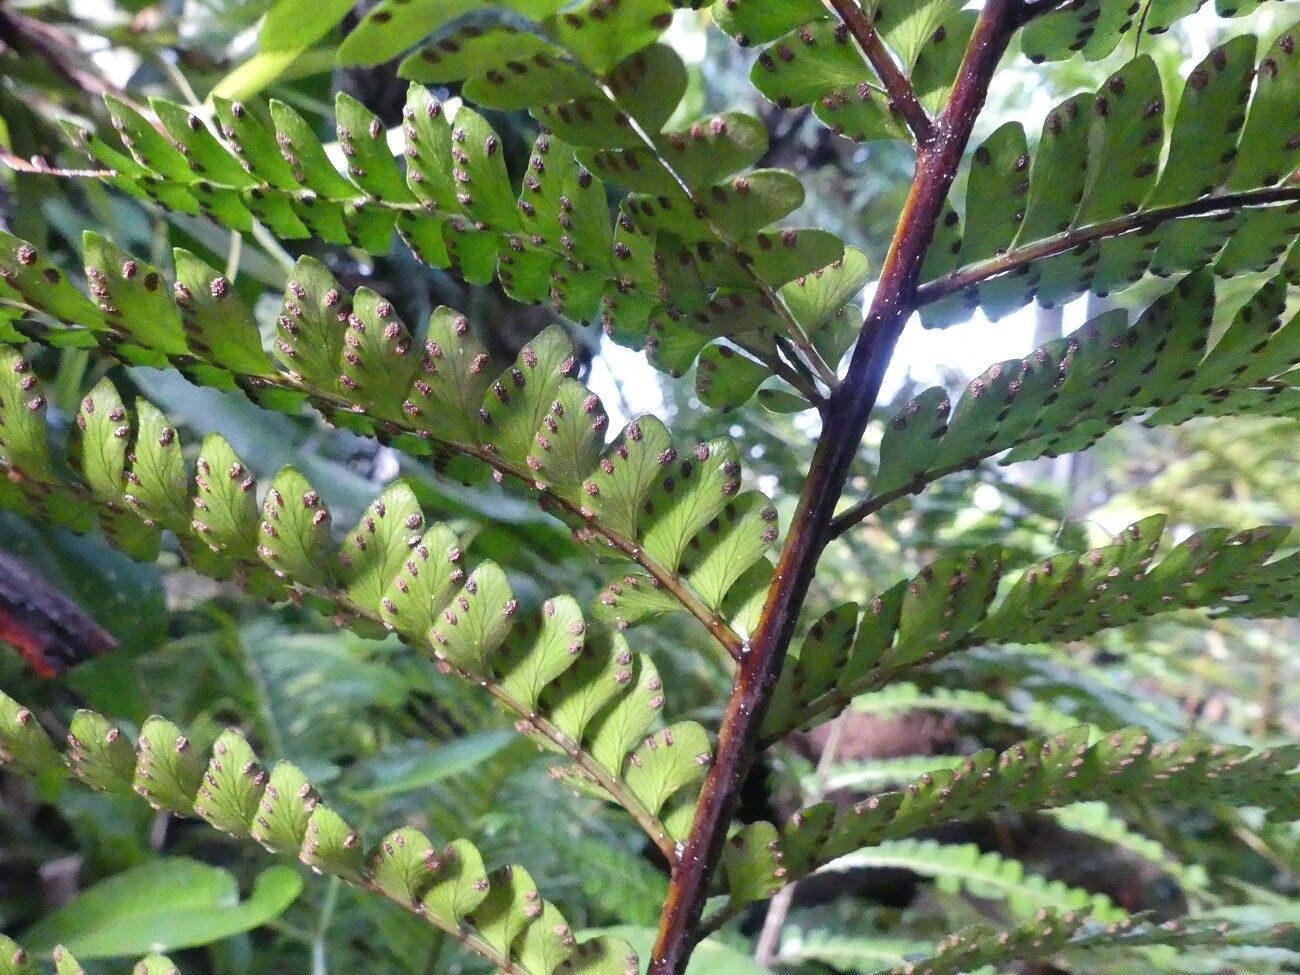
1. Spore Collection:
- Identify mature fronds with dark, almost black spores on the underside. These are housed in small structures called sori.
- Carefully cut the frond and place it in a paper bag to dry for a couple of days, allowing spores to release.
2. Spore Sowing:
- Prepare a seed-starting mix or combine peat moss and vermiculite (1:1 ratio) in a shallow tray.
- Sterilize the mix by baking it in the oven at low heat (around 180°F) for 30 minutes.
- Once cooled, moisten the mix and sprinkle the collected spores evenly across the surface, avoiding overcrowding.
- Mist lightly with water and enclose the tray in a clear plastic bag or cover with a humidity dome.
3. Cultivating Sporelings:
- Place the tray in a warm, shaded location (around 70-75°F) and keep the soil consistently moist but not soggy.
- Be patient, as germination can take anywhere from a few weeks to several months.
- Tiny heart-shaped gametophytes will emerge first, eventually developing into recognizable fernlets.
4. Transplanting:
- Once the fernlets are large enough to handle, carefully separate and transplant them into individual pots filled with well-draining potting mix.
Method 2: Division – A Quicker Route to New Ferns
If you prefer immediate gratification, division offers a faster and easier alternative for propagating your Mahogany Fern. Here’s a step-by-step breakdown:
1. Choosing the Right Time:
- Spring is the ideal time for division as the fern enters its active growing phase.
2. Dividing the Plant:
- Carefully remove the fern from its pot and gently loosen the soil around the roots.
- Identify healthy sections with a good amount of roots and fronds.
- Using a sharp, sterilized knife or shears, carefully separate the sections, ensuring each division has sufficient roots.
3. Potting the Divisions:
- Prepare individual pots slightly larger than the root ball of each division with well-draining potting mix.
- Plant each division at the same depth it was previously growing.
- Water thoroughly and place the newly potted divisions in a warm, shaded location.
4. Aftercare:
- Keep the soil consistently moist as the divisions establish themselves. Avoid overwatering, as soggy soil can lead to root rot.
- New growth indicates successful rooting and a sign that your new ferns are thriving.
Enjoy the Rewards of Your Labor
Propagating your Mahogany Fern, whether from spores or division, is a rewarding experience that connects you deeper to the captivating world of ferns. So why not roll up your sleeves, embrace the learning curve, and witness the magic of new life unfurl in your own home?