From Pad to Patch: Propagating the Prickly Pear Cactus (Opuntia hyptiacantha)
The Opuntia hyptiacantha, more commonly known as the prickly pear cactus, is a striking desert denizen with its vibrant green pads and dazzling yellow flowers. These hardy cacti are not only beautiful but also surprisingly easy to propagate, making them a fantastic choice for beginners and experienced gardeners alike. Ready to expand your cactus collection or start a new patch of these resilient plants? Read on to discover the secrets of prickly pear propagation!
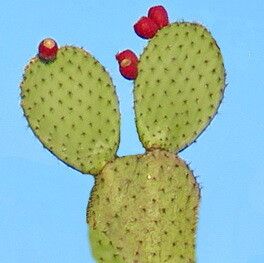
The Power of Pads: A Simple and Effective Method
The most common and straightforward method for propagating prickly pear cacti is through their iconic pads. These fleshy structures, also known as cladodes, are packed with the potential to generate new roots and shoots. Here’s how to get started:
- Harvesting Pads: Select healthy, mature pads that have reached a good size. Use sharp, clean scissors or a sharp knife to make a clean cut at the base of the pad.
- Wounding the Pad: A light score across the cut end of the pad encourages rapid root development.
- Curing the Pad: Allow the pad to dry and callous over for a few days. This allows a protective layer to form and prevents rot.
- Preparation for Planting: Select a well-draining potting mix designed for cacti and succulents. Fill a pot with the mixture, and create a small indentation for the pad.
- Planting: Place the pad in the indentation, ensuring the cut end is firmly in the soil.
- Watering: Water sparingly to avoid over-watering and causing root rot. Allow the soil to dry out completely between waterings.
- Patience is Key: The pad will gradually develop roots and eventually sprout new shoots, forming a whole new cactus plant.
Beyond Pads: Exploring Seeds and Stem Cuttings
While pad propagation is the most popular method, there are other ways to cultivate your prickly pear patch.
- Seeds: If you want to try a more traditional approach, you can propagate prickly pear cacti from seeds. Collect ripe fruits and extract the seeds. Scarify the seeds by lightly scratching their surface to break dormancy. Sow them in a seed-starting mix and keep them warm and moist.
- Stem Cuttings: For a less traditional method, stem cuttings can also be used. Cut sections of the cactus stems, allow them to dry, and then plant them in well-draining soil.
Location, Location, Location: Choosing the Right Environment
Prickly pear cacti thrive in sunny, warm environments. When choosing a location for your new cacti, consider these factors:
- Sunlight: These plants need at least six hours of direct sunlight per day.
- Soil: Prickly pears prefer well-draining sandy soil.
- Watering: Water sparingly, allowing the soil to dry out completely between waterings. Overwatering can cause root rot.
Additional Tips for Success
- Protection: Ensure your prickly pear cacti are protected from frost as they are not cold hardy.
- Pest Control: Keep an eye out for pests such as mealybugs, aphids, and scale insects.
- Fertilization: Fertilize during the growing season with a balanced fertilizer diluted to half strength.
Conclusion:
With a little patience and the right techniques, you can easily propagate prickly pear cacti and create a vibrant and unique collection. From simple pad propagation to exploring seeds and stem cuttings, these methods unlock the potential of this fascinating plant, allowing you to enjoy the beauty and resilience of the prickly pear in your own garden. So, don your gloves, grab some tools, and embark on your journey of prickly pear propagation!