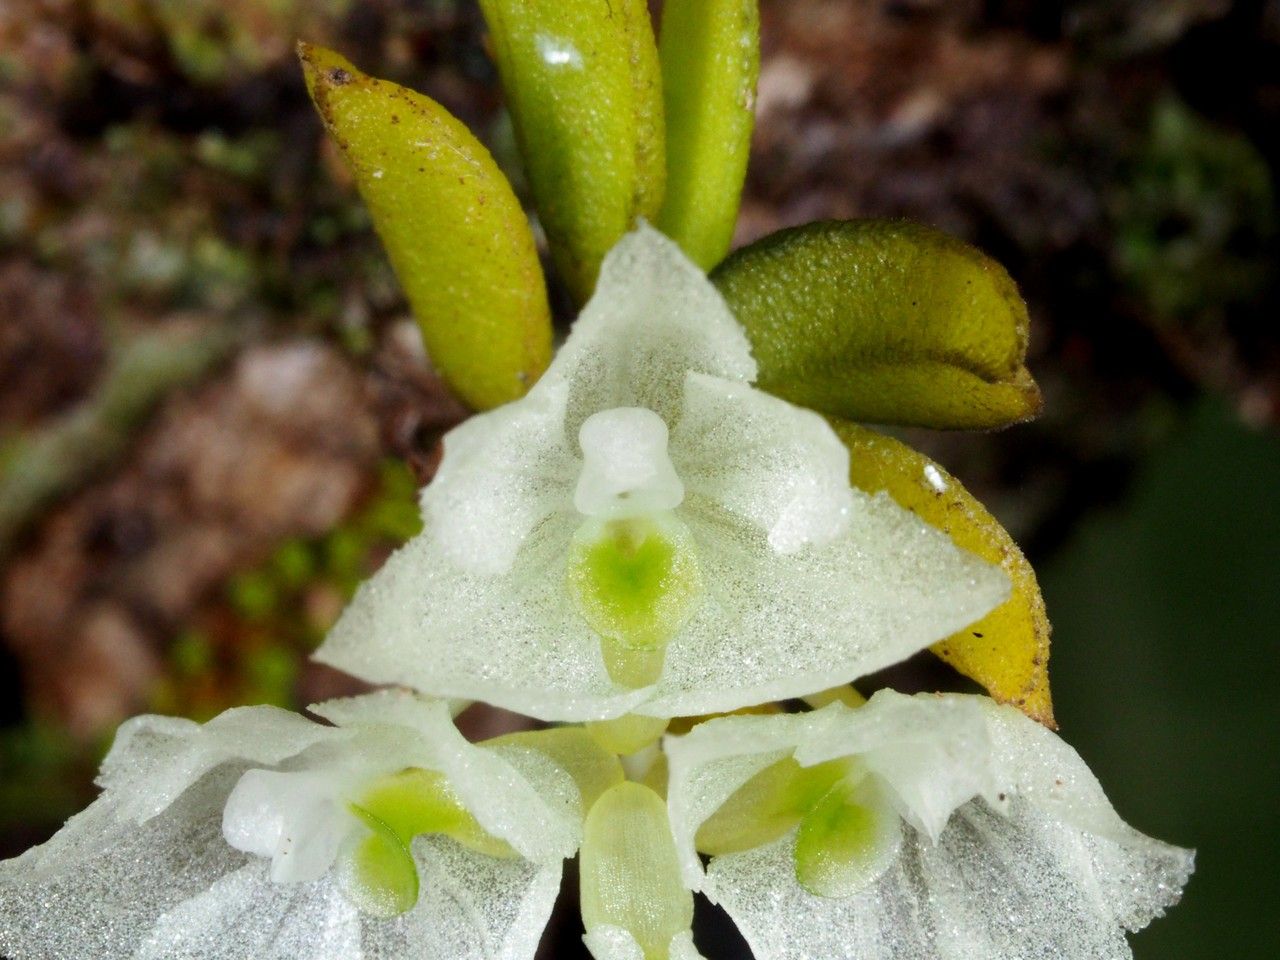
Unlocking the Secrets of Hymenorchis serrulata: A Guide to Propagation
Hymenorchis serrulata, with its delicate orchid-like flowers and captivating fragrance, is a prized possession for any plant enthusiast. But what’s even more exciting is that this beauty can be easily multiplied with the right knowledge and techniques. In this blog post, we’ll explore the fascinating world of Hymenorchis serrulata propagation, allowing you to share the joy of its blooms with friends, family, and even yourself!
Understanding the Basics of Propagation
Essentially, propagation is the process of creating new plants from existing ones. For Hymenorchis serrulata, there are primarily two methods we’ll focus on:
- Division: This technique involves separating the plant into individual sections with their own root system.
- Seed Propagation: Though a bit more demanding, it offers the chance to cultivate a whole new generation of Hymenorchis serrulata from seed.
Division: The Simpler Route
Division is particularly easy for Hymenorchis serrulata, making it an excellent choice for beginners. Here’s how to accomplish it:
- Timing is Key: The best time for division is during the dormant period, often in late winter or early spring.
- Careful Separation: Gently remove the plant from its pot and inspect its root system. Look for natural divisions where the plant has already formed multiple clumps.
- Divide and Conquer: Use a sharp, clean knife or pruning shears to carefully separate the clumps. Each division should have its own healthy root system.
- Repotting: Choose a pot sized appropriately for each division and fill it with a well-draining potting mix. Plant the divisions, ensuring the root system is spread out comfortably.
Seed Propagation: For the Adventurous
While challenging, seed propagation offers a sense of accomplishment and allows you to experience the entire life cycle of the Hymenorchis serrulata. Here’s a simplified guide:
- Collecting Seeds: Collect ripe seed pods from your Hymenorchis serrulata. It’s crucial to note that these seeds require specific conditions for germination.
- Sterile Medium: Prepare a sterile sowing medium, such as a mix of peat moss and vermiculite.
- Sowing the Seeds: Sprinkle the seeds evenly onto the surface of the sterile medium. Mist with water to create a humid environment.
- Optimal Conditions: Place the seeds under a fluorescent light source with a temperature around 70-75°F and maintain a consistently high level of humidity.
- Germination Time: Be patient! Hymenorchis serrulata seeds take several weeks to germinate, and it can be months before you see seedlings.
Tips for Successful Propagation
- Sterilization: Ensuring your tools and potting mediums are clean and sterile significantly reduces the risk of diseases.
- Watering: Avoid overwatering. Hymenorchis serrulata prefers a slightly drier soil environment.
- Environment: Mimic the plant’s natural habitat. Provide adequate light and humidity while avoiding direct sunlight.
Spread the Beauty
Propagating your Hymenorchis serrulata is an incredibly rewarding experience. It allows you to share the joy of its captivating blooms with others while expanding your own collection. Whether you choose the easier division method or take on the challenge of seed propagation, remember that passion, patience, and a little bit of care will set you on the path to success. So, get your hands dirty and unlock the secrets of this fascinating orchid-like wonder!