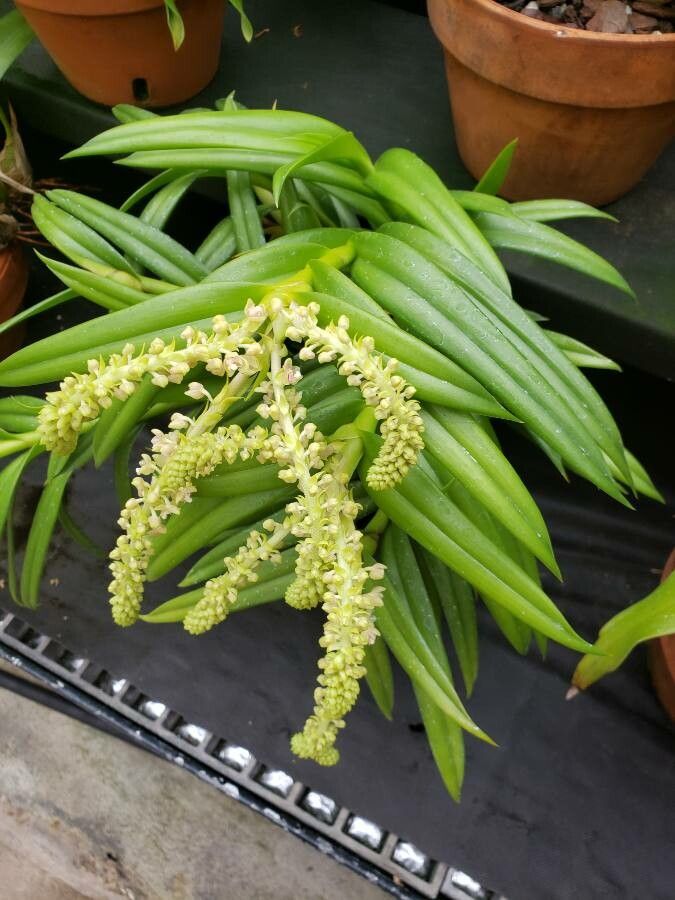
Mycaranthes Floribunda: Spreading the Beauty of This Orchid Wonder
The Mycaranthes floribunda, with its cascading sprays of fragrant, star-shaped flowers, is a true orchid gem. But the joy of owning this gorgeous plant can be amplified by sharing it with others. Propagation, the process of creating new plants from existing ones, allows you to expand your own collection and share this beauty with friends and fellow plant enthusiasts.
This blog post will guide you through the process of propagating your Mycaranthes floribunda. While it may seem daunting at first, with the right knowledge and a little patience, you can enjoy the thrill of watching new orchids emerge from your own efforts.
The Two Most Common Propagation Methods
For Mycaranthes floribunda, two main methods of propagation are commonly used:
Division: This method involves separating individual growths or “pseudobulbs” from the main plant. Each section should have at least two pseudobulbs and some roots, ensuring a healthy start for the new plant.
- Keiki Propagation: Keikis are baby plants that develop on the mother plant, typically on the flower spike or stem. When a keiki develops several roots and leaves, it can be carefully removed and potted individually.
Step-by-Step Propagation Guide
1. Preparation:
- Timing: The best time to propagate your Mycaranthes floribunda is during the spring or early summer, when the plant is actively growing.
- Tools: You’ll need a sterile knife or scissors, a pot filled with a well-draining orchid potting mix, and a rooting hormone (optional).
2. Division:
- Inspect for suitable divisions: Look for healthy sections of the plant with at least two pseudobulbs and some roots.
- Divide carefully: Use a sterile knife to separate the chosen section from the main plant. Be gentle and minimize damage to roots and pseudobulbs.
3. Keiki Propagation:
- Identify mature keikis: Look for keikis with several roots and multiple leaves before separating them.
- Remove the keiki: Carefully detach the keiki from the mother plant by cutting the connecting stem just below the root system.
4. Planting:
- Potting the divisions: Place the divided plant in a pot filled with the orchid potting mix, ensuring the base of the pseudobulbs is covered with the substrate.
- Planting the keiki: Plant the detached keiki in a small pot with orchid potting mix, making sure the roots are spread out and covered.
5. Aftercare:
- Watering: Water the newly potted plants thoroughly, allowing excess water to drain.
- Light: Provide medium to bright indirect light, avoiding harsh direct sunlight.
- Humidity: Keep the humidity relatively high, especially for keikis. You can achieve this by misting the plant regularly or placing the pot on a humidity tray.
- Temperature: Maintain a temperature between 60-80°F (15-27°C).
Fertilizer: Use a balanced orchid fertilizer diluted to half strength every two to three weeks.
Patience is Key
Remember that propagation takes time. Newly potted divisions or keikis may not show signs of growth immediately. Be patient and provide them with optimal care, and soon you’ll be rewarded with the joy of watching new Mycaranthes floribunda plants blossom.
By following these steps, you can successfully propagate your Mycaranthes floribunda, sharing its beauty and enjoying the rewarding process of nurturing new life. Whether you choose division or keiki propagation, the key is to approach the task with patience and care, nurturing the delicate orchids into thriving new plants. The beautiful and fragrant blooms of your propagated orchids will be a testament to your dedication and expertise, allowing you to truly appreciate this wonderful and versatile orchid species.