From Lawn Pest to Garden Treasure: Propagating Cenchrus Echinatus (Sandbur)
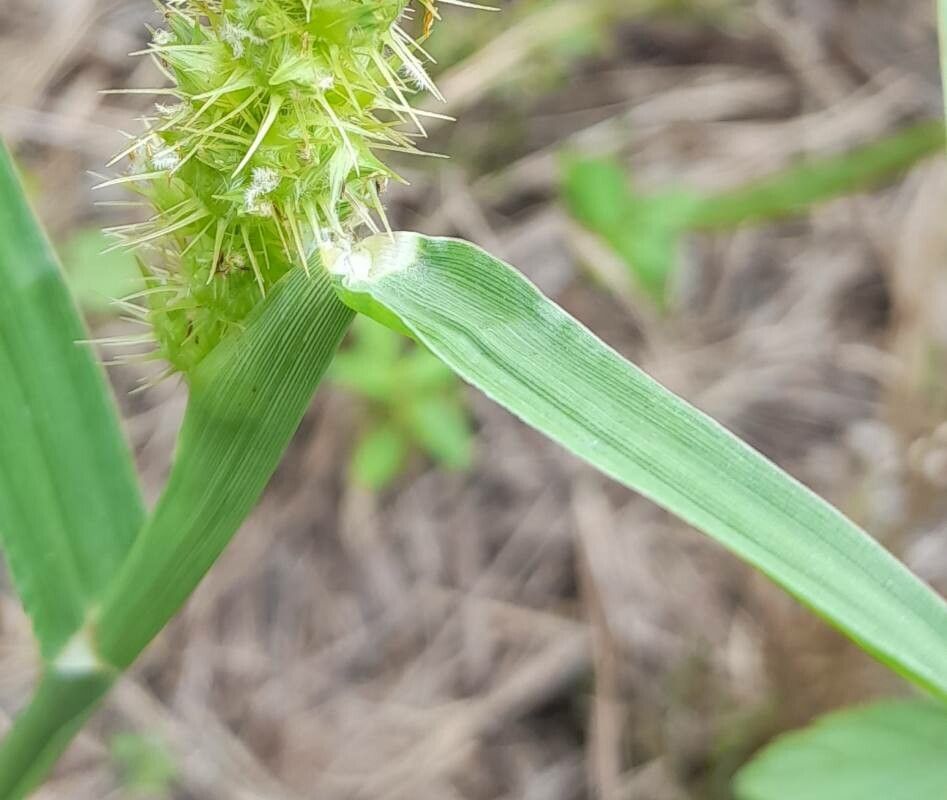
You may know it as the bane of barefoot walks, but Cenchrus echinatus, better known as sandbur, is more than just a prickly nuisance. This hardy grass species boasts drought tolerance, vigorous growth, and beautiful feathery seed heads, making it a viable and attractive option for landscaping and even natural lawn care.
But before you jump into tackling sandbur in your garden, let’s talk about propagation. This tenacious plant can be a bit of a challenge to cultivate, but with the right knowledge and techniques, you can turn these prickly newcomers into a flourishing lawn.
The Power of Seeds:
The most straightforward (and often accidental) way to propagate sandbur is through its seeds. These tiny, barbed seeds are readily dispersed by wind, animals, and even your shoes, making it a prolific spreader. However, if you’re aiming for a controlled spread, here’s what you need to know:
- Collecting Seeds: Harvest mature seed heads just before they completely dry. If you let them dry on the plant, the seeds will be released and you’ll lose control of their distribution.
- Sowing Seeds: Sandbur seeds need a warm climate to germinate. Sow seeds directly in the ground once temperatures have warmed up, ensuring they’re covered with a thin layer of soil. Keep the soil moist but not saturated.
- Spacing: Space the seeds 6-12 inches apart to allow room for the plants to grow.
Vegetative Propagation:
Sandbur can also be propagated through its vegetative parts, offering a quicker and more controlled method of establishing a new patch. Here’s how:
- Division: This method is best performed in the spring or fall when the plant is actively growing.
- Carefully dig up a mature sandbur clump.
- Divide the clump into smaller sections, each with roots and healthy foliage.
- Plant the divisions in a prepared area and water well.
- Stem Cuttings: Take stem cuttings from healthy, non-flowering sandbur plants.
- Cut stems about 4-6 inches long, removing the lower leaves.
- Dip the cut ends in rooting hormone, if desired.
- Plant the cuttings in a well-draining soil mix.
- Keep the cuttings moist and warm until they root.
Tips for Success:
- Full Sun: Sandbur thrives in full sun. Ensure you’re planting in an area that receives at least 6-8 hours of sunlight daily.
- Well-Drained Soil: Sandbur prefers well-drained soil that doesn’t hold water. Amend heavy soils with compost or sand to improve drainage.
- Water Wisely: Though drought-tolerant, sandbur benefits from regular, deep watering, especially during establishment.
The Good, the Bad, and the Prickly:
While sandbur offers a unique, drought-tolerant landscaping solution, it’s vital to understand its potential drawbacks:
- Invasiveness: Sandbur can rapidly spread if not managed, potentially becoming a nuisance in unwanted areas.
- Prickly Nature: The sharp, barbed seeds can be painful and irritating, so caution is needed when handling the plant or walking near it.
Conclusion:
Sandbur, often viewed as a pesky weed, can transform into a valuable addition to your garden with careful cultivation and a touch of patience. By understanding its propagation methods and its unique strengths and challenges, you can leverage its hardiness and resilience to create a vibrant, low-maintenance landscape. Just don’t forget your shoes!