
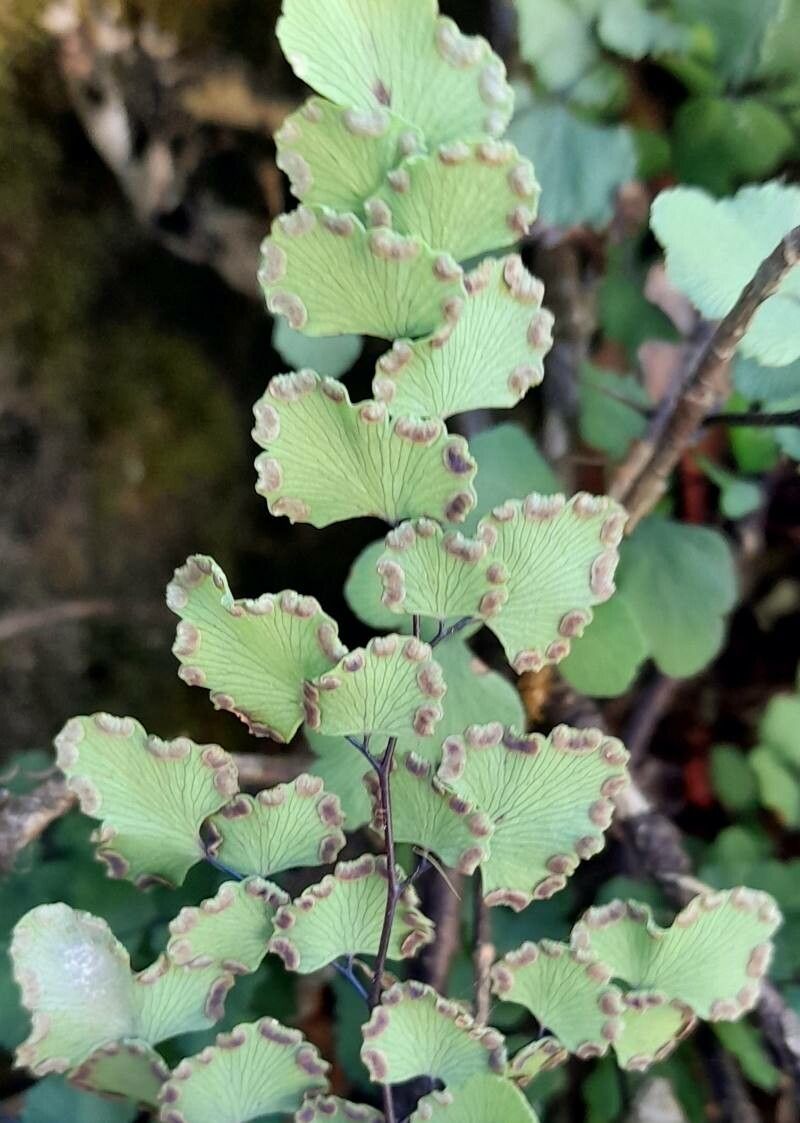
Bringing Life to Your Home: Propagating the Delicate Adiantum Chilense Fern
The Adiantum chilense, with its delicate, lacy fronds and vibrant green hues, adds a touch of elegance and tranquility to any indoor space. But did you know that this beautiful fern can also be easily propagated? That’s right, you can expand your collection of these graceful plants with minimal effort and create a verdant oasis in your home.
Understanding the Basics of Adiantum Chilense Propagation
Adiantum chilense, like many ferns, is a plant that is not typically grown from seed. Instead, these ferns thrive through spore propagation or division. Let’s take a closer look at each method:
1. Spore Propagation
Process: Spore propagation involves harvesting spores from the underside of mature fern fronds. These spores are then sown in a sterile medium like a mix of peat moss and perlite. Maintaining the proper humidity and temperature is crucial.
Timeframe: This method takes patience as it can take several months for spores to germinate and develop into young ferns.
Pros: Spore propagation allows you to create a large number of new ferns.
- Cons: It requires a considerable amount of time and attention to detail.
2. Division
Process: This simpler method involves gently separating a portion of the established plant, ensuring each new division has both roots and fronds.
Timeframe: This method is faster, with new growth emerging within weeks.
Pros: Division is relatively quick and easy, requiring minimal specialized equipment.
- Cons: Limited new plants can be produced from a single parent plant.
Steps to Propagate Your Adiantum Chilense
Spore propagation:
Harvesting spores: Identify mature fronds with brown patches on their undersides, which contain the spores. Gently scrape these patches into a container.
Preparing the medium: Sterilize a mixture of peat moss and perlite. Fill a shallow tray or pot with this medium.
Sowing spores: Sprinkle the harvested spores evenly on the surface of the medium and lightly mist with water.
Incubation: Cover the tray with a plastic wrap or glass, creating a miniature greenhouse. Keep the medium moist and maintain temperatures between 70-75°F.
- Germination: After several months, tiny green fronds may appear. These can be carefully transplanted into individual pots once they have grown several fronds.
Selecting a healthy plant: Choose a well-established Adiantum chilense with multiple fronds and a healthy root system.
Gently removing divisions: Carefully remove the plant from its pot. Use your fingers or a sharp knife to separate the plant into sections, ensuring that each new division has several fronds and a good portion of roots.
Planting divisions: Plant the divisions in separate pots filled with well-draining potting mix. Keep the soil moist but not soggy.
- Aftercare: Place the newly potted ferns in a shady, humid location. Keep the soil consistently moist and watch for new fronds to emerge.
Tips for Success:
- Maintain high humidity levels by placing the plants in a humid environment, using a pebble tray, or misting them regularly.
- Use filtered water for watering.
- Ensure the potting mix is well-drained, preventing overwatering.
- Avoid direct sunlight, as this can scorch the delicate fronds.
Enjoy the Journey:
Propagating Adiantum Chilense is a rewarding experience, offering a chance to witness the fascinating life cycle of these ferns and create new additions to your collection. With a few simple techniques and consistent care, you can successfully grow your own lush, vibrant Adiantum chilense ferns, enhancing your living space with their natural beauty and tranquility.