Taming the Sea Box: Propagating Alyxia buxifolia
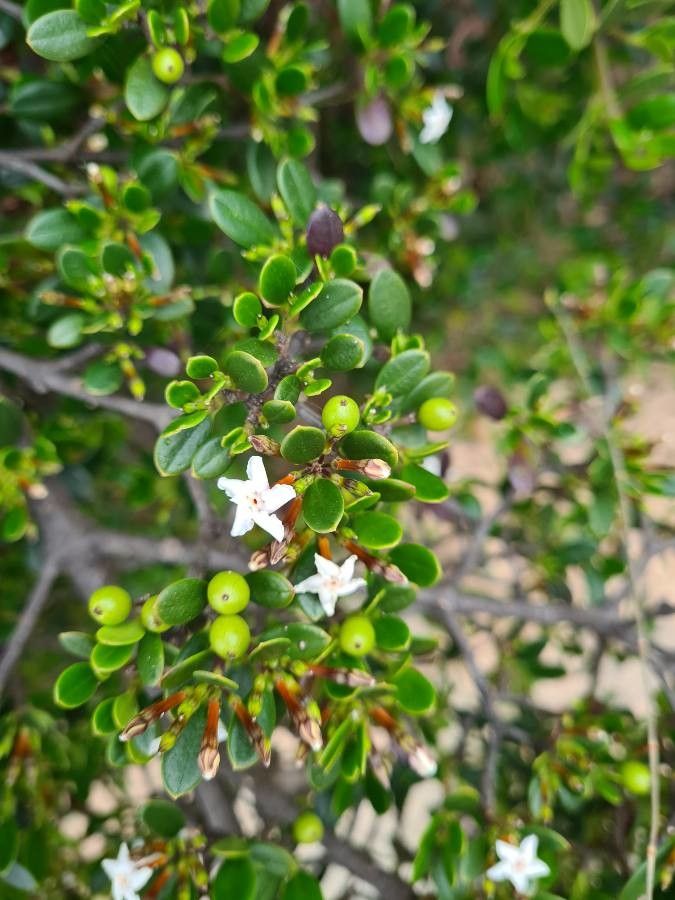
The Alyxia buxifolia, affectionately known as the Sea Box or Coast Rosemary, is a hardy Australian native beloved for its glossy foliage, delicate white flowers, and resilience in coastal conditions. While readily available in nurseries, propagating your own Alyxia buxifolia can be incredibly rewarding. It’s also a great way to share your love for this stunning plant with friends and family. So, let’s dive into the world of propagating this beautiful coastal gem!
Two Main Approaches: Cuttings vs. Seed
While Alyxia buxifolia can be grown from seed, it’s a less reliable method. Seeds can be difficult to source and have a lower germination rate. Plus, they won’t necessarily inherit the characteristics of the parent plant.
That’s why propagation through cuttings reigns supreme! This method is much easier, quicker, and ensures your new plant will share the same features as the parent.
Mastering the Art of Cuttings
Here’s a step-by-step guide to successfully propagate Alyxia buxifolia from cuttings:
1. Timing is Key:
The best time to take cuttings is during the warmer months, ideally in spring or early summer, when the plant is actively growing.
2. Selecting the Right Cuttings:
Look for healthy, non-flowering shoots that are around 10-15cm long. Ideally, choose stems with new growth at their tips.
3. Preparing the Cuttings:
- Using clean, sharp secateurs or pruning shears, make a cut just below a leaf node (the point where the leaf joins the stem).
- Remove the lower leaves from the cutting, leaving 2-3 pairs at the top.
- If the remaining leaves are large, you can trim them in half to reduce moisture loss.
4. Encouraging Root Development:
- Dipping the cut end in rooting hormone powder (optional but recommended) can significantly increase the success rate.
- Fill a small pot or seed tray with a well-draining propagating mix or a 50/50 mix of peat moss and perlite.
- Make a hole in the mix with a pencil and carefully insert the cutting, ensuring the bottom node is buried.
- Gently firm the mix around the cutting.
5. The Waiting Game:
- Water the cuttings thoroughly after planting and place them in a bright, warm location, but out of direct sunlight.
- Maintain a humid environment by covering the pot with a clear plastic bag or using a propagation dome. This helps retain moisture and encourages faster rooting.
- Mist the cuttings regularly to prevent them from drying out.
6. Signs of Success:
- In around 4-6 weeks, you should start to see new growth, signaling that roots have developed.
- Gently tug on the cutting; resistance means roots are establishing.
7. Potting On:
- Once the roots are well-established, you can transplant your new Alyxia buxifolia plant into a larger pot or directly into the garden.
- Choose a sunny or partially shaded location with well-draining soil.
Enjoy Your New Coastal Companion!
Propagating your own Alyxia buxifolia is a deeply satisfying experience. With a little patience and care, you can enjoy the beauty and hardiness of this remarkable Australian plant for years to come. And who knows, maybe you’ll even inspire others to start their own little coastal gardens!