Unlocking the Magic: Propagating the Enchanting Aquilegia Bertolonii
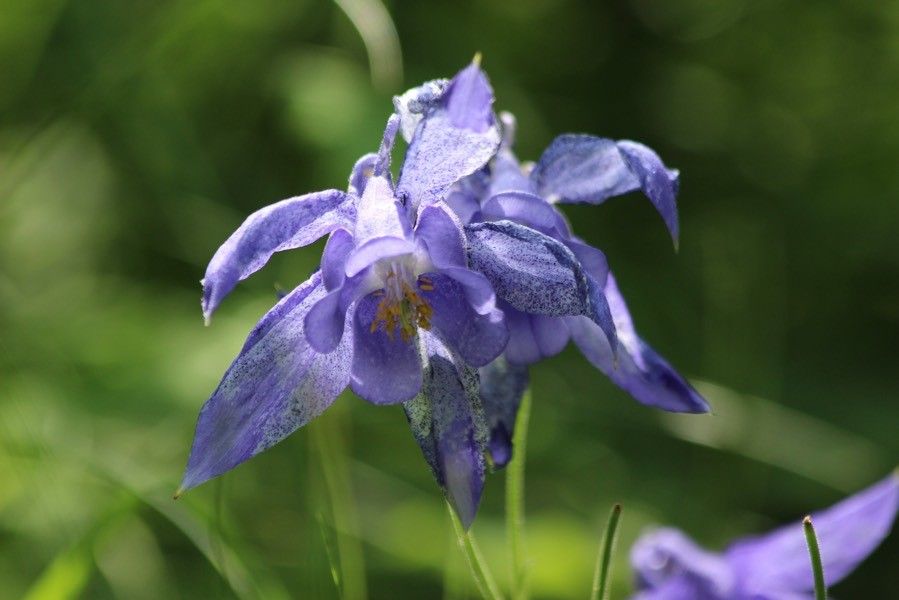
The Aquilegia bertolonii, a charming alpine columbine with its ethereal blue and white blooms, is a captivating addition to any rock garden or alpine trough. While acquiring these beauties from nurseries is an option, there’s a certain magic to coaxing life from seed or nurturing a cutting into a flourishing plant. Ready to unlock this magic for yourself? Let’s delve into the world of Aquilegia bertolonii propagation!
The Seed Route: A Journey of Patience and Reward
Propagating from seed, while requiring patience, offers a fulfilling experience and the potential for a larger number of plants. Here’s how to embark on this rewarding journey:
- Seed Collection: If you’re lucky enough to have an existing Aquilegia bertolonii, let a few flowers develop into seed pods. Once the pods turn brown and dry, collect them carefully, as the seeds can scatter easily.
- Sowing Time: For best results, sow your seeds in autumn or early spring. These periods provide the natural temperature fluctuations that the seeds need to germinate.
- Sowing Medium: Use a well-draining seed starting mix or create your own by combining peat moss, perlite, and vermiculite.
- The Sowing Process: Scatter the seeds thinly over the surface of your chosen medium and lightly press them in. Don’t bury them deeply, as light aids in germination.
- Moisture and Light: Keep the medium consistently moist but not waterlogged. Place the tray in a bright location, but out of direct sunlight.
- Germination: Be patient! Aquilegia bertolonii seeds can take anywhere from a few weeks to a couple of months to germinate.
- Transplanting: Once the seedlings develop a couple of sets of true leaves, gently transplant them into individual pots filled with a well-draining potting mix.
Cutting Edge Propagation: A Faster Path to Blooms
For a quicker route to blossoming beauties, propagating from cuttings is your answer. Follow these steps for success:
- Timing is Key: Take your cuttings in spring when the plant is actively growing.
- Choosing the Right Cuttings: Select healthy, non-flowering stems that are about 3-4 inches long. Cut just below a leaf node, the point where the leaf joins the stem.
- Preparing the Cuttings: Remove the lower leaves, leaving 2-3 leaves at the top of the cutting. Dip the cut end in rooting hormone powder to encourage root development.
- Planting the Cuttings: Plant the cuttings in a pot filled with a mix of perlite and vermiculite, ensuring that the leaf nodes are below the soil line.
- Creating a Greenhouse Environment: Cover the pot with a clear plastic bag or humidity dome to create a warm, humid environment that promotes root growth.
- Patience and Observation: Place the cutting in a well-lit area, out of direct sunlight. Keep the medium consistently moist and be patient; rooting can take several weeks.
- Transplanting: Once roots develop and new growth appears, your cutting is ready to be transplanted into a pot filled with a well-draining potting mix.
Nurturing Your New Aquilegia Bertolonii
Whether you choose the patient path of seeds or the quicker route of cuttings, caring for your new Aquilegia bertolonii is key to their success:
- Well-Draining Soil: Ensure your chosen potting mix or garden location provides excellent drainage to prevent root rot.
- Sunlight Requirements: Plant your Aquilegia bertolonii in a spot that receives morning sun and afternoon shade, or dappled sunlight throughout the day.
- Watering: Water regularly, allowing the soil to dry out slightly between waterings.
- Fertilization: Feed your plants with a balanced, water-soluble fertilizer every few weeks during the growing season.
Propagating your own Aquilegia bertolonii, whether from seed or cuttings, is a journey filled with anticipation and ultimately, the immense satisfaction of nurturing life. So why not roll up your sleeves, get a little dirt under your nails, and experience the magic for yourself?