Multiply Your Luck: Propagating the Enchanting Ardisia Solanacea
The Ardisia solanacea, also known as the coral berry or spiceberry, is an evergreen shrub treasured for its glossy foliage, delicate blossoms, and vibrant, long-lasting berries. This tropical beauty adds a touch of the exotic to homes and gardens alike. If you’re looking to expand your Ardisia collection or share its charm with friends, propagating this resilient plant is easier than you might think!
This guide will delve into the two most effective methods for propagating Ardisia solanacea:
1. Seed Propagation: Embracing the Cycle of Life
Propagating Ardisia solanacea from seeds offers a rewarding experience, allowing you to witness the plant’s life cycle from its earliest stage. Here’s how to do it:
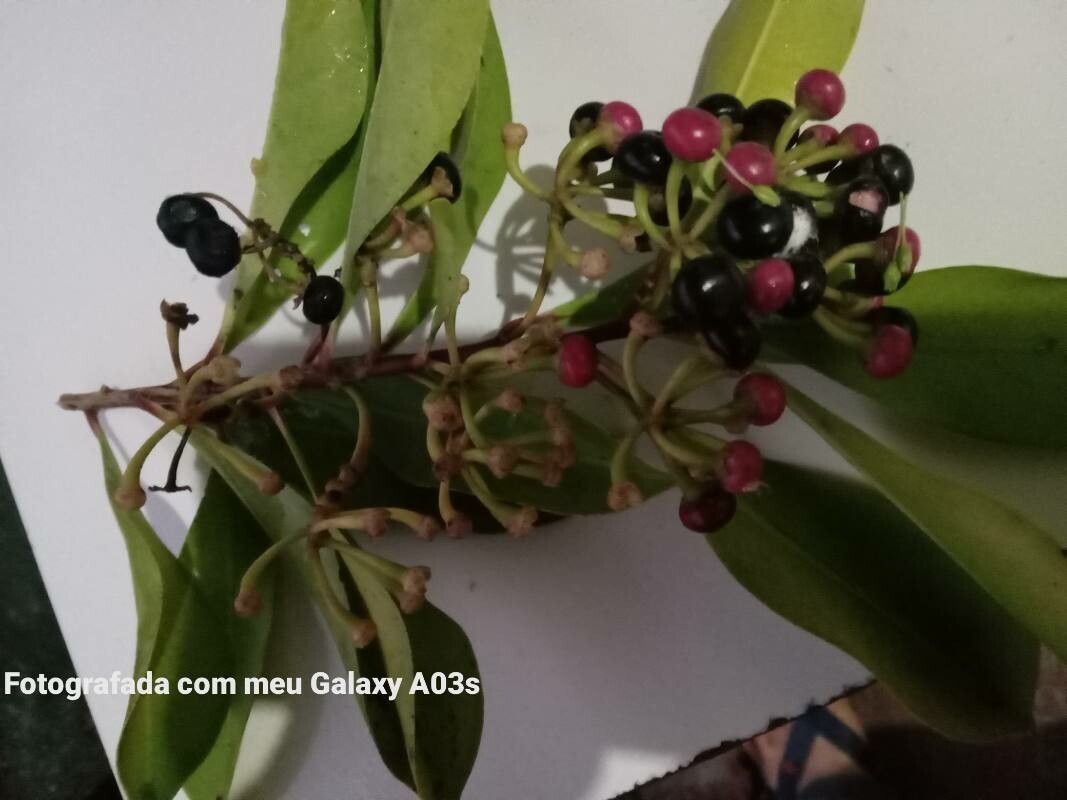
- Collecting Seeds: Harvest ripe berries from an existing plant. Ripe berries are plump and display a deep red or purplish-black hue. Gently crush the berries to extract the seeds, rinsing off any remaining pulp.
- Preparing for Sowing: Sow the seeds in a seed-starting mix or a well-draining potting mix. Choose a pot with drainage holes to prevent waterlogging. Moisten the mix before sowing.
- Sowing and Care: Place the seeds on the surface of the mix, lightly pressing them down without burying them. Mist the surface with water and cover the pot with a plastic dome or wrap to create a humid environment.
- Germination: Place the pot in a warm, bright location, out of direct sunlight. Germination typically takes 2-4 weeks. Ensure the soil remains consistently moist but not soggy.
- Transplanting: Once the seedlings develop a few sets of true leaves, transplant them into individual pots filled with well-draining potting mix.
2. Stem Cuttings: A Faster Route to New Plants
Stem cuttings offer a quicker propagation method, allowing you to create a new plant that’s genetically identical to the parent plant. Here’s a step-by-step guide:
- Taking Cuttings: Select healthy, non-flowering stems from the current year’s growth. Using a sharp, sterilized knife or pruning shears, take cuttings about 4-6 inches long, making a clean cut just below a leaf node.
- Preparing the Cuttings: Remove the lower leaves from the cutting, leaving 2-3 leaves at the top. Dip the cut end in rooting hormone powder (optional but recommended) to encourage faster root development.
- Planting the Cuttings: Plant the cuttings in a pot filled with a well-draining potting mix or a seed-starting mix. Gently firm the soil around the base of the cutting.
- Encouraging Root Development: Water the cuttings thoroughly and cover the pot with a clear plastic bag or a humidity dome. This will create a warm, humid environment essential for root development.
- New Growth: After about 4-6 weeks, gently tug on the cuttings to check for resistance. Resistance signifies root development. Once roots have formed, you can transplant the rooted cuttings into individual pots.
Tips for Success:
- Optimal Timing: Spring and early summer are the ideal times for propagating Ardisia solanacea, as the plant is actively growing during these seasons.
- Light and Temperature: Provide bright, indirect light and maintain a temperature of around 70-75°F (21-24°C) for optimal results.
- Watering: Keep the soil consistently moist but not overly wet. Overwatering can lead to root rot, hindering successful propagation.
- Patience is Key: Remember that propagation takes time. Don’t be discouraged if you don’t see results immediately. With proper care and patience, you’ll soon be enjoying new additions to your Ardisia family!
Propagating Ardisia solanacea is a fulfilling endeavor that allows you to expand your plant collection while deepening your connection with this captivating species. Whether you choose to start from seed or stem cuttings, the process promises the joy of witnessing new life unfold, adding a tangible touch of green magic to your life.