Unleashing the Power of Propagation: A Guide to Growing Astragalus canadensis
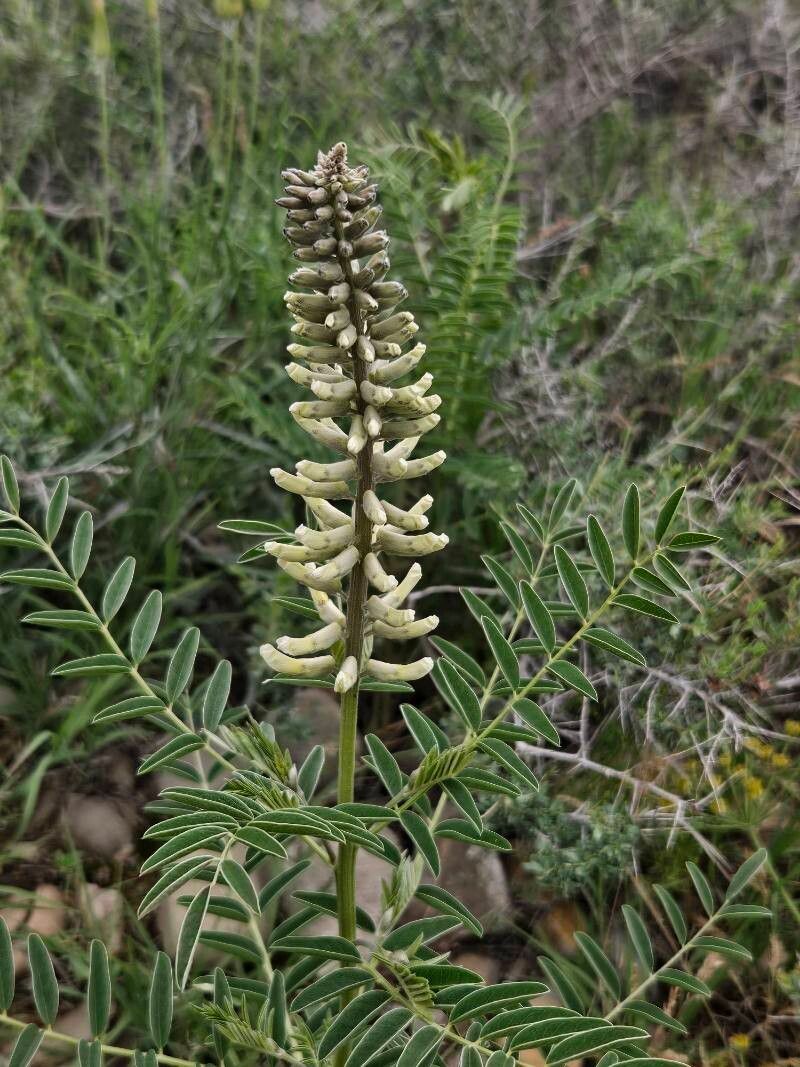
Astragalus canadensis, commonly known as Canadian milkvetch, is a beautiful and resilient North American native plant gaining popularity for its delicate flowers and potential health benefits. If you’re looking to add this unique perennial to your garden or want to share its charm with others, propagation is a rewarding journey.
While Astragalus canadensis can be purchased as young plants, propagating it yourself is incredibly satisfying and often more economical. Let’s explore the two most effective methods:
1. Seed Starting: A Journey of Patience and Reward
Starting Astragalus canadensis from seed is an adventure that requires a bit of patience, but the rewards are well worth the effort.
- Timing is Everything: Late winter or early spring is the ideal time to sow your seeds indoors. This gives them a head start before the warmer weather arrives.
- The Right Environment: Sow seeds in seed trays filled with a well-draining seed starting mix. Barely cover the seeds, as they need light to germinate. A warm, sunny windowsill or a grow light setup will provide the necessary light and warmth.
- Germination Dance: Be prepared for a bit of a wait, as Astragalus canadensis seeds can take anywhere from 2 to 4 weeks to germinate. Keep the soil consistently moist but not soggy.
- Transplanting Triumph: Once your seedlings have developed a few sets of true leaves and the danger of frost has passed, they’re ready to be transplanted outdoors. Choose a spot in your garden with full sun to partial shade and well-drained soil.
2. Division: Sharing the Bounty
For established Astragalus canadensis plants, division is a fantastic way to propagate new plants while also rejuvenating the mother plant.
- When to Divide: Early spring, just as new growth begins, is the optimal time for division. However, you can also successfully divide in the fall after the plant has finished flowering.
- Carefully Unearth: Gently dig around the plant’s perimeter, ensuring you don’t damage the roots. Once loosened, carefully lift the entire plant from the ground.
- The Art of Division: Using a sharp, clean knife or garden spade, divide the plant into sections, making sure each section has a healthy clump of roots and shoots.
- Replant and Thrive: Replant the divisions at the same depth they were originally growing and water them in well.
Tips for Propagation Success
- Well-Draining Soil is Key: Astragalus canadensis thrives in well-drained soil. If your garden soil is heavy clay, amend it with compost or sand to improve drainage.
- Embrace the Sun (and Some Shade): While Astragalus canadensis prefers full sun, it can tolerate some light shade, especially in hotter climates.
- Watering Wisdom: Water your plants regularly, especially during their first year of establishment. Once established, they are relatively drought-tolerant.
Propagating Astragalus canadensis is a rewarding process that allows you to connect with this beautiful native plant on a deeper level. Whether you choose to sow seeds or divide existing plants, you’ll be rewarded with more of these stunning perennials to grace your garden or share with friends and family.