Taming the Wild Beauty: Propagating the Canary Island’s Bencomia brachystachya
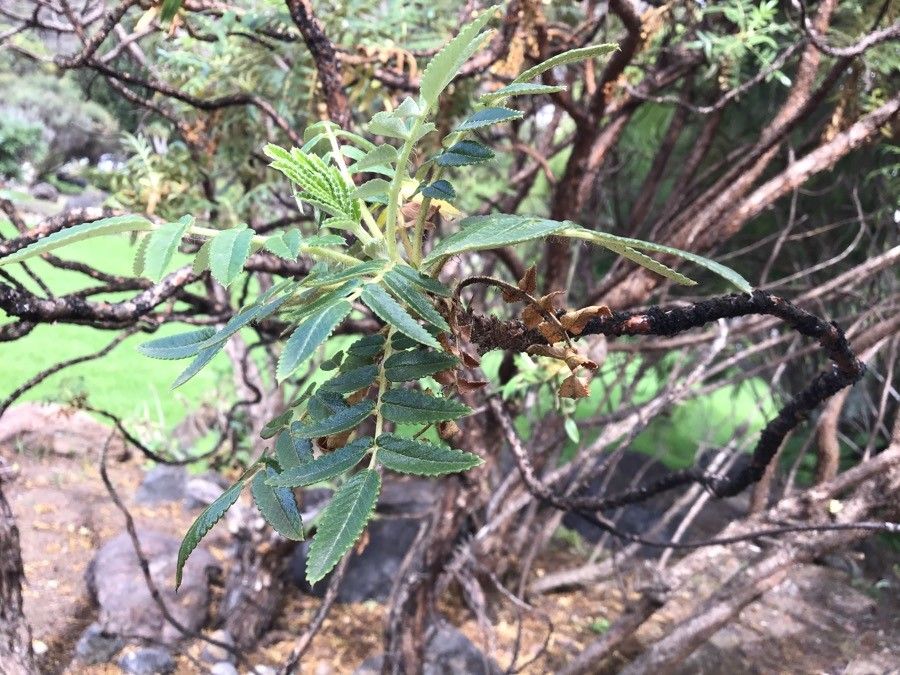
The Canary Islands are renowned for their unique and diverse flora, and among their botanical treasures is the intriguing Bencomia brachystachya. This evergreen shrub, with its attractive foliage and captivating, bottle-brush-like flowers, holds a certain charm for adventurous gardeners. But successfully cultivating this island endemic requires understanding its unique propagation needs.
While information about Bencomia brachystachya propagation might seem scarce, don’t despair! This article will guide you through the different methods and provide valuable tips for success.
Seeds: A Test of Patience
Propagating Bencomia brachystachya from seed can be a rewarding, albeit time-consuming, endeavor. Freshly collected seeds offer the highest viability.
Here’s how to sow Bencomia brachystachya seeds:
- Collection and Preparation: Obtain seeds from a reliable source. Lightly scarify the seeds by rubbing them gently with sandpaper. This process helps break the hard outer coating and encourages germination.
- Sowing: Sow the seeds in a well-draining seed-starting mix. Sprinkle them onto the surface and cover them lightly with the mixture.
- Environment: Place the seed tray in a bright location, out of direct sunlight. Maintain a temperature of around 68-75°F (20-24°C). Mist the soil regularly to keep it consistently moist but not waterlogged.
- Patience is Key: Germination can be erratic and may take several weeks to several months. Don’t be discouraged if you don’t see results immediately.
- Transplanting: Once the seedlings have developed a couple of sets of true leaves, transplant them into individual pots filled with a well-draining potting mix.
Cuttings: A Quicker Route:
For those seeking faster results, propagating Bencomia brachystachya from cuttings offers a viable alternative.
Here’s a step-by-step guide:
- Timing is Everything: Take semi-hardwood cuttings in late spring or early summer when the plant is actively growing.
- Selecting the Right Cuttings: Choose healthy, non-flowering stems that are about 4-6 inches long.
- Preparing the Cuttings: Remove the lower leaves from the cutting, leaving only a few at the top. Wound the base of the cutting slightly with a sharp knife to expose the cambium layer.
- Hormone Treatment: Dip the wounded end of the cutting in rooting hormone powder to stimulate root development.
- Planting the Cuttings: Plant the treated cuttings in a well-draining rooting mix, burying at least two nodes below the surface.
- Creating Humidity: Cover the cuttings with a clear plastic bag or humidity dome to create a warm, moist environment that promotes rooting.
- Monitoring and Care: Place the cuttings in a brightly lit area but out of direct sunlight. Keep the rooting medium consistently moist.
- Rooting Success: After about 4-8 weeks, gently tug on the cuttings. Resistance indicates successful rooting.
Transplanting and Beyond:
Once rooted, gradually acclimate the young plants to outdoor conditions before transplanting them to a larger pot or directly into the garden. Bencomia brachystachya thrives in well-draining soil and prefers a sunny location with some afternoon shade, especially in warmer climates.
A Few Words of Caution:
Be aware that Bencomia brachystachya is considered endangered in its natural habitat. Always obtain plants or seeds from reputable sources that practice sustainable harvesting.
While propagating this Canary Island gem may require patience and dedication, the rewards are well worth the effort. With the right techniques and a touch of green-thumb magic, you can enjoy the unique beauty of Bencomia brachystachya for years to come.