Crumbling for More: Propagating the Wavy Buckler-Mustard (Biscutella flexuosa)
The Wavy Buckler-Mustard, scientifically known as Biscutella flexuosa, might not roll off the tongue as effortlessly as its common name, but this unassuming plant holds a unique charm for any keen gardener. With its delicate, pale yellow flowers and intriguing seed pods resembling tiny shields, it adds a touch of understated elegance to rock gardens, borders, and gravel beds. If, like many who encounter this charmer, you find yourself yearning for more, propagation is surprisingly achievable, even for beginners. Let’s delve into the world of Biscutella flexuosa propagation and unlock the secrets to expanding your collection.
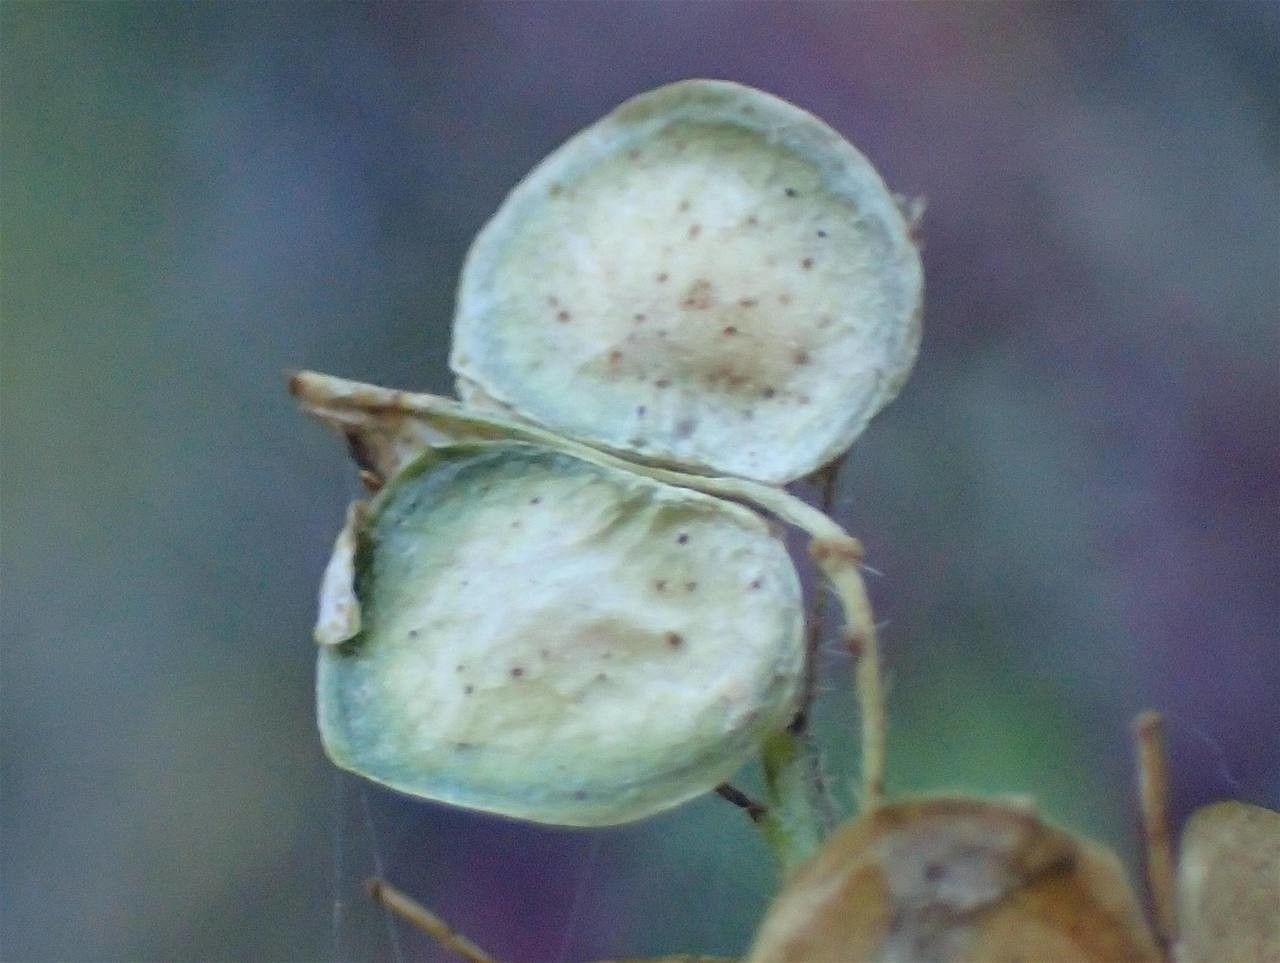
Seed Starting: A Journey From Tiny Discs to Flourishing Plants
The most common and rewarding method for propagating Biscutella flexuosa is through seeds. These are housed within the plant’s distinctive “bucklers” – flat, round seed pods that give the plant its common name. Here’s how to start your Wavy Buckler-Mustard from seed:
- Seed Collection: As the flowering season ends (late spring to early summer), keep a close eye on the seed pods. They will begin to turn brown and papery as they dry. Collect the pods before they split open and scatter the seeds.
- Seed Preparation: Gently crush the pods to release the small, round seeds. No need for special treatments – these seeds are ready to sow!
- Sowing: Biscutella flexuosa prefers well-drained soil with a slightly alkaline pH. Sow the seeds in seed trays or pots filled with a suitable seed-starting mix. Press the seeds gently into the surface, ensuring they are covered by a thin layer of soil.
- Watering and Light: Keep the soil consistently moist but not waterlogged. Place the tray or pots in a bright location, but out of direct sunlight.
- Germination: Patience is key! Germination can take anywhere from 2 to 4 weeks. Once the seedlings emerge, continue to provide adequate light and moisture.
- Transplanting: When the seedlings are large enough to handle (around 2-3 inches tall), carefully transplant them into individual pots or directly into your garden, spacing them about 10-12 inches apart.
Beyond Seeds: Exploring Alternative Propagation Methods
While seed propagation is the most prevalent method for Biscutella flexuosa, there are a couple of alternative techniques you can explore:
- Division: Mature plants can be carefully divided in the spring or fall. Dig up the plant, gently separating the root ball into smaller sections, ensuring each division has healthy roots and shoots. Plant the divisions immediately.
- Cuttings: Basal cuttings taken in spring or early summer can be rooted successfully. Dip the cut ends in a rooting hormone and place them in a moist, well-draining medium.
Tips for Propagation Success:
- Well-draining soil is paramount: Biscutella flexuosa thrives in well-drained soil and is susceptible to root rot in overly wet conditions.
- Mimic its natural habitat: Provide a sunny location and don’t be afraid to let the soil dry slightly between waterings.
- Patience is a virtue: This plant might take its time to germinate and establish, but the wait is well worth the reward of witnessing its charming blooms and unique seed pods.
Propagating Biscutella flexuosa is an enjoyable endeavor that allows you to expand your garden with this delightful and low-maintenance plant. So why not crumble a few “bucklers” and embark on your own propagation journey? You’ll be rewarded with a tapestry of delicate blooms and fascinating seed pods that add a touch of whimsical beauty to your garden sanctuary.