Unleashing the Crimson Fire: Propagating the Exquisite Brachychiton bidwillii
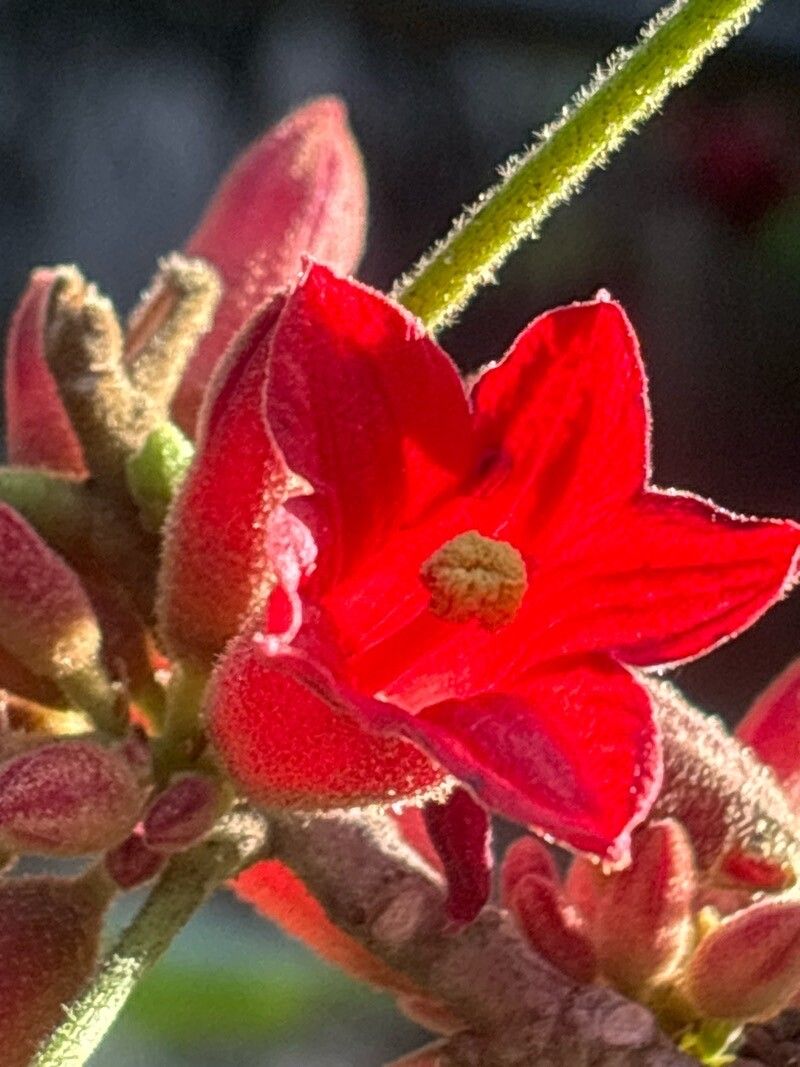
The Brachychiton bidwillii, more charmingly known as the Dwarf Kurrajong or Little Kurrajong, boasts an allure that captivates plant enthusiasts and casual admirers alike. Native to Australia, this small tree with its vibrant crimson bell-shaped flowers and fascinating growth habit can be a stunning addition to your garden. If you’re taken by this botanical beauty and wish to expand your collection or share the joy with fellow plant lovers, then understanding how to propagate it is key.
While the Little Kurrajong does produce seeds, propagation by seed comes with its own set of challenges:
The Seed Route (and its hurdles):
- Seed Scarcity: Finding viable seeds can be like searching for hidden treasure, as they are not always readily available commercially.
- Germination Patience: Brachychiton seeds, notorious for their hard seed coats, can take their sweet time to germinate, sometimes stretching into months.
- Unpredictable Results: Seed-grown plants may display variations from the parent plant, adding an element of delightful surprise (or perhaps not-so-delightful if you’re aiming for consistency).
The Cutting Edge: A More Reliable Approach
For a faster and more reliable method, consider propagating your Brachychiton bidwillii through cuttings. Here’s how:
1. Timing is Everything:
The ideal time to take cuttings is during the active growing season, which typically falls in spring or early summer. Look for new growth that’s firm but not overly woody.
2. Tooling Up:
You’ll need a few essentials:
- Sharp, sterilized pruning shears or a knife: This ensures a clean cut and minimizes the risk of introducing diseases to your cutting.
- Rooting hormone (optional but recommended): This magical powder encourages root development and significantly improves your chances of success.
- Well-draining potting mix: A mixture of peat moss, perlite, and sand works well.
3. Taking the Cut:
- Select a healthy stem that’s about 4-6 inches long and has several nodes (small bumps where leaves emerge).
- Make a clean cut just below a node, angling it slightly.
- Remove any leaves from the lower two-thirds of the cutting to prevent rotting.
4. The Rooting Process:
- Dip the cut end of the stem in rooting hormone (if using).
- Plant the cutting in the prepared potting mix, burying at least one node below the surface.
- Water gently and thoroughly, being careful not to overwater.
5. Creating a Greenhouse Effect:
- Cover the pot with a clear plastic bag or create a humidity dome using a plastic bottle. This helps retain moisture and promotes root development.
- Place the pot in a warm, brightly lit spot but out of direct sunlight.
6. Patience is a Virtue:
- Check the moisture levels regularly and mist the cutting if needed.
- Within a few weeks to a couple of months, you should start to see new growth, indicating successful rooting.
7. Transplanting Your Success:
- Once the cutting has developed a healthy root system, it’s time to transplant it into a larger pot or directly into your garden.
Propagating your Brachychiton bidwillii is a rewarding experience, allowing you to multiply your own little piece of Australian beauty. With patience and the right techniques, you can enjoy the fiery blooms of this captivating tree for years to come.