Untwist the Fun: Multiply Your Bulbine torta with These Easy Propagation Techniques
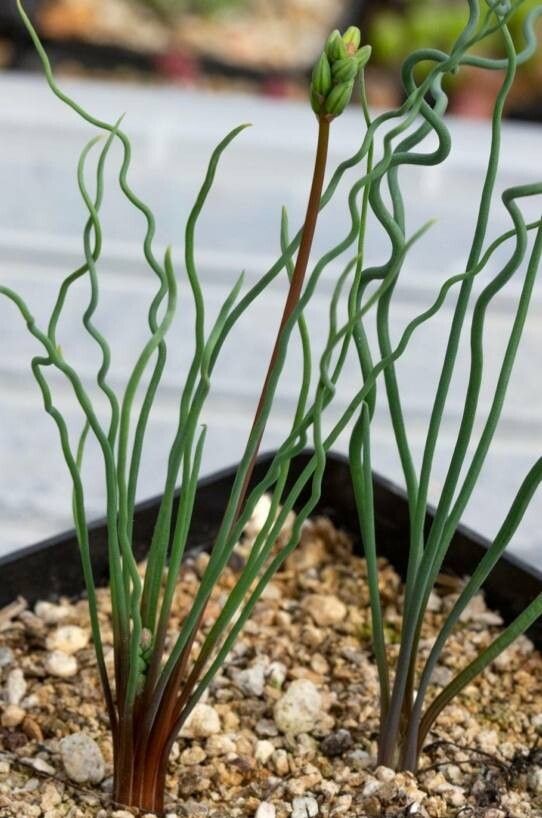
The Bulbine torta, also charmingly known as the “Corkscrew Bulbine” or “Spiral Grass,” is a sight to behold. This South African native boasts vibrant, spiraling foliage that adds a touch of whimsy to any garden or sunny windowsill. But the fun doesn’t stop there! Propagating your Bulbine torta is surprisingly easy, allowing you to expand your quirky plant collection without breaking the bank. Let’s unravel the secrets of multiplying this charming succulent.
Method 1: Division – The “Go Forth and Multiply” Approach
The easiest and quickest way to propagate your Bulbine torta is through division. This method takes advantage of the plant’s natural tendency to form clumps.
Here’s how:
- Timing is Key: The best time for division is during the growing season, ideally spring or early summer.
- Gently Does It: Carefully remove the entire plant from its pot.
- Divide and Conquer: Loosen the soil around the roots and gently separate the plant into smaller sections, ensuring each section has a good root system.
- Repotting Time: Plant each division in a well-draining potting mix, water thoroughly, and place it in a sunny location.
Method 2: Leaf Cuttings – From Spiral to Sprout
Did you know that those quirky, twisted leaves hold the secret to new life? Propagating Bulbine torta from leaf cuttings might take a bit longer than division, but it’s equally rewarding.
Follow these steps:
- Snip Smart: Choose healthy, mature leaves for your cuttings. Use a clean, sharp knife or pair of scissors to remove the leaves at the base.
- Let Them Rest: Allow the cut end of the leaves to callus over for a day or two. This helps prevent rotting.
- Prepare Your Bed: Fill a shallow tray or pot with a well-draining potting mix.
- Planting Time: Insert the callused end of each leaf cutting into the soil, ensuring that at least a third of the leaf is buried.
- Patience is Key: Keep the soil lightly moist and place the cuttings in a warm, bright location, out of direct sunlight. Roots should start to form in a few weeks, and eventually, new plantlets will emerge.
Method 3: Seeds – A Slower, Yet Rewarding Journey
While not as common, propagating Bulbine torta from seeds can be a fun experiment, especially if you enjoy witnessing the entire life cycle of a plant.
Here’s the gist:
- Source Your Seeds: Obtain fresh Bulbine torta seeds from a reputable supplier or collect them from your own plants after flowering.
- Sowing the Seeds: Sow the seeds thinly on the surface of a well-draining seed-starting mix and lightly press them down.
- Keep them Cozy: Cover the tray with a plastic dome or wrap to create a humid environment and place it in a warm, bright location.
- Germination Time: Be patient, as germination can take several weeks. Once the seedlings emerge and have a few sets of true leaves, you can transplant them into individual pots.
A Few Tips for Success:
- Drainage is Key: Bulbine torta is a succulent and prone to root rot if the soil stays too wet. Ensure excellent drainage in your chosen propagation method.
- Sunlight is Essential: Provide your propagated plants with plenty of bright, indirect sunlight to thrive.
- Be Patient: Propagation takes time. Don’t be discouraged if you don’t see results immediately.
With a little patience and these easy-to-follow steps, you’ll be twisting and turning your way to a garden full of these charming, spiral-shaped delights!