Unlocking the Secrets to Multiply Your Scarlet Gilia: A Guide to Centropogon solanifolius Propagation
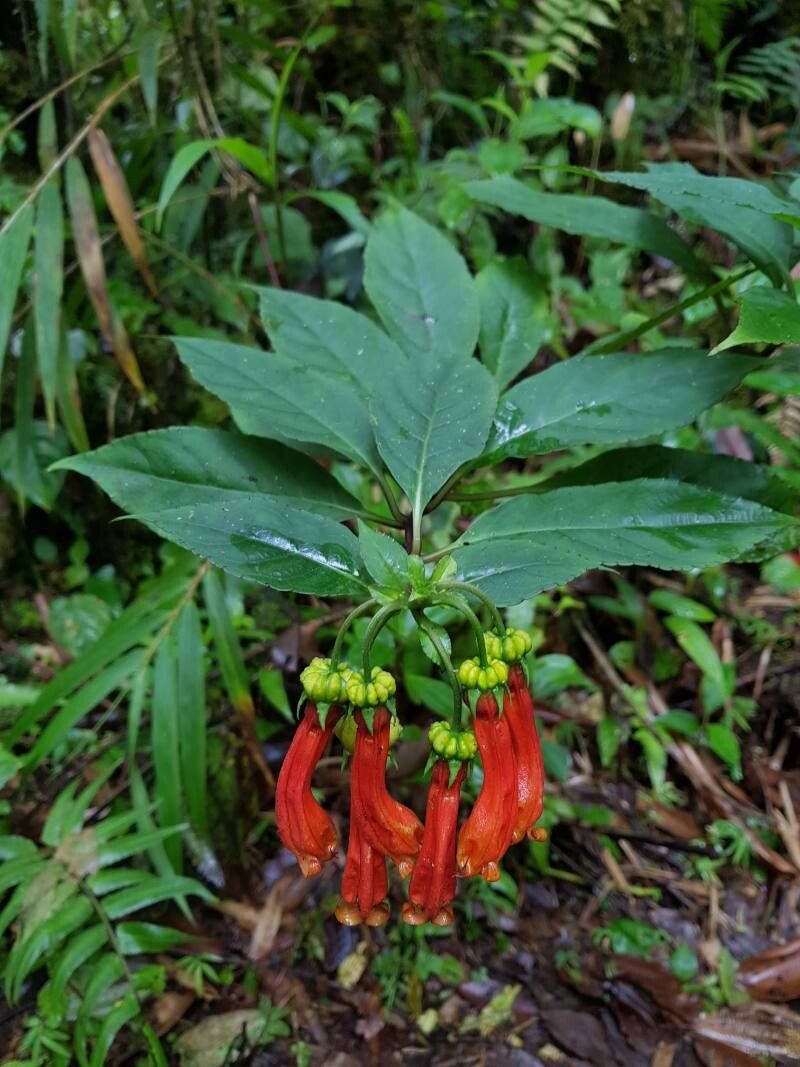
The vibrant Scarlet Gilia, also known as Centropogon solanifolius, is a showstopper with its fiery-red, tubular flowers that attract hummingbirds like magnets. Native to the Andes region of South America, this plant brings an exotic touch to gardens lucky enough to host it. If you’re eager to expand your Scarlet Gilia collection or share its beauty, then mastering propagation is key.
Luckily, this striking plant can be multiplied in a couple of ways, each offering its own rewards and challenges. So, let’s dive into the world of Scarlet Gilia propagation, shall we?
Method 1: Seeds of Potential
Starting Scarlet Gilia from seed is an adventure in patience and observation. Here’s how it’s done:
- Harvesting the Goods: After the flowers fade, small, seed-filled capsules will form. Collect these capsules when they turn brown and dry, gently crushing them to release the tiny, dust-like seeds.
- Sowing the Future: In spring, sow the seeds directly into a well-draining seed-starting mix, barely covering them. Maintain consistent moisture and warmth (around 70-75°F). Germination can be slow, taking anywhere from a few weeks to a couple of months.
- Nurturing the Seedlings: Once your Scarlet Gilia seedlings emerge, provide them with bright, indirect light and continue to keep the soil evenly moist. Thin out weaker seedlings to give the strongest ones space to thrive.
- Transplanting with Care: When your seedlings have developed several sets of true leaves, they’re ready for their own pots or a sunny spot in your garden.
Method 2: The Cutting Edge
Taking cuttings is a faster and more reliable method for propagating Scarlet Gilia. Here’s the game plan:
- Timing is Everything: The best time to take cuttings is in late spring or early summer when the plant is actively growing.
- Choosing the Right Cut: Look for healthy, non-flowering stems. Using a sharp, clean knife or pair of pruning shears, take a 4-6 inch cutting just below a leaf node.
- Prepping for Success: Remove the lower leaves from the cutting, leaving 2-3 pairs at the top. You can dip the cut end in rooting hormone to encourage faster root development, although it’s not essential.
- Planting the Cuttings: Insert the cuttings into a pot filled with a well-draining potting mix. Keep the soil consistently moist and provide bright, indirect light.
- Rooting and Beyond: After a few weeks, your cuttings should develop roots. Gently tugging on the cutting will tell you if roots have formed. Once rooted, you can transplant them into larger pots or directly into your garden.
Tips for Propagation Triumph:
- Well-Draining Soil: Scarlet Gilia is susceptible to root rot, so a well-draining soil mix is crucial.
- Light Show: While Scarlet Gilia enjoys sunny spots, dappled sunlight or afternoon shade is best, especially in hotter climates.
- Water Wisely: Keep the soil consistently moist but avoid overwatering, which can lead to root problems.
Propagating your Scarlet Gilia is a rewarding experience that lets you share the joy of this stunning plant. Whether you choose the rewarding journey of growing from seed or the quicker satisfaction of taking cuttings, remember – patience, observation, and the right conditions will ensure your propagation efforts blossom. Happy gardening!