How to Propagate Cercis glabra
Unlocking the Secrets of the Redbud: A Guide to Propagating Cercis glabra
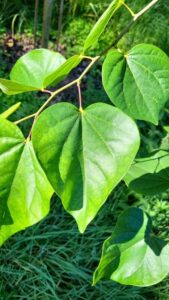
The Redbud tree, with its heart-shaped leaves and vibrant spring blossoms, holds a special place in many gardens. Imagine duplicating that beauty, filling your outdoor space with these enchanting trees without breaking the bank. Propagating your own Cercis glabra, also known as the Eastern Redbud, might seem like a daunting task, but it’s a rewarding process that’s easier than you think.
This comprehensive guide will equip you with the knowledge and techniques to successfully propagate your very own Cercis glabra from seed or cuttings. Let’s dive in!
Method 1: Starting from Seed
-
Seed Collection and Preparation (Fall):
- Gather mature seed pods from an established Redbud tree in late summer or early fall. Look for brown, dry pods.
- Extract the seeds from the pods and store them in a cool, dry place until late winter or early spring.
-
Stratification (Mimicking Winter):
- Redbud seeds require a period of cold stratification to break dormancy.
- In late winter, place the seeds in a moistened paper towel within a sealed plastic bag.
- Store the bag in your refrigerator (around 40°F or 4°C) for 6-8 weeks.
-
Sowing (Spring):
- In early spring, fill seedling trays or pots with a well-draining seed starting mix.
- Plant the seeds about ½ to 1 inch deep and water them lightly.
- Place the containers in a warm, brightly lit location, but out of direct sunlight.
- Transplanting:
- Once the seedlings develop a strong root system and have at least two sets of true leaves, transplant them into individual pots or directly into your garden in a well-prepared, sunny location.
Method 2: Propagating from Cuttings
-
Taking Cuttings (Late Spring to Early Summer):
- Select healthy, semi-hardwood cuttings (partially mature wood) from the current year’s growth.
- Cuttings should be about 4-6 inches long, with at least two nodes (bumps where leaves were attached).
-
Preparing the Cuttings:
- Remove the leaves from the lower half of the cutting.
- Make a small wound at the base of the cutting, gently scraping off a small section of bark.
- Dip the wounded end in rooting hormone powder (optional, but recommended).
-
Planting the Cuttings:
- Fill pots with a well-draining rooting mix.
- Insert the cuttings into the mix, burying the bottom node.
- Water thoroughly.
-
Encouraging Root Development:
- Create a humid environment by covering the pots with a clear plastic bag or using a propagation dome.
- Place the cuttings in a warm, bright location, but out of direct sunlight.
- Transplanting:
- After about 4-6 weeks, gently tug on the cuttings to check for resistance, which indicates root development.
- Once rooted, transplant the cuttings into individual pots or directly into your garden.
Caring for Your New Redbuds
Whether you choose to propagate from seed or cuttings, the care for your new Redbud trees remains the same:
- Sunlight: Provide at least 6 hours of sunlight per day.
- Water: Water regularly during the first year, especially during dry spells.
- Soil: Well-draining soil is essential.
- Fertilizer: Fertilize in early spring with a balanced fertilizer.
Propagating your own Cercis glabra is a fulfilling endeavor that allows you to expand your garden and connect with this beautiful tree on a deeper level. With patience and care, you can watch as your tiny seeds or cuttings transform into stunning Redbuds, adding grace and color to your landscape for years to come.