From Seed to Splendor: How to Easily Propagate Chiococca belizensis
The Chiococca belizensis, with its captivating star-shaped white flowers and plump red berries, adds a touch of tropical charm to any garden. But finding this enchanting plant can be a challenge. Fear not, fellow plant lovers! Growing your own Chiococca belizensis is achievable with a little knowledge and a bit of patience, thanks to the plant’s remarkable propensity for easy propagation.
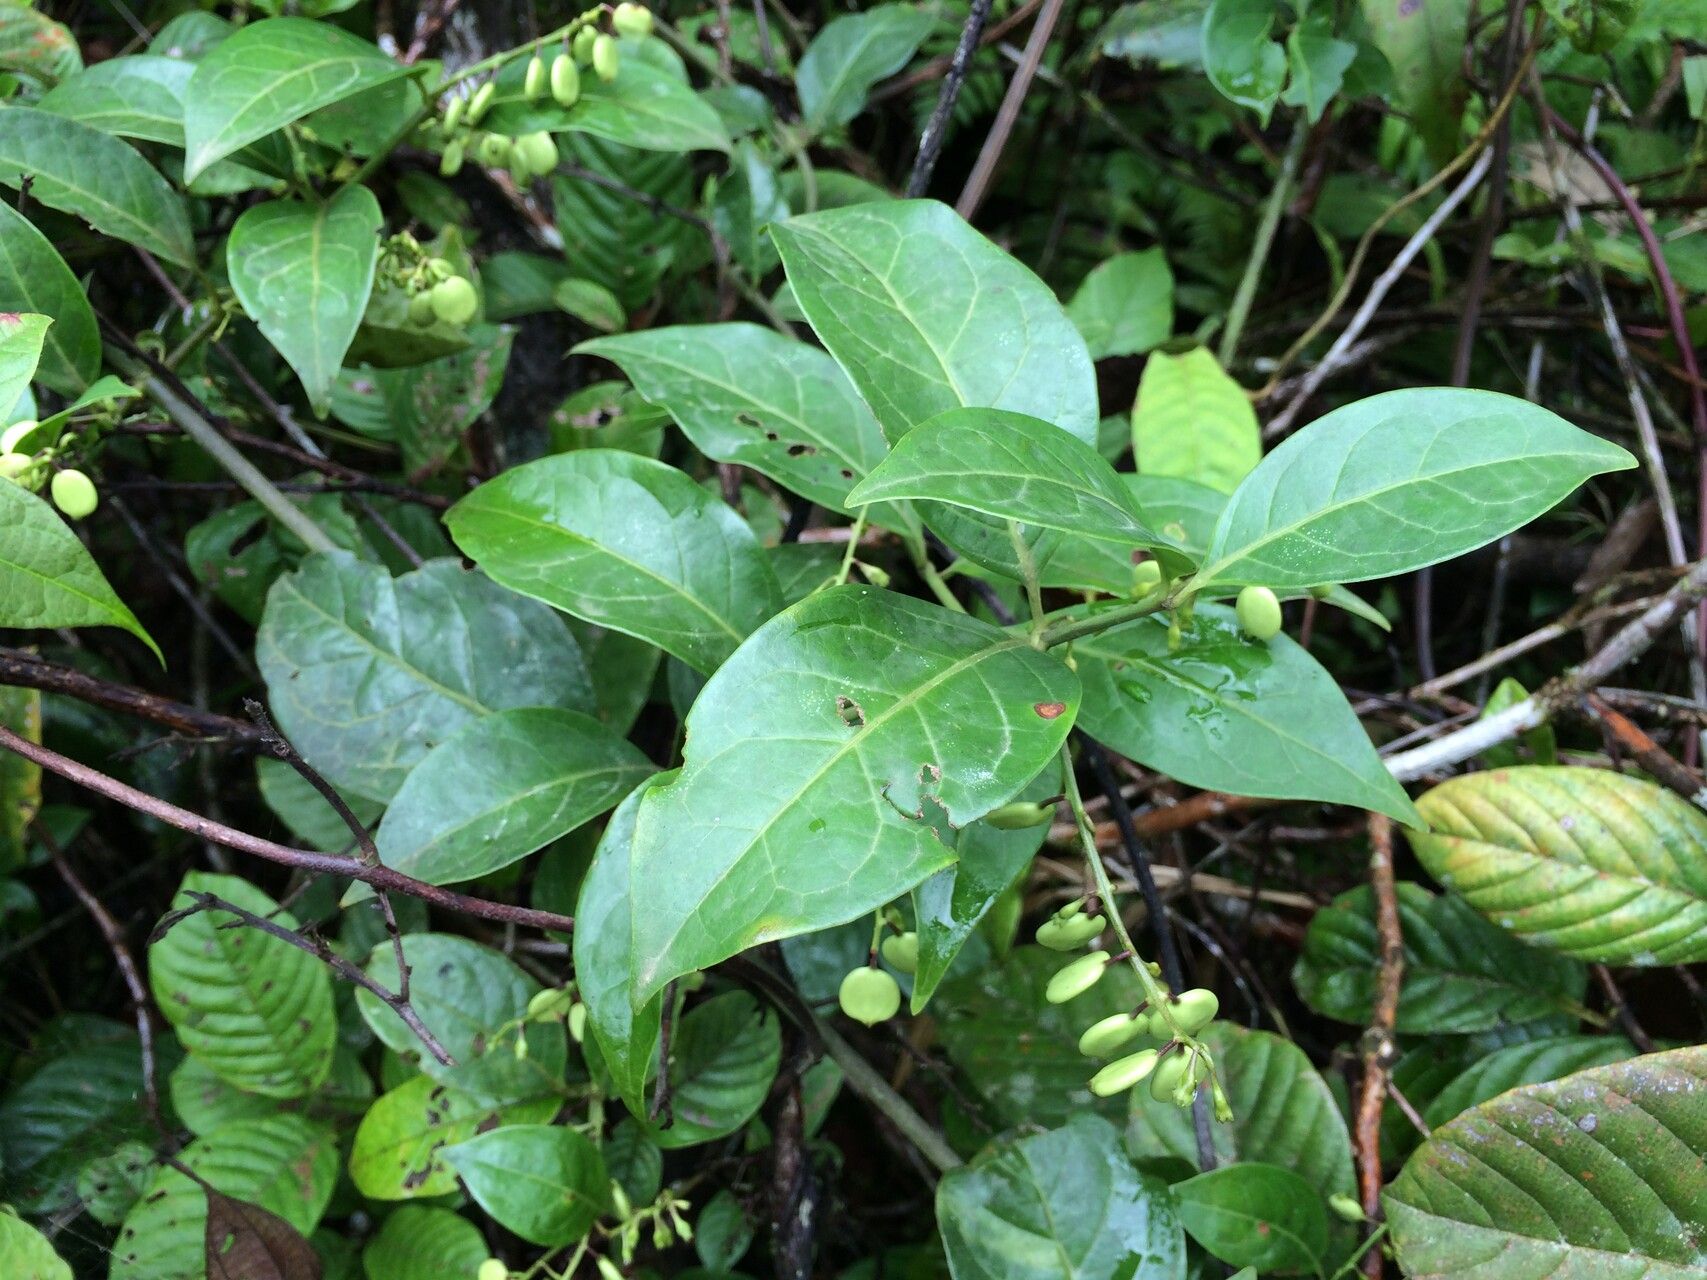
Taking Root: The Magic of Seeds
Chiococca belizensis is known for its reliable propagation through seeds. These small, black seeds are encased within the vibrantly colored berries, making them both visually appealing and conveniently available. To get started, follow these steps:
- Harvesting the Seeds: Gently collect the ripe berries from your Chiococca belizensis plant.
- Seed Extraction: Carefully remove the seeds from the berries, making sure they are clean and devoid of any remaining pulp.
- Prepare the Seed Starting Mix: Use a seed starting mix readily available at most gardening stores, ensuring it drains well and holds moisture.
- Sowing the Seeds: Lightly press the seeds into the soil, covering them with a thin layer of mix (about ⅓ inch deep).
- Provide Ideal Conditions: Place your seed tray in a warm, well-lit location, but avoid direct sunlight. Keep the soil consistently moist, being careful not to overwater.
- Patience and Germination: Germination typically takes around 2-4 weeks. Once the seedlings develop a few true leaves, they are ready for the next step.
Branching Out with Cuttings
Chiococca belizensis also lends itself well to propagation by cuttings. This method allows for quicker growth and the preservation of existing plant traits. Here’s how:
- Choose Healthy Cuttings: Select non-flowering, semi-hardwood stems from the plant. Cuttings should be around 4-6 inches long, with at least two nodes (leaf junctions) each.
- Prepare the Cuttings: Remove the lower leaves from the stem, leaving only the top two leaves. This allows for better root development.
- Dipping in Rooting Hormone (Optional): To boost rooting success, consider dipping the cut ends of the cuttings in a rooting hormone solution.
- Planting in Rooting Medium: Use a well-draining mix like a peat moss and perlite blend or a commercial rooting formula.
- Maintaining Humidity: Place the cuttings in a warm, humid environment for optimal root growth. You can use a propagation tray or a plastic bag to create this condition.
- Time for Roots: Roots usually develop within 4-6 weeks. Once the cuttings show signs of new growth, they are ready for transplanting.
Tips for Transplanting
Whether you’ve propagated your Chiococca belizensis from seeds or cuttings, transplanting into a larger pot or directly into the garden requires careful planning.
- Hardening Off Seedlings: Gradually acclimate your seedlings to outdoor conditions before transplanting by placing them in a protected area for a few hours each day, increasing the time spent outdoors gradually.
- Prepare the Soil: Choose a well-draining soil mix that contains a good amount of organic matter. Amend the soil with compost or other organic materials to improve drainage and nutrient content.
- Handle with Care: When transplanting, be gentle with the roots to avoid damaging them.
- Water Deeply: After transplanting, water your new plant thoroughly, ensuring the soil is saturated but not soggy.
Enjoying Your New Chiococca belizensis
With proper care, your new Chiococca belizensis will flourish. This semi-evergreen vine thrives in a warm, sunny environment and appreciates consistent watering, especially during the hot summer months. Its captivating blooms and vibrant berries offer a delightful spectacle, attracting pollinators like hummingbirds and butterflies to your garden.
From seed to splendor, the journey of growing your own Chiococca belizensis is both rewarding and fulfilling. So, embrace the simplicity of plant propagation and let this tropical gem weave its magic in your garden!