From Seeds to Super Blooms: Propagating the Charming Clarkia pulchella
Imagine fields of vibrant pink, purple, and white blossoms, dancing in the summer breeze. That’s the magic of the Clarkia pulchella, a stunning wildflower that’s incredibly easy to grow, thanks to its penchant for self-seeding and simple propagation methods.
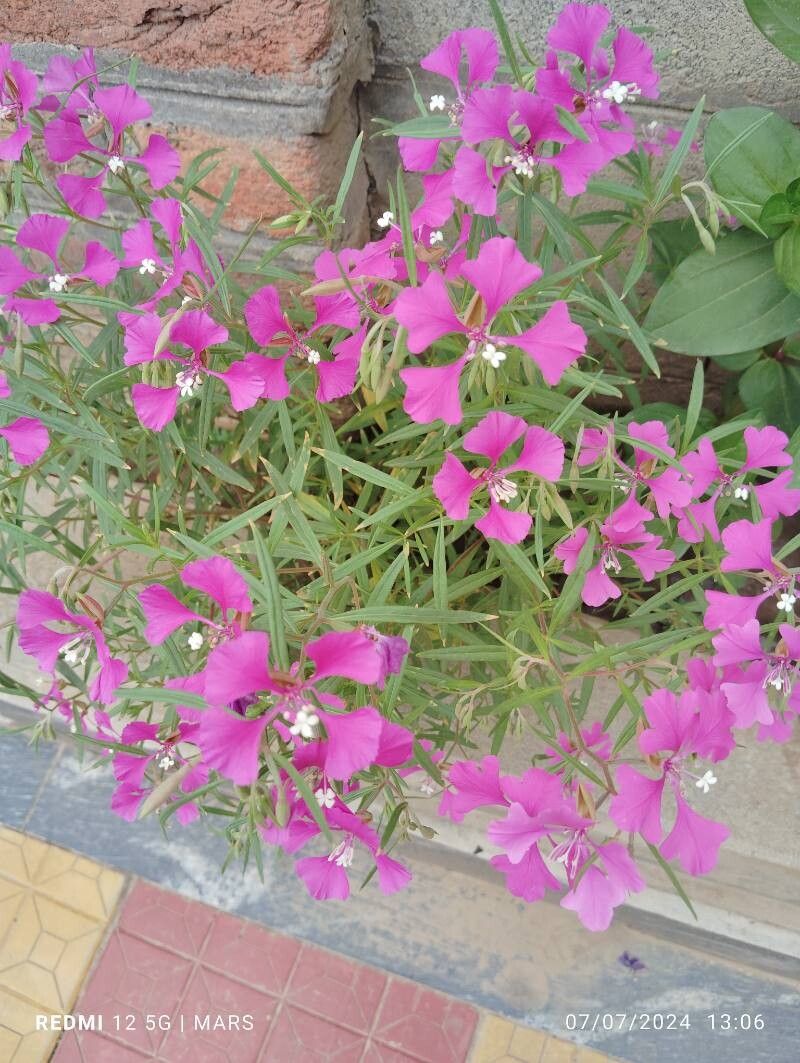
Known for its graceful, cup-shaped flowers and delicate, airy stems, the Clarkia pulchella, or “Farewell to Spring” as it’s fondly called, adds a touch of whimsy to any garden. But its beauty isn’t the only reason to love this annual. It also boasts a fascinatingly simple propagation process, making it accessible for gardeners of all experience levels.
Sowing the Seeds of Success:
The most common method for propagating Clarkia pulchella is through seeds. These tiny treasures can be sown directly into the garden after the last frost, as they prefer cool temperatures. Here’s a simple guide for seed sowing:
- Prepare the Soil: Choose a sunny spot with well-drained soil. Loosen the soil and rake it smooth.
- Seed Sowing: Scatter the tiny seeds directly onto the surface, barely covering them with a thin layer of soil.
- Water Gently: Mist the soil lightly to ensure the seeds stay moist.
- Thinning Out: Once seedlings emerge, thin them out to about 6 inches apart.
- Enjoy the Show: The Clarkia pulchella will bloom within 6-8 weeks of sowing.
The Power of Self-Seeding:
One of the most magical aspects of the Clarkia pulchella is its ability to self-seed. This means you can simply let nature take its course, and the plant will scatter its seeds across the garden, creating a beautiful, natural display year after year.
From Cuttings to Blooms:
While seed propagation is the go-to for Clarkia pulchella, you can also try propagating from cuttings. This method offers a faster way to grow new plants, especially if you want to create a specific garden design.
Here’s how to propagate from cuttings:
- Choose Strong Stems: Select healthy, new stems from the current year’s growth. Make sure they are about 4 inches long and have at least two sets of leaves.
- Prepare the Cuttings: Snip off the bottom set of leaves and dip the end of the stem into rooting hormone (optional but helpful).
- Potting Time: Plant the cuttings in a pot filled with a sterile, well-draining potting mix. Water thoroughly and place the pot in a bright, indirect light location.
- Patience is Key: It might take a few weeks for the cuttings to root, but with patience and proper care, you’ll soon see new growth.
Tips for a Stunning Display:
- Deadheading: Regularly removing spent flowers will encourage the plant to produce more blooms.
- Water Wisely: Keep the soil evenly moist, but avoid overwatering, which can lead to root rot.
- Choose the Right Companions: Pair the Clarkia pulchella with other drought-tolerant annuals like cosmos, zinnias, and sunflowers for a beautiful, summery display.
The Takeaway:
Propagating the Clarkia pulchella is a joyride for gardeners of all levels. With its simplicity in terms of both seed sowing and stem cuttings, this vibrant annual will provide a stunning show of colour in your garden while keeping you captivated with its easy-to-master propagation methods. So, why not invite the charming Farewell to Spring into your garden this year and discover how easy it is to create a landscape filled with its delicate beauty?