Unveiling the Secrets of Coronanthera Clarkeana Propagation: A Step-by-Step Guide
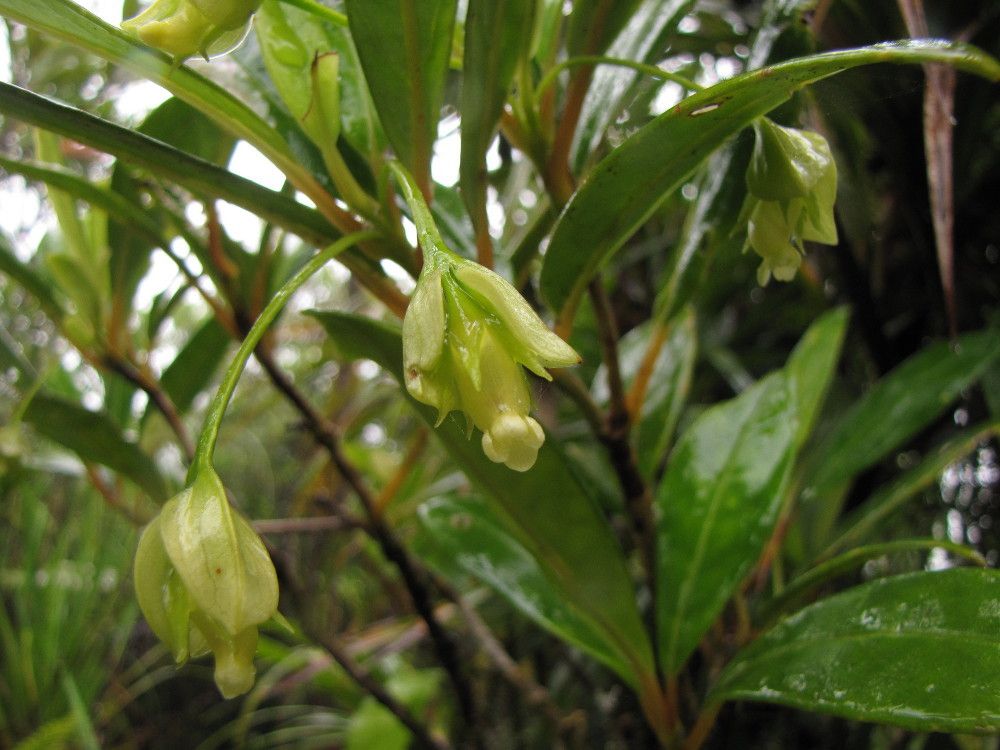
The Coronanthera clarkeana, with its delicate, bell-shaped flowers and vibrant foliage, is a true gem of the Australian rainforest. This enchanting shrub, also known as the “Fairy Bells” or “Waxberry,” captivates with its ethereal presence. If you’re lucky enough to acquire one, you might dream of expanding your collection or sharing its beauty with others.
Propagating Coronanthera clarkeana can seem intimidating, but fear not! This guide will equip you with the knowledge and confidence to multiply your floral treasures.
Understanding the Basics
Before embarking on your propagation journey, it’s essential to know that Coronanthera clarkeana can be propagated through two primary methods:
- Seed Propagation: This method, though requiring patience, offers the satisfaction of nurturing a plant from its very beginning.
- Cutting Propagation: A quicker method, perfect for those eager to see faster results.
Method 1: Seed Propagation – A Labor of Love
Step 1: Seed Collection
- Collect ripe berries from your Coronanthera clarkeana in the fall. Ripe berries are plump and display a deep purple hue.
- Gently extract the seeds from the fleshy berry. Each berry typically contains one or two seeds.
- Clean the seeds using a sieve and running water, ensuring all fruit pulp is removed.
Step 2: Sowing the Seeds
- Fill seed trays or pots with a well-draining seed-raising mix.
- Sow the seeds on the surface of the moistened mix, pressing them down lightly.
- Cover the seeds with a thin layer of the seed-raising mix and mist gently.
Step 3: Nurturing Germination
- Place the trays or pots in a warm, well-lit area, out of direct sunlight.
- Maintain consistent moisture by misting regularly, ensuring the soil never completely dries out.
- Germination can be slow, ranging from a few weeks to several months.
Method 2: Cutting Propagation – A Shortcut to Success
Step 1: Taking the Cuttings
- Choose healthy stems from your Coronanthera clarkeana that are showing new growth.
- Using sharp, sterilized pruning shears, take cuttings about 4-6 inches long.
- Cut just below a leaf node (the point where the leaf attaches to the stem).
Step 2: Preparing the Cuttings
- Remove the leaves from the bottom third of each cutting.
- Dip the cut end of each cutting into a rooting hormone powder (optional but recommended).
Step 3: Planting the Cuttings
- Fill pots or trays with a well-draining potting mix.
- Create a hole in the mix using your finger or a pencil.
- Insert the cutting into the hole, ensuring the leaf nodes are below the soil line.
- Gently firm the soil around the cutting and water it in.
Step 4: Encouraging Root Growth
- Place the pots or trays in a warm, bright location but out of direct sunlight.
- Maintain humidity by covering the cuttings with a clear plastic bag or humidity dome.
- Regularly check the moisture level of the soil, keeping it consistently moist but not waterlogged.
Once your Coronanthera clarkeana cuttings have rooted (typically within 4-6 weeks), you can gradually acclimatize them to their new environment. With proper care and attention, your propagated plants will flourish, offering a symphony of delicate blooms and enchanting beauty for years to come.