From Seed to Stature: Propagating the Majestic Cunonia aoupiniensis
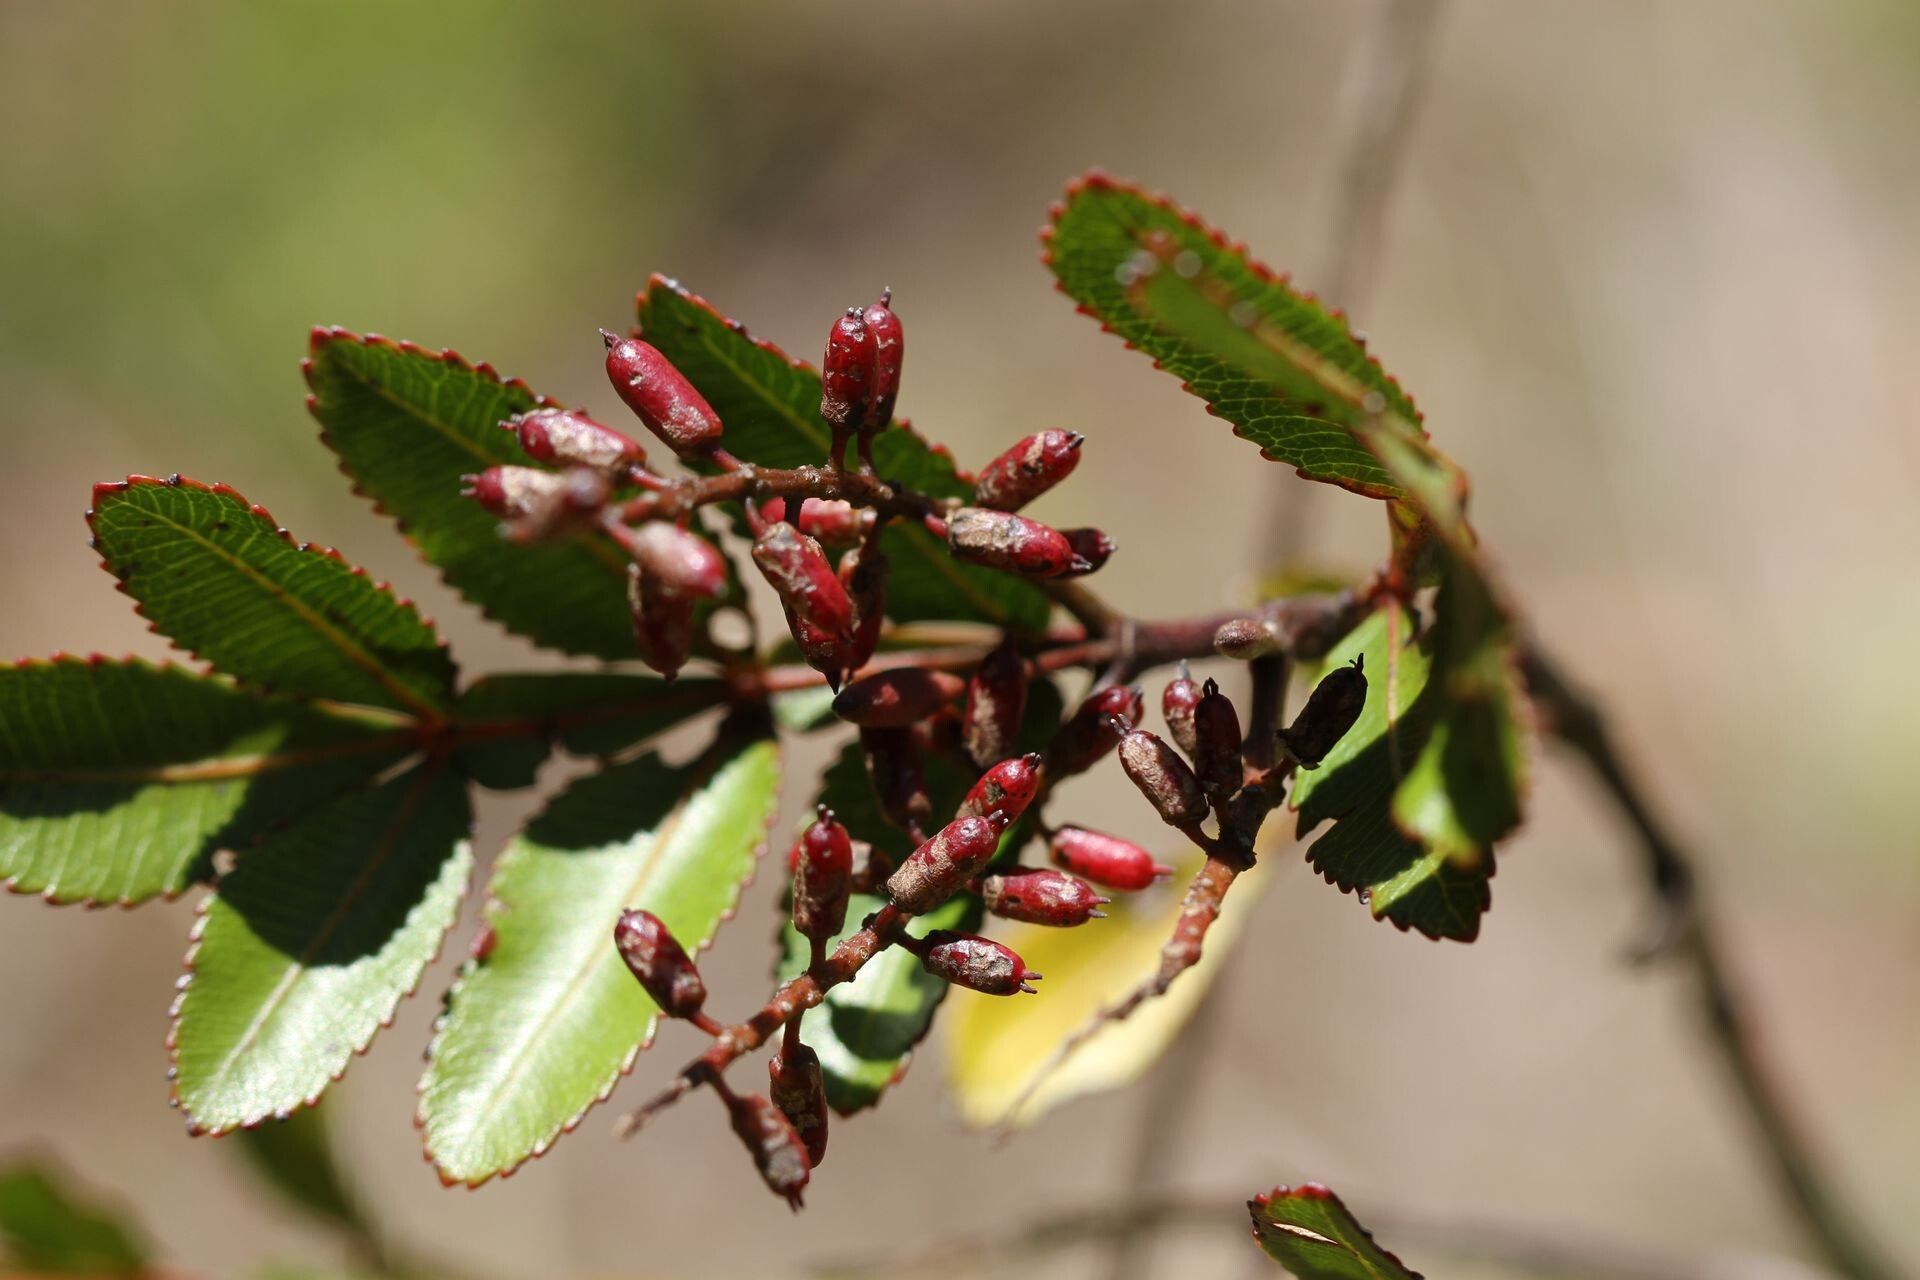
The Cunonia aoupiniensis, also known as the “Red Cunonia,” is a captivating evergreen tree native to the tropical rainforests of New Caledonia. With its striking red-tinged foliage and graceful, spreading branches adorned with clusters of white flowers, it’s a true showstopper. While a bit of a challenge to grow, the reward of cultivating this majestic tree is well worth the effort. Today, we’ll delve into the fascinating world of propagating Cunonia aoupiniensis, uncovering the secrets to success.
Understanding the Options:
Like many plants, Cunonia aoupiniensis can be propagated through various methods:
- Seeds: This is the most common and traditional method. However, it requires patience as Cunonia seeds are notoriously slow to germinate.
- Cuttings: This involves taking a portion of a healthy branch and encouraging it to develop roots. While more demanding, it can be a faster route to a new tree.
- Air Layering: This technique involves inducing root formation on a branch while it’s still attached to the parent plant, allowing for faster development.
Stepping into the World of Seeds:
If you’re embarking on the journey of propagation from seed, prepare yourself for a process that requires patience and a keen eye.
- Sourcing the Seeds: Fresh, viable seeds are essential for success. If you’re lucky enough to have a mature Cunonia aoupiniensis nearby, harvest the seeds from mature fruit capsules. Otherwise, you may need to seek reputable seed suppliers specializing in tropical plants.
- Pre-Sowing Treatment: Most Cunonia seeds benefit from a period of cold stratification, mimicking the natural winter conditions they experience in their native environment. This can be achieved by placing the seeds in a moist environment at a temperature of 3-5°C for several weeks.
- Planting Time: Once the seeds have undergone cold stratification, they are ready for planting. Choose a well-draining, slightly acidic potting mix, and sow the seeds about twice their depth. Maintain consistently moist conditions and a warm ambient temperature.
- Patience is Key: Germination can take anywhere from several weeks to months, so don’t lose hope if you don’t see immediate results. Be diligent about watering and protecting the young seedlings from harsh sunlight.
Taking the Cutting Route:
Propagating Cunonia aoupiniensis from cuttings requires a different approach.
- Timing is crucial: The best time for taking cuttings is in the spring or early summer when the plant is actively growing.
- Selecting the Material: Choose a healthy, semi-hardwood cutting, about 10-15 cm long, from the current season’s growth. Make a clean cut just below a node, ensuring the cutting has at least two sets of leaves.
- Preparing the Cutting: Dip the cut end of the cutting in rooting hormone to stimulate root formation. Plant the cutting in a specialized cuttings mix or a well-draining soil blend enriched with perlite or vermiculite.
- Providing Ideal Conditions: Maintain consistently moist but not soggy conditions, and shelter the cuttings from direct sunlight. A humidity dome or plastic wrap can help retain moisture and encourage rooting.
The Art of Air Layering:
Air layering is a fascinating technique that allows you to create new plants with enhanced growth potential.
- Choosing the Right Branch: Select a healthy, non-flowering branch that’s ideally a year old or more. The optimal diameter is about 1-2 cm for easier manipulation.
- Preparing the Site: Score the branch horizontally with a sharp knife at a point about 1-2 cm below a node. This incision helps stimulate root formation.
- Encouraging Roots: Wrap the scored area with moist sphagnum moss, ensuring it stays moist but not soggy. Seal the moss in place with plastic wrap or aluminum foil.
- Patience and Monitoring: Keep the sphagnum moss consistently moist, and monitor for root development. After several months, when roots emerge, you can sever the branch below the rooted section and plant it in a pot.
A Final Word:
Cultivating Cunonia aoupiniensis requires a bit more effort than some other plants, but the rewards are undeniably captivating. Whether you choose to propagate through seeds, cuttings, or air layering, this journey will allow you to witness the transformative power of nature. With patience, dedication, and the right techniques, you’ll be well on your way to enjoying the graceful elegance of this mesmerizing tree in your own backyard.