Unleash the Magic of Dichaea acroblephara: A Guide to Propagation for Beginners
The beauty of orchids lies in their intricate blooms and captivating diversity. One such enchanting specimen is the Dichaea acroblephara, often known as the “Hairy Dichaea.” Its airy, cascading form and delicate, star-shaped flowers make it a sought-after addition to any indoor jungle. But how do you share this beauty? Through propagation!
A Glimpse into Dichaea acroblephara Propagation
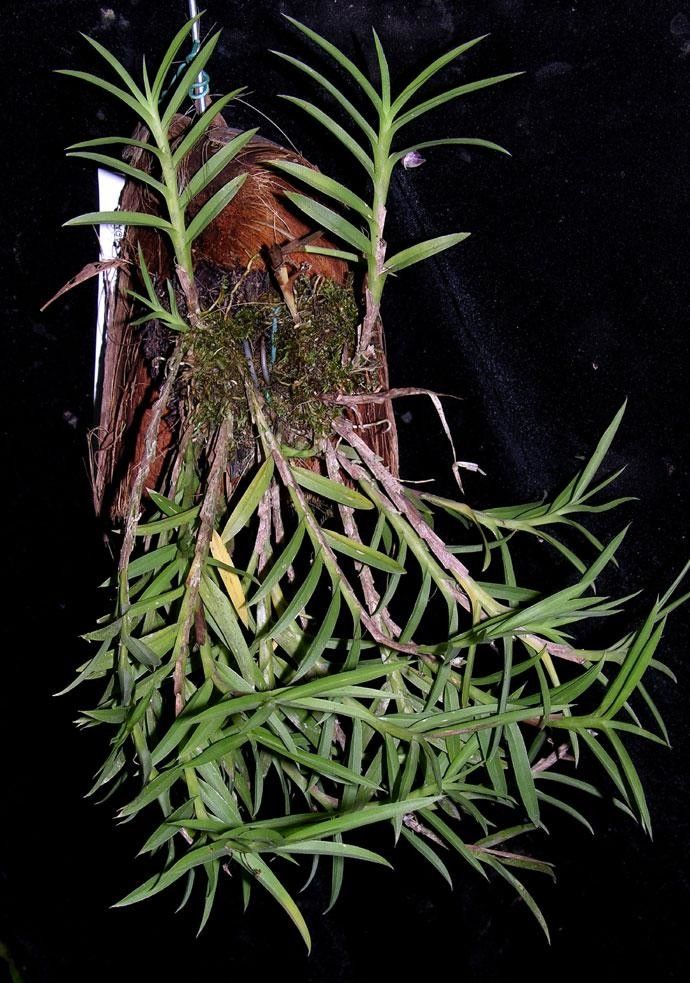
Unlike other orchids, Dichaea acroblephara is a true climber. It thrives in the wild by clinging to trees and rocks, relying on its aerial roots for water and nutrients. This unique adaptation is key to its propagation as well. Unlike traditional methods that involve dividing bulbs or cuttings, Dichaea acroblephara is best propagated through division or air layering.
1. Division: Sharing the Roots of Beauty
This method takes advantage of the plant’s natural tendency to form multiple growth points along its rhizome. Here’s the breakdown:
- Choose a Healthy Plant: Select a mature Dichaea acroblephara with multiple growth points and well-developed roots.
- Prepare the Plant: Gently remove the plant from its pot and carefully untangle the intricate root system. Look for separate growth points with their own set of roots.
- Divide Carefully: Using a sharp, sterile knife or scissors, gently cut the rhizome between growth points, ensuring each division has a healthy root system.
- Repot with Care: Plant each division in an appropriately sized pot with a well-draining medium. Ensure that the roots are spread out evenly and that the rhizome sits just above the soil level.
- Provide Optimal Care: Offer the new divisions the same care as their parent plant, including bright indirect light, regular watering, and consistent humidity.
2. Air Layering: A Little Patience for Big Rewards
This technique mirrors the plant’s natural growing habit, encouraging new roots to form directly on the aerial stems. Here’s how it works:
- Select a Healthy Stem: Choose a mature stem with several nodes (point where leaves grow). The ideal spot is a few inches below a leaf node.
- Make a Cut: Using a sharp, sterile blade, make a shallow cut, about 2/3 of the way through the stem.
- Apply Sphagnum Moss: Wrap the cut area with moist sphagnum moss and secure it tightly with plastic wrap or aluminum foil. Keep the moss consistently moist.
- Wait Patiently: Let the stem sit for several weeks until new roots emerge within the moss.
- Cut and Repot: Once adequate roots have developed, carefully cut the rooted section below the moss and plant it in a pot with a well-draining medium.
Tips for Success:
- Sterilize: Always sterilize your tools with rubbing alcohol before cutting to prevent infections.
- Humidity is Key: Maintaining high humidity around the plant is crucial. You can mist regularly, use a humidifier, or place the plant on a pebble tray filled with water.
- Patience is a Virtue: Propagation of Dichaea acroblephara can take some time. Be patient, provide good care, and you’ll be rewarded with beautiful new plants to share with your friends and family, or even to brighten your own indoor oasis.
By learning these techniques, you can unlock the magic of Dichaea acroblephara propagation and share its stunning beauty with the world. Whether you opt for division or air layering, you’ll add a captivating new layer to your plant parenting journey. After all, the joy of growing orchids lies not only in their beauty but also in the process of sharing them with others.