Multiply Your Amoena Love: The Easy Guide to Propagating Echeveria Amoena
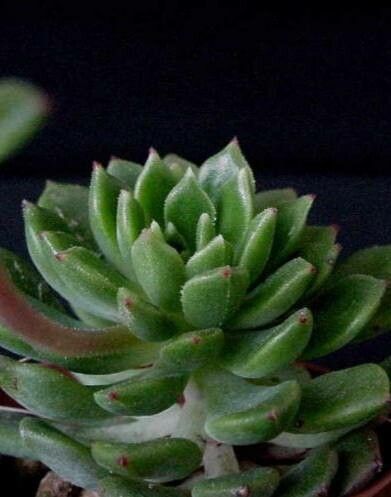
Echeveria amoena, with its charming rosettes and delicate blooms, is a succulent sweetheart for any plant lover. But did you know that multiplying your amoena joy is surprisingly simple? Propagation, the process of creating new plants from existing ones, is surprisingly easy with this resilient succulent. Let’s dive into the world of echeveria amoena propagation and discover just how straightforward it can be!
The “How” and “Why” of Echeveria Amoena Propagation
Why propagate your Echeveria amoena in the first place? There are several compelling reasons:
- Expand your collection: Create a whole family of amoenas without spending a dime!
- Rejuvenate older plants: Over time, older rosettes can become leggy. Propagation allows you to start fresh with youthful plants.
- Share the love: Propagated plants make thoughtful gifts for fellow plant enthusiasts.
- Save a struggling plant: If parts of your amoena are damaged, propagation can help salvage healthy sections.
Echeveria Amoena Propagation: A Choose-Your-Own Adventure
The beauty of propagating Echeveria amoena is the variety of methods at your disposal:
1. Leaf Cuttings: The Beginner-Friendly Approach
This is the most popular and easiest method. Here’s how it’s done:
- Select healthy leaves: Choose plump, firm leaves without any damage.
- Twist and pull: Gently twist and pull the leaf from the stem, ensuring the entire leaf detaches.
- Let them rest: Allow the leaves to callus over for a few days in a dry, shaded location.
- Time to propagate: Lay the leaves on top of a well-draining soil mix, misting occasionally.
- Patience is key: Tiny plantlets will sprout from the base of the leaves in a few weeks.
2. Offsets (Pups): The Natural Division
Echeveria amoena often produces “pups”– small rosettes that grow at the base of the mother plant.
- Separate carefully: Gently remove pups that have developed their own root system.
- Pot them up: Plant the offsets in their own pots with well-draining soil.
3. Stem Cuttings: For a More Established Start
- Make the cut: Use a sharp, sterilized knife or scissors to take a stem cutting, ideally with a few leaves.
- Callus formation: Allow the cutting to callus over for a few days in a dry, shaded area.
- Plant and grow: Plant the callused end in well-draining soil and water sparingly.
Essential Tips for Propagation Success:
- Well-draining soil: A mix designed for succulents or cacti is crucial to prevent root rot.
- Bright, indirect light: Avoid placing newly propagated plants in direct sunlight, which can scorch them.
- Water wisely: Less is more! Water only when the soil is completely dry, misting lightly in between.
Enjoy the Rewards of Propagation!
Propagating your Echeveria amoena is a rewarding experience, allowing you to multiply your collection and share the succulent love. With a little patience and care, you’ll soon have a thriving family of these beautiful plants. So why wait? Get propagating today and watch your amoena love grow!