Multiply Your Echeveria Angustifolia: A Propagation Playbook
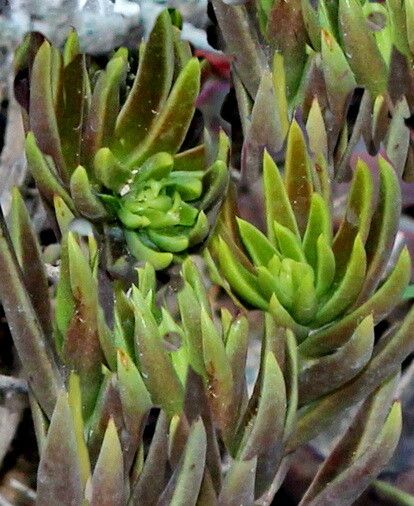
Echeveria angustifolia, with its intriguing, slender leaves and delicate rosette form, is a succulent superstar. But did you know that propagating this beauty is easier than you might think? That’s right, you can multiply your succulent collection without breaking the bank (or even leaving your home!).
This guide will walk you through the simple steps of propagating your Echeveria angustifolia, turning you into a bona fide succulent sorcerer!
Propagation Powerhouse: Understanding Your Options
Echeveria angustifolia offers several easy propagation methods. Let’s explore the most popular ones:
- Leaf Cuttings: The most common and arguably easiest method involves using individual leaves to grow new plants.
- Offsets (Pups): Many Echeveria varieties, including angustifolia, produce baby plants, or “pups”, around their base. These little ones are practically ready-made for propagation!
Let’s Get Down to Business: Step-by-Step Propagation
1. Prepping for Success:
- Sharp and Clean: Before you begin, ensure your cutting tool (sharp knife or shears) is clean and sterilized to prevent introducing bacteria to your cuttings.
- Well-Draining Soil: Choose a well-draining soil mix specifically formulated for succulents or cacti. A blend of potting soil, perlite, and coarse sand works well.
- The Right Container: Shallow trays or small pots with drainage holes are ideal for propagation.
2. Leaf Cutting Method:
- Select Healthy Leaves: Choose plump, healthy leaves from your Echeveria angustifolia. Gently twist the leaves from the stem, ensuring the entire leaf detaches with a clean break.
- Callus Over: Allow the leaves to callus over in a warm, dry place for a few days or until the cut end forms a dry seal. This prevents rotting when you plant them.
- Ready to Plant: Place the callused leaves on top of the prepared soil mix, slightly burying the callused end.
- Misting Magic: Lightly mist the soil every few days, ensuring it doesn’t become overly wet. Aim for a slightly moist environment.
- Patience is Key: In a few weeks, you’ll notice tiny pink roots emerging from the base of the leaf, followed by a miniature rosette – your new plant! Once the new rosette grows larger, you can carefully separate it from the mother leaf and pot it individually.
3. Offset (Pup) Propagation:
- Identify and Detach: Look for pups growing around the base of your mature Echeveria angustifolia. Carefully separate them from the mother plant, ensuring they have their own root system.
- Potting Time: Plant the offsets in their own pots filled with well-draining soil, burying the roots gently. Water lightly.
- Easy Does It: Provide indirect sunlight and maintain a slightly moist soil environment until the offsets establish themselves.
A Few Pro-Tips for Success:
- Provide bright, indirect sunlight for your cuttings and offsets.
- Allow the soil to dry out completely between waterings.
- Be patient! Propagation takes time – anywhere from a few weeks to a couple of months.
Conclusion:
Propagating your Echeveria angustifolia is a rewarding and straightforward experience. With a little patience and these simple techniques, you’ll be expanding your succulent collection in no time! So, go forth, propagate, and enjoy the satisfaction of growing your own stunning Echeverias.