Unleashing the Golden Tide: Propagating Western Wallflower (Erysimum capitatum)
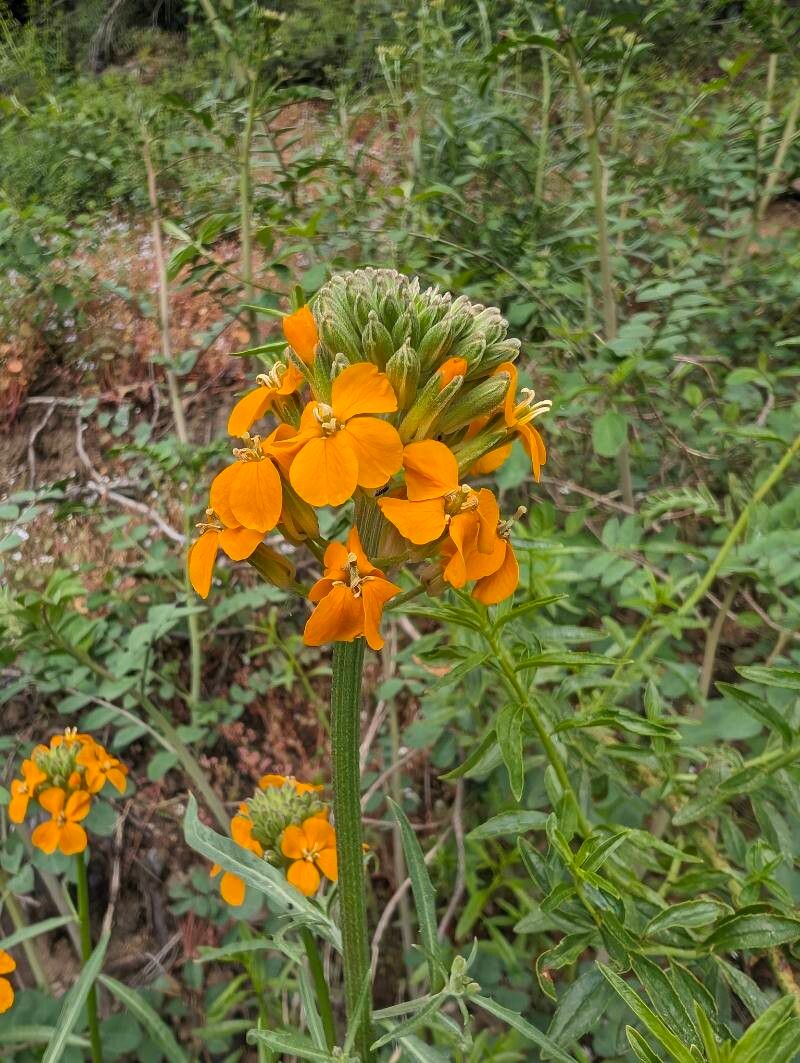
The Western Wallflower, or Erysimum capitatum, is a vibrant splash of color in the landscape, with its clusters of cheerful yellow, orange, or purplish flowers. This North American native is a favorite for attracting pollinators and adding a touch of wild beauty to gardens. If you’re smitten with this easy-going bloomer, propagating your own is a fulfilling way to expand your flower power. Let’s explore the two main methods to multiply your Erysimum capitatum success:
1. Sow Seeds of Success:
Starting Western Wallflower from seed is a straightforward process that even beginner gardeners can master. Here’s a step-by-step guide:
- Timing is Key: For best results, sow seeds directly outdoors in either fall or early spring. Fall sowing allows the seeds to experience natural stratification (exposure to cold), which often leads to better germination rates.
- Prepare the Bed: Choose a location that receives full sun to partial shade. Loosen the soil and remove any weeds. Erysimum capitatum prefers well-drained soil and can tolerate poor soil conditions.
- Sowing the Seeds: Scatter the seeds onto the prepared soil, aiming for a spacing of about 6-12 inches. Gently press the seeds into the soil but avoid burying them too deeply.
- Water Wisely: Keep the soil consistently moist until the seeds germinate, which typically takes 1-3 weeks. Once established, Western Wallflower is relatively drought-tolerant.
- Thinning Out: If necessary, thin out the seedlings once they reach a few inches tall, leaving the strongest plants to thrive.
2. Cuttings: Cloning Your Favorites:
Want to create an exact replica of a particularly stunning Western Wallflower? Taking cuttings is a reliable method for propagating:
- Timing: The best time for taking cuttings is in the spring or early summer when the plant is actively growing.
- Gather Your Tools: You’ll need a sharp, clean pair of pruning shears or scissors, a small pot filled with well-draining potting mix, and rooting hormone (optional but recommended).
- Taking the Cutting: Select a healthy, non-flowering stem. Using your shears, make a clean cut just below a leaf node (where the leaf emerges from the stem). Aim for a cutting that’s about 4-6 inches long.
- Prepare the Cutting: Remove leaves from the bottom inch or two of the stem. Dip the cut end in rooting hormone to encourage root development.
- Planting: Make a small hole in the potting mix and gently insert the cutting. Firm the soil around the base.
- Creating a Humid Environment: To promote rooting, cover the pot with a clear plastic bag or use a humidity dome. Keep the soil consistently moist.
- Patience is Key: Rooting can take several weeks. You’ll know it’s successful when you see new growth. Once the cutting is well-rooted, you can transplant it outdoors.
Western Wallflower: A Rewarding Experience for Any Gardener:
Whether you choose to start from seed or take cuttings, propagating Erysimum capitatum is a rewarding endeavor. This low-maintenance beauty will attract pollinators, create a stunning display of color, and bring joy to your garden year after year. So go ahead, unleash the golden tide of Western Wallflower in your outdoor space!