Unearthing the Secrets to Multiply Your Freesia fergusoniae: A Propagation Guide
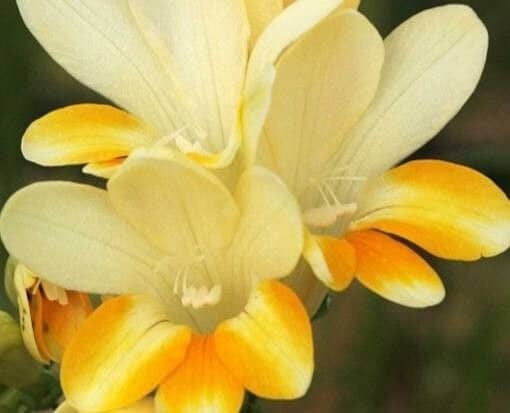
Freesia fergusoniae, with its charming, bell-shaped blooms and enchanting fragrance, holds a special place in the hearts of many plant enthusiasts. Native to South Africa, this captivating bulb enjoys a devoted following for its graceful beauty and relative ease of care. While acquiring new plants is always an option, there’s a certain satisfaction – and economic sense – in propagating your own. So, let’s delve into the fascinating world of Freesia fergusoniae propagation and discover the methods that’ll have you enjoying an abundance of these floral treasures.
The Two Pathways to Propagation: Seed vs. Corm Division
Freesia fergusoniae offers two primary methods of propagation:
1. Seed Propagation: An Exercise in Patience and Reward
Propagating from seed offers a rewarding journey, albeit one that requires patience. Here’s how to embark on this fulfilling endeavor:
- Collecting Seeds: Allow the spent flower heads to remain on the plant after blooming. Once they dry, carefully collect the seed pods. Break them open to reveal the small, black seeds within.
- Sowing the Seeds: Prepare a well-draining seed starting mix and sprinkle the seeds on the surface. Lightly cover them with a fine layer of mix and mist gently to moisten.
- Providing Optimal Conditions: Place the seed tray in a warm, bright location, but out of direct sunlight. Maintain consistent moisture but avoid overwatering.
- Germination and Growth: Seedlings should emerge in a few weeks. Thin out weaker seedlings to provide optimal space for the stronger ones. Be patient, as it may take a couple of years for these seedlings to reach flowering size.
2. Corm Division: A Quicker Route to Floral Abundance
For those seeking quicker results, corm division is the preferred method. Follow these steps for success:
- Timing is Key: Lift the corms from the ground during the plant’s dormant period, typically after the foliage has yellowed and died back.
- Careful Separation: Gently brush off excess soil and identify the healthy, plump corms. Use a clean, sharp knife to carefully separate the smaller cormels, ensuring each division has visible growing points (nodes).
- Replanting: Prepare a planting site with well-draining soil amended with compost. Plant the corms approximately 2-3 inches deep and 4-6 inches apart.
- Water Wisely: Water lightly after planting, increasing frequency as new growth emerges. Remember, Freesia fergusonie prefers well-drained soil, so avoid overwatering.
Nurturing Your New Freesia Fergusoniae
Regardless of the propagation method chosen, providing proper care is essential for flourishing plants:
- Sunlight: These beauties thrive in full sun to partial shade. Choose a location that receives at least 4-6 hours of sunlight daily.
- Soil: Well-drained soil is crucial to avoid corm rot. Incorporating organic matter like compost enhances drainage and provides essential nutrients.
- Watering: Water deeply but infrequently, allowing the soil to dry out slightly between waterings.
- Fertilizing: A balanced fertilizer applied during the growing season promotes healthy foliage and abundant blooms.
Propagating Success: Tips and Tricks
- Sterilize Tools: To minimize the risk of disease, sterilize cutting tools with rubbing alcohol before and after use.
- Patience is a Virtue: Propagation, especially from seed, requires patience. Don’t be discouraged if you don’t see immediate results.
- Enjoy the Journey: Witnessing new life emerge from seeds or dormant corms is deeply rewarding. Embrace the process and celebrate each milestone.
By following these comprehensive guidelines, you’ll be well on your way to propagating a breathtaking collection of Freesia fergusoniae. Soon, your garden will be graced with their exquisite beauty and intoxicating fragrance, a testament to your green thumb and the magic of propagation.