How to Propagate Gardenia posoquerioides
From One Gardenia to Many: Unlocking the Secrets of Propagating Gardenia posoquerioides
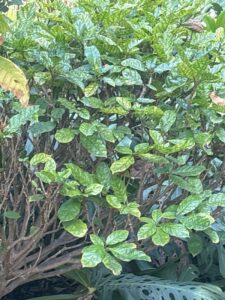
The beautiful, fragrant blooms of Gardenia posoquerioides, often referred to as the “Cape Jasmine,” are a delight to any garden. But what if you could multiply those delights and share them with friends or create a thriving garden of these fragrant beauties? That’s where propagation comes in!
Propagating your own Gardenia posoquerioides plants is a rewarding and achievable endeavor, even for beginners. It allows you to create new plants from existing ones, preserving desirable traits and expanding your collection. This blog post will guide you through the different methods of propagation for this captivating plant, equipping you with the knowledge to bring more Gardenia posoquerioides into your life.
The Power of Cuttings:
One of the most common and successful methods for propagating Gardenia posoquerioides is through cuttings. This technique involves taking a section of healthy stem, typically 4-6 inches long, from a mature plant. Here’s a step-by-step guide:
- Choose the right stem: Select a non-flowering, healthy stem with at least two sets of leaves.
- Make the cut: Use sharp, sterilized scissors or a knife to make a clean cut just below a leaf node.
- Remove lower leaves: Remove the leaves on the bottom 1-2 inches of the stem, leaving only the top two leaves.
- Prepare the rooting medium: Utilize a well-draining potting mix suitable for rooting or a combination of peat moss and perlite.
- Dip in rooting hormone: Optionally, dip the cut end of the stem in rooting hormone to enhance root development.
- Plant the cutting: Insert the stem into the rooting medium, making sure the lower node is buried within the soil.
- Maintain humidity and warmth: Cover the cutting with a plastic bag or dome to create a humid environment and place it in a warm, bright location.
- Monitor and water: Keep the rooting medium slightly moist but not soggy.
- Patience is key: It can take several weeks for roots to develop, so be patient and continue providing appropriate care.
Layering: A Gentle Approach
For those seeking a lower-risk propagation method, layering might be the perfect choice. This technique involves gently encouraging roots to form on a stem while it’s still attached to the parent plant. Here’s the process:
- Select a low-lying stem: Choose a healthy, flexible branch that can be bent towards the ground.
- Make a shallow cut: Carefully score the underside of the stem a few inches from the tip.
- Position the stem: Bend the stem and position the scored area into a small hole in the soil.
- Secure the stem: Anchor the stem in place with a bent wire or a pebble.
- Keep the soil moist: Regularly water the area around the buried stem, ensuring consistent moisture.
- Wait and watch: It might take several months for roots to form, but the stem will eventually start to grow independently.
Remember: Regardless of the method you choose, it’s crucial to provide the right environment for successful propagation. Ensure adequate light, warmth, and moisture for optimal root development. With proper care, you’ll soon witness the joy of your new Gardenia posoquerioides plants thriving in your garden or sharing their fragrance with others. So, get ready to cultivate your own miniature gardenia oasis!