Unfurling the Fern: A Guide to Propagating Gleichenia dicarpa
The Gleichenia dicarpa, also known as the “Fork Fern” or “Kangaroo Fern,” is a stunningly elegant fern with delicate, branched fronds that evoke a sense of wild, ancient beauty. Its unique appearance and ease of care make it a popular choice for gardeners, but what about sharing this beauty with others? Thankfully, propagating Gleichenia dicarpa is surprisingly easy, allowing you to expand your own fern collection or share the magic with friends.
This guide will take you step-by-step through the journey of propagating Gleichenia dicarpa, exploring the secrets to successfully cultivating new plants from existing ones.
Understanding the Basics
Gleichenia dicarpa is a fern, which means it doesn’t produce flowers or seeds for reproduction. Instead, it relies on spores for propagation. These tiny, dust-like spores are found on the underside of the fern’s fronds and serve as the building blocks for new ferns.
Choosing the Right Time
The ideal time for propagating Gleichenia dicarpa from spores is during the spring or early summer. This is when the fern is actively growing and has abundant spores available.
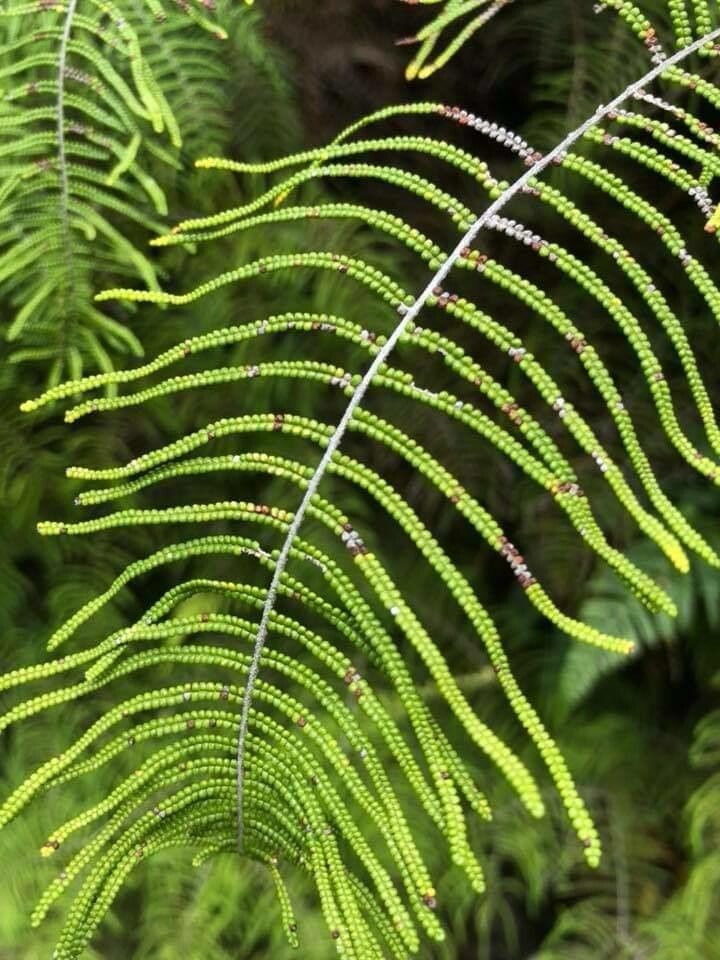
Gathering the Spores
- Select healthy fronds: Choose mature, vibrant fronds that are not damaged or diseased. The underside of these fronds will be covered in tiny brown spots or lines containing the spores.
- Carefully detach the fronds: Gently detach the chosen fronds from the plant, being careful not to damage the spores.
- Prepare the spores: Place the detached fronds in a paper bag or container and allow them to dry in a cool, dark place for a few days. This will help release the spores.
- Harvest the spores: When the fronds are fully dry, lightly tap them against a piece of paper to collect the spores.
Sowing the Spores
- Choose a suitable pot or container: A shallow tray or pot with drainage holes is ideal. The container should be no deeper than 2-3 inches.
- Create a sterile medium: Use a sterile, well-draining media such as a mix of peat moss and perlite.
- Sprinkle the spores: Gently scatter the collected spores evenly over the surface of the media. Do not press them into the soil.
- Provide a humid environment: Mist the surface of the media with water and cover the pot with a clear plastic lid, creating a mini greenhouse. This will trap moisture and provide the necessary humidity for spore germination.
- Maintain the humidity: Keep the media moist but not waterlogged, misting regularly as needed.
- Light and temperature: Place the container in a well-lit area with indirect sunlight and maintain a temperature of 65-75 degrees Fahrenheit.
Patience is Key
Fern spores can take several weeks to germinate, so patience is essential. Keep the media consistently moist and the environment humid. You’ll know germination has begun when tiny green prothalli (a type of fern plant) emerge.
Transplanting
Once the prothalli have developed, gently transplant them into individual pots filled with a well-draining potting mix. Keep the environment humid and provide adequate light. Within a few months, you’ll see young fern fronds unfurling.
Cultivating Your New Ferns
Young Gleichenia dicarpa ferns need consistent moisture and indirect sunlight. Over time, you can gradually increase the amount of light they receive. As your ferns grow, continue to provide a well-draining potting mix and regular fertilization to ensure healthy growth.
Enjoy the Beauty
Propagating Gleichenia dicarpa from spores is a rewarding experience that allows you to cultivate new ferns from the tiniest of beginnings. By following these steps and exercising patience, you can enjoy the beauty of these captivating plants for years to come, sharing the magic with others.