Taming the Wild Beauty: Propagating Hakea Mitchellii
Hakea mitchellii, with its spiky foliage and showy, creamy-white blooms, is a striking addition to any garden. This hardy Australian native, also known as the Desert Needlewood, brings a unique, almost prehistoric charm to landscaping. But taming this wild beauty isn’t as straightforward as some garden varieties. If you’re up for a rewarding challenge, propagating Hakea mitchellii at home is achievable with a bit of patience and the right know-how.
Two Paths to Propagation:
Hakea mitchellii can be propagated through two main methods:
Seed: The most common and arguably most exciting way to grow your own Desert Needlewood is from seed. The journey from seed to flowering plant is a rewarding one, providing a sense of accomplishment for any plant enthusiast.
- Cuttings: While slightly less reliable, propagating from cuttings offers a faster route to a mature plant. This method is ideal for those seeking to replicate the characteristics of a specific Hakea mitchellii specimen.
The Seed Route: A Journey of Patience
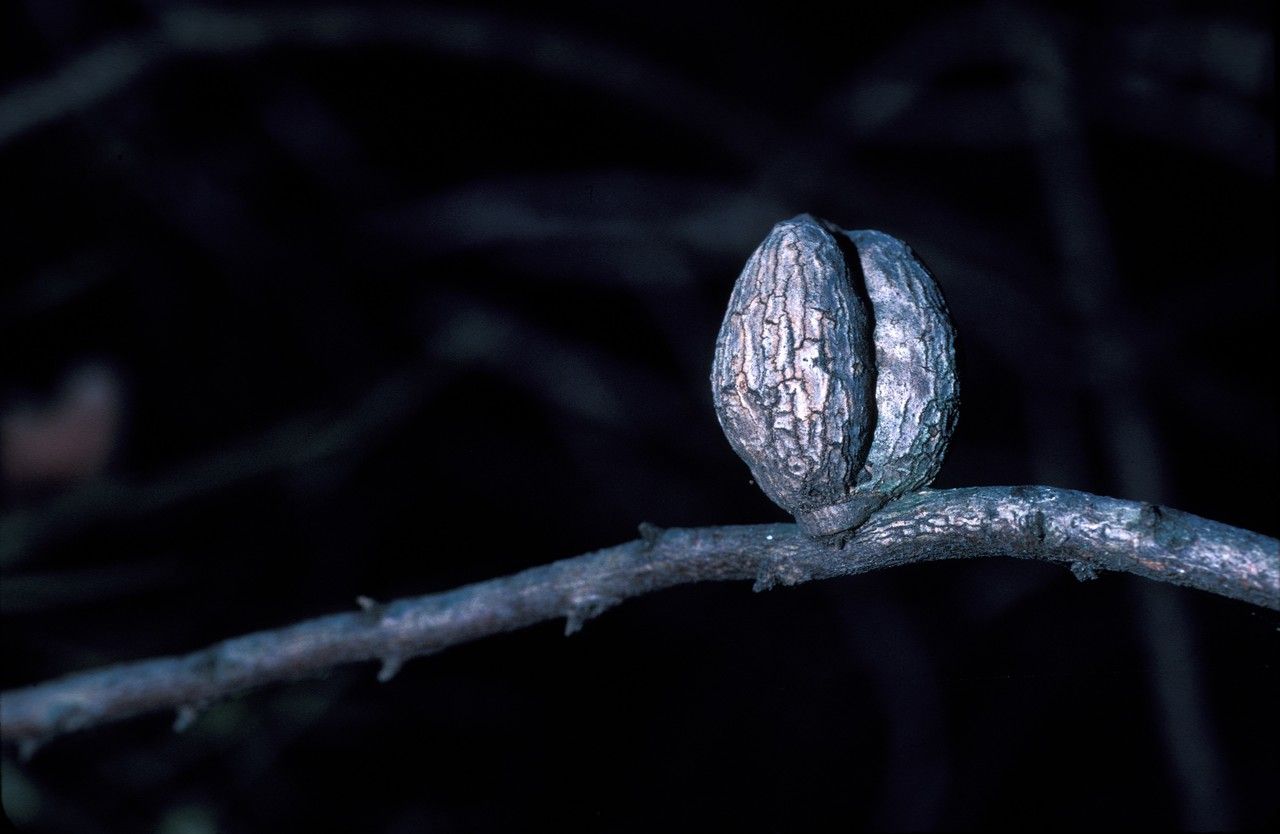
- Collecting Seeds: Begin by sourcing ripe seed pods from a healthy Hakea mitchellii. The pods, turning from green to grey, will eventually split open, revealing winged black seeds.
- Preparing for Sowing: Soak the seeds in warm water overnight to improve germination rates. You can further enhance germination by lightly scarring the seed coat with fine sandpaper.
- Sowing the Seeds: Use a well-draining seed raising mix and sow the seeds about 1cm deep. Keep the soil consistently moist but not waterlogged.
- Patience is Key: Germination can be erratic, taking anywhere from a few weeks to several months. Be patient and maintain consistent moisture and warmth for optimal results.
The Cutting Edge: Cloning Your Hakea
- Choosing the Right Cutting: Select healthy, semi-hardwood cuttings around 10-15cm long during the cooler months. Look for stems with new growth that has started to harden.
- Preparing the Cutting: Remove the leaves from the lower third of the cutting and wound the base slightly to encourage root development. Dip the cut end in rooting hormone for a boost.
- Planting the Cutting: Plant the cutting in a well-draining potting mix specifically designed for cuttings. Maintain a humid environment by covering the pot with a clear plastic bag or using a propagation dome.
- Nurturing New Roots: It may take several weeks for roots to develop. Keep the potting mix consistently moist and provide bright, indirect light.
Caring for Your Hakea Mitchellii Progeny:
Once your seedlings or cuttings have established a good root system, it’s time to transplant them into larger pots or directly into the ground. Choose a location with well-drained soil and full sun to partial shade. Water regularly during the first year to help your Hakea mitchellii thrive.
Propagating Hakea mitchellii requires a touch of patience and dedication, but the reward of seeing this stunning Australian native flourish in your own backyard is well worth the effort. Whether you choose the seed route or the cutting edge, you’ll be rewarded with a piece of the Australian landscape that will bring beauty and intrigue to your garden for years to come.