Unfurling the Tropics: Propagating Your Own Heliconia Platystachys
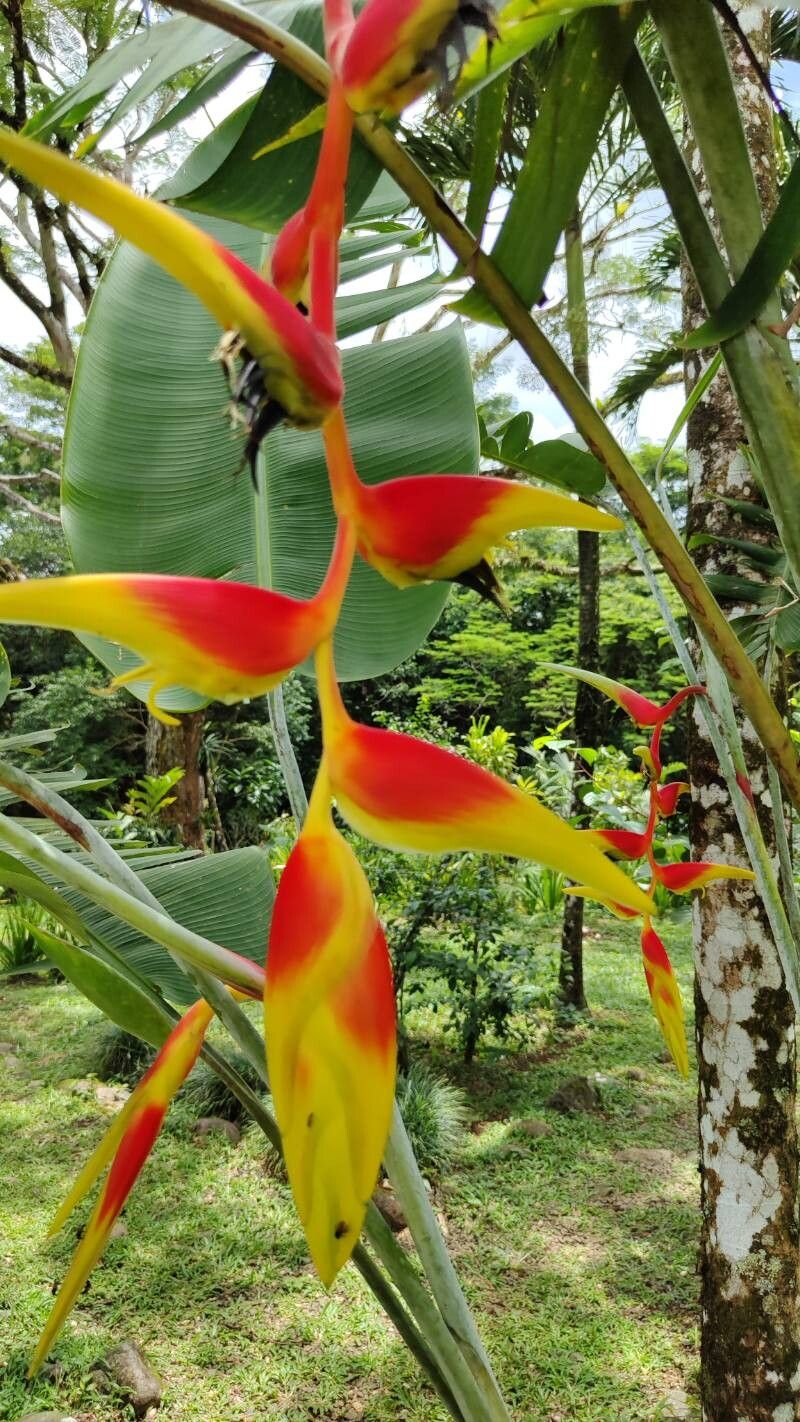
Heliconia platystachys, with its vibrant, lobster claw-shaped blooms, brings a touch of the tropics to any garden or home. Want to multiply your floral treasures and share the joy? Propagating your own Heliconia platystachys is easier than you might think! This guide will walk you through the process, unveiling the secrets to success.
Understanding Your Heliconia
Before diving into propagation, it’s helpful to understand how Heliconia platystachys grows. This clump-forming perennial spreads via underground rhizomes – modified stems that grow horizontally and sprout new shoots. Tapping into this natural growth habit is the key to multiplying your plants.
Two Paths to Propagation
You can propagate Heliconia platystachys through two primary methods:
1. Rhizome Division:
This method mimics the plant’s natural reproduction and is best done in spring.
- Digging In: Carefully dig up the entire clump of your Heliconia platystachys, ensuring you get a good portion of the root system.
- Separation Anxiety: Gently shake off excess soil and examine the rhizome structure. Using a sharp, sterilized knife or pruning shears, divide the rhizomes into sections, ensuring each section has at least two to three healthy shoots and a good amount of roots.
- Repotting: Prepare pots or planting holes with well-draining soil enriched with organic matter. Plant your rhizome sections at the same depth they were originally growing, ensuring the shoots are above the soil line.
- Water and Patience: Water thoroughly after planting and keep the soil consistently moist but not soggy. New growth should emerge within a few weeks, signaling a successful division.
2. Seed Propagation:
While less common due to lower success rates and longer germination times, growing Heliconia platystachys from seed offers a rewarding challenge.
- Seed Sourcing: Seeds can be collected from mature plants after the flowering bracts have faded or purchased from reputable suppliers.
- Scarification and Soaking: Heliconia seeds have a hard outer coating. To improve germination rates, nick the seed coat with a file or lightly scarify it with sandpaper. Soak the seeds in warm water for 24 hours before sowing.
- Sowing: Plant seeds in a well-draining seed-starting mix, covering them lightly with soil. Provide warmth (around 75-85°F) and high humidity, simulating a tropical environment. A seedling heat mat and humidity dome can be helpful tools.
- Patience is Key: Germination can take anywhere from a few weeks to several months. Once seedlings have a few sets of true leaves, they can be transplanted into individual pots.
Post-Propagation Care:
Whether you choose rhizome division or seed propagation, newly established Heliconia platystachys plants thrive in bright, indirect light and well-draining soil. Maintain consistently moist soil, fertilize regularly during the growing season, and provide support for taller varieties using stakes or trellises.
Sharing the Tropical Abundance:
Propagating your own Heliconia platystachys not only adds lush beauty to your space but also allows you to share a piece of the tropics with others. Gift these stunning plants to loved ones or trade divisions with fellow plant enthusiasts, spreading the joy of these vibrant blooms far and wide.