How to Propagate Heliconia sarapiquensis
Unleash the Tropical Symphony: Propagating Your Own Heliconia Sarapiquensis
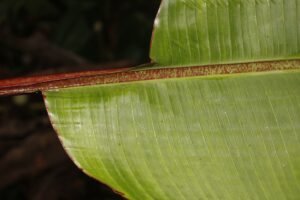
Imagine a fiery dance of scarlet and gold, exotic birds flitting amongst vibrant plumes – no, it’s not a dream, it’s the Heliconia Sarapiquensis gracing your garden! This striking tropical beauty, also known as the “Scarlet Torch” or “Lobster Claw”, isn’t just for seasoned plant enthusiasts. With a bit of know-how, you can easily propagate your own fiery paradise.
Two Paths to Paradise: Rhizome Division and Seeds
Heliconia Sarapiquensis can be propagated in two primary ways:
- Rhizome Division: This method, ideal for established plants, involves separating the underground stems (rhizomes) to create new plants.
- Seeds: Propagation from seed offers a satisfying (though often longer) journey, allowing you to witness the plant’s full life cycle.
Rhizome Division: Duplicating Your Tropical Flare
Spring, with its burst of new life, is the perfect time for rhizome division. Here’s how:
- Carefully unearth the rhizome: Using a clean, sharp shovel, gently dig around the base of the mother plant, exposing the rhizome system.
- Divide and conquer: Look for sections of rhizome with at least one healthy bud or shoot. Using a sterilized knife, carefully cut these sections away from the main clump.
- Potting up your divisions: Prepare pots with well-draining soil (a mix of peat moss, perlite, and vermicast works wonders). Plant each rhizome section a few inches deep, ensuring the bud points upwards.
- Nurture and wait: Water your newly potted divisions thoroughly and place them in a warm, shaded location. Maintain consistent moisture and watch as they spring to life!
Seed Propagation: A Test of Patience and Reward
While more time-consuming, growing Heliconia Sarapiquensis from seed is an incredibly rewarding experience:
- Source your seeds: Heliconia seeds can be purchased online or harvested from mature plants. Look for plump, healthy seeds for the best chance of success.
- Break the dormancy (optional): Heliconia seeds often have a period of dormancy. Soaking the seeds in warm water for 24-48 hours can help speed up germination.
- Sow with care: Using a seed-starting mix, plant your seeds about half an inch deep in individual pots or seed trays.
- Patience is key: Keep the soil consistently moist and warm (around 75-85°F). Germination can take anywhere from a few weeks to several months.
- Transplanting Triumph: Once your seedlings develop a strong root system and are several inches tall, they can be transferred to larger pots or directly into your garden bed.
A Thriving Tropical Paradise Awaits
No matter your chosen method, propagating Heliconia Sarapiquensis offers a rewarding experience for plant lovers of all levels. With the right knowledge and a dash of patience, you’ll soon be surrounded by a symphony of scarlet torches, transforming your garden into a vibrant tropical haven.