Unlocking the Secrets of Propagation: How to Grow More Hovea Longifolia
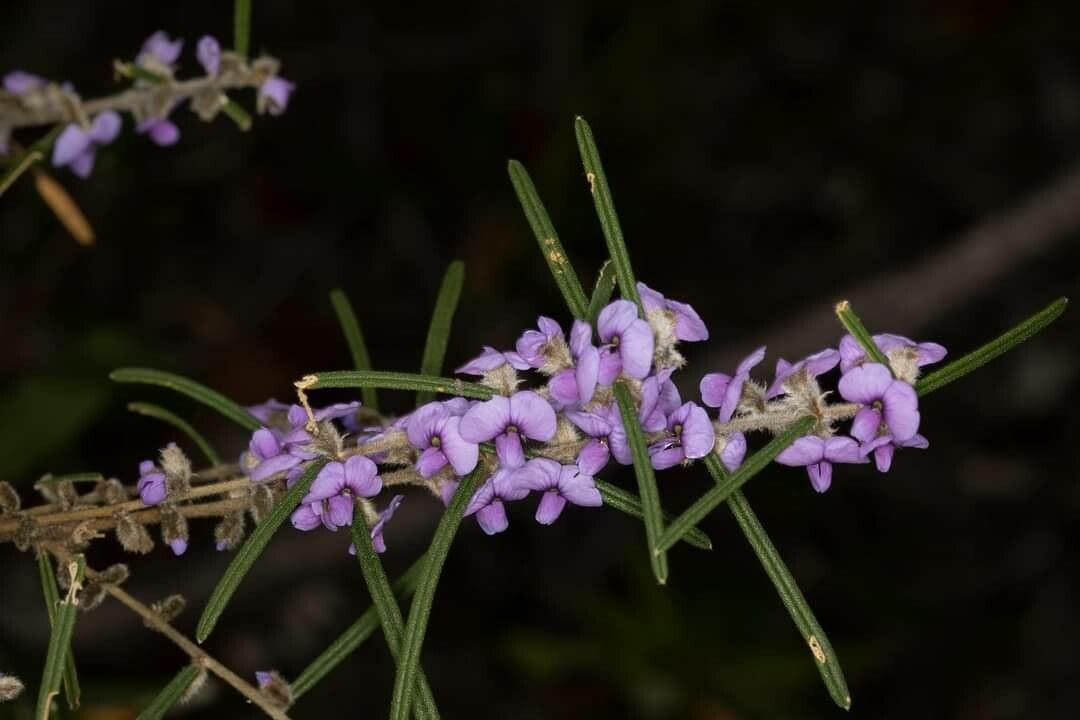
The Hovea longifolia, with its vibrant purple blooms and elegant, spear-shaped leaves, is a true showstopper in any garden. Native to Australia, this evergreen shrub adds a touch of exotic beauty with its cascading foliage and stunning floral displays. If you’re eager to expand your collection or share the joy of this plant with others, understanding how to propagate Hovea longifolia is key.
While this hardy plant can be a bit finicky to reproduce, don’t let that deter you! This guide will explore the two most effective methods for propagating Hovea longifolia:
Method 1: Seed Propagation – A Test of Patience
Propagating Hovea longifolia from seed requires patience and a bit of green thumb magic. Here’s how:
- Seed Collection: After the flowers fade, the Hovea longifolia produces small pods containing tiny black seeds. Collect these pods once they turn brown and start to dry.
- Seed Preparation (Scarification): Hovea seeds boast a hard outer coating that requires scarification to enhance germination. Gently nick or rub the seed coat with sandpaper or a nail file. This process allows water to penetrate and triggers germination.
- Sowing the Seeds: Sow the scarified seeds in a well-draining seed-raising mix, covering them lightly with a thin layer of the mix. Keep the soil consistently moist but not waterlogged.
- Patience is Key: Germination can take anywhere from several weeks to a few months. Place the seed tray in a warm, brightly lit location, away from direct sunlight.
- Transplanting: Once the seedlings develop a strong root system and have a few sets of true leaves, you can transplant them into individual pots or your garden bed.
Method 2: Cuttings – A Faster Path to Success
Propagating from cuttings tends to be a quicker and more reliable method for Hovea longifolia. Follow these steps:
- Timing is Everything: The ideal time to take cuttings is in the spring or early summer, during the plant’s active growth period.
- Selecting the Cuttings: Choose healthy, semi-hardwood stems that are around 4-6 inches long. Cut just below a leaf node (where the leaf joins the stem) with a sharp, sterilized knife or pruning shears.
- Prepare the Cuttings: Remove the lower leaves from the cutting, leaving only a couple of leaves at the top. This minimizes moisture loss.
- Hormone Boost (Optional but Recommended): Dip the base of the cutting in rooting hormone powder to stimulate root development.
- Planting the Cuttings: Plant the cuttings in a well-draining potting mix specifically formulated for cuttings. Keep the soil consistently moist.
- Creating a Humid Environment: Cover the pot with a clear plastic bag or use a propagation dome to create a humid environment. This helps retain moisture and promotes root growth.
- Monitoring for Success: After several weeks, gently tug on the cuttings to check for resistance. Resistance indicates successful root development.
Caring for Your New Hovea Longifolia Plants
Whether you choose to propagate through seeds or cuttings, providing the right care for your newly established plants is essential:
- Well-Draining Soil: Hovea longifolia thrives in well-draining soil that prevents waterlogging.
- Sunlight Requirements: Place your plants in a location that receives at least six hours of sunlight daily for optimal growth and blooming.
- Moderate Watering: Water deeply when the soil feels dry to the touch. Avoid overwatering, which can lead to root rot.
- Protection from Frost: While Hovea longifolia is relatively hardy, young plants benefit from protection from frost and extreme cold.
Propagating Hovea longifolia can be a rewarding experience, allowing you to multiply these stunning plants and share their beauty with others. Remember, patience is key. By providing the right conditions and care, you can enjoy the satisfaction of successful propagation and a garden adorned with the captivating allure of Hovea longifolia.