How to Propagate Inula candida
Unlocking the Secrets of Inula Candida: A Propagation Guide for Golden Blooms
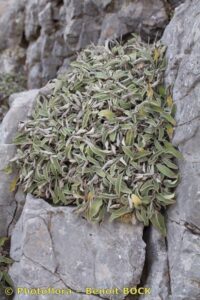
Inula candida, with its sunny disposition and vibrant yellow blooms, is a delightful addition to any garden. This flowering perennial, hailing from the Mediterranean, is admired for its resilience and ability to thrive in challenging conditions. But what if you want to multiply your Inula candida joy without breaking the bank? Propagation is the answer!
While purchasing established plants is always an option, propagating your own Inula candida from seed or cuttings offers a rewarding experience and an economical way to expand your plant family.
Method 1: Sowing Seeds of Success
- Timing is Key: Early spring is the ideal time to sow Inula candida seeds indoors.
- Prepare a Welcoming Bed: Use a well-draining seed starting mix and sow the seeds about ¼ inch deep.
- Patience is a Virtue: Keep the soil consistently moist and place the seed tray in a warm, brightly lit location (avoid direct sunlight). Germination can take anywhere from a few weeks to a couple of months.
- Thinning Out the Crowd: Once seedlings develop a couple of true leaves, thin them out to give the strongest ones ample space to grow.
- Gradually Acclimatize: Before transplanting outdoors after the last frost, gradually acclimate the seedlings to outdoor conditions over a week or two.
- Find Their Forever Home: Choose a sunny location with well-drained soil and space the plants about 18-24 inches apart.
Method 2: Taking the Cutting Edge
- The Right Cut: In late spring or early summer, take 4-6 inch cuttings from healthy, non-flowering stems.
- Prep the Cuttings: Remove the lower leaves from the bottom inch of the cutting to prevent rot.
- Hormone Boost (Optional): Dip the cut end in rooting hormone to encourage faster root development.
- Create a Cozy Environment: Plant the cuttings in a pot filled with a well-draining mixture of peat moss and perlite.
- Humidity is Key: Cover the pot with a clear plastic bag or use a propagation dome to maintain humidity around the cuttings.
- Root Check: After 4-6 weeks, gently tug on the cuttings to check for resistance, indicating root development.
- Pot On and Transplant: Once roots are established, transplant the cuttings into individual pots and allow them to grow larger before planting them outdoors the following spring.
Nurturing Your Inula Candida Clones:
Regardless of your chosen propagation method, providing the right care is essential for your new Inula candida plants to thrive. Ensure they receive adequate sunlight, well-drained soil, and moderate watering. Pinching back the young plants encourages bushier growth and more abundant blooms.
Propagating Inula candida might require some patience and gentle care, but the reward of witnessing new life sprout and flourish under your care is truly gratifying. So, why not roll up your sleeves and embark on this rewarding horticultural adventure? You’ll soon have a garden brimming with cheerful, golden Inula candida blooms!