Taming the Velvet Bean: A Guide to Propagating Machaerium villosum
The Machaerium villosum, more affectionately known as the Velvet Bean plant, is a showstopper. With its cascading vines, delicate blossoms, and unique seed pods covered in soft, fuzzy hairs, this Brazilian native is a beautiful addition to any plant lover’s collection. But if you’re looking to expand your Velvet Bean family, you might be wondering about the best ways to propagate this striking plant. Look no further, because we’re diving deep into the world of Machaerium villosum propagation!
Two Roads to Success: Seeds vs. Cuttings
The good news is that the Velvet Bean can be propagated in two ways: seeds and stem cuttings. Each method has its own set of pros and cons, so let’s take a closer look at both:
1. Seeds: Embracing the Element of Surprise
Propagating from seed offers a wonderful sense of anticipation and allows you to witness the entire growth journey of your new plant.
The Process:
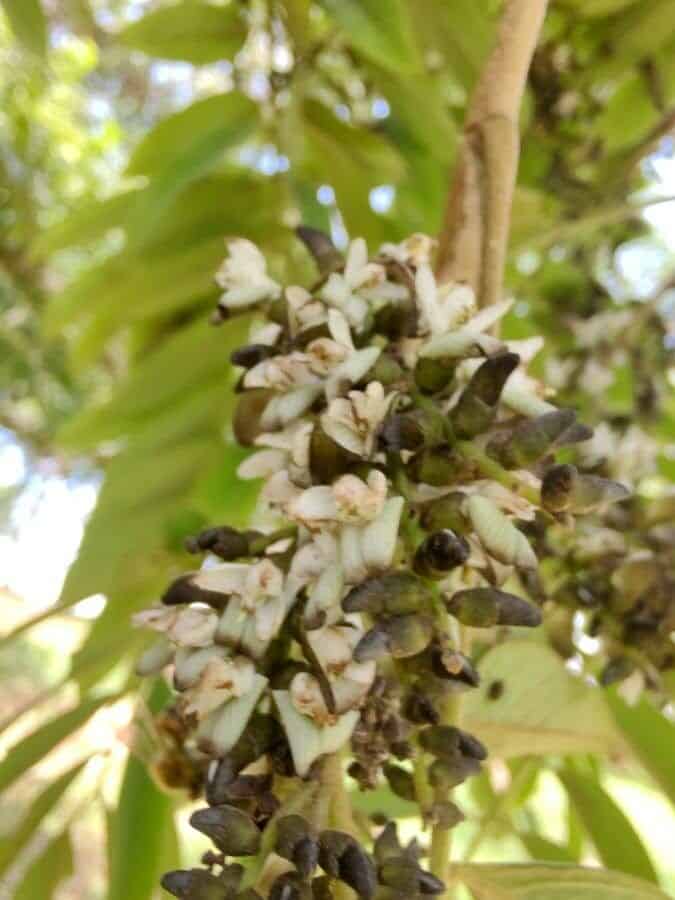
- Harvesting: Collect ripe seed pods directly from the plant. The pods should be dry and brownish in color.
- Extraction and Preparation: Carefully open the pods and remove the seeds. You can lightly scarify the seeds (nicking the outer layer) to improve germination rates.
- Sowing: Plant the seeds in a well-draining seed starting mix, burying them about ½ inch deep.
- Patience is Key: Keep the soil consistently moist and provide warmth and indirect sunlight. Germination can be erratic, taking anywhere from a few weeks to a couple of months.
- Pros: Inexpensive, readily available, and offers genetic diversity.
- Cons: Slower process, germination rates can be inconsistent, and you won’t get a genetically identical clone of the parent plant.
2. Stem Cuttings: Cloning Your Beloved Velvet Bean
If you’re looking for a quicker and more predictable propagation method, stem cuttings are your best bet. This method allows you to create a replica of your existing plant.
The Process:
- Selecting the Right Cutting: Choose a healthy, non-flowering stem from new growth. The cutting should be around 4-6 inches long with at least two sets of leaves.
- Preparing the Cutting: Remove the leaves from the bottom inch of the stem and dip the end into a rooting hormone (optional but recommended).
- Planting and Care: Plant the cutting in a well-draining potting mix, burying at least one node (where the leaves were removed). Keep the soil moist and provide warmth and humidity.
- Root Development: It will typically take 4-6 weeks for roots to develop.
- Pros: Faster results, higher success rate, produces a genetically identical plant.
- Cons: Requires access to a healthy parent plant.
Creating the Ideal Environment
Regardless of the method you choose, providing the right environment is key to successful propagation:
- Well-draining Soil: Use a peat-based potting mix blended with perlite or vermiculite to ensure proper drainage and aeration.
- Consistent Moisture: Keep the soil consistently moist but never soggy.
- Warmth and Humidity: Aim for temperatures between 70-80°F (21-27°C) and provide humidity through a humidity dome or regular misting.
- Indirect Sunlight: Place your seedlings or cuttings in a location with bright, indirect sunlight.
From Seedling to Stunning Specimen
Once your propagated Velvet Bean plants have developed a strong root system and several sets of leaves, you can gradually acclimate them to outdoor conditions and transplant them into larger pots or your garden. With proper care and attention, these new additions will reward you with their captivating beauty and charm for years to come.