Waking the Sleeping Beauty: Propagating the Majestic Island Mallow
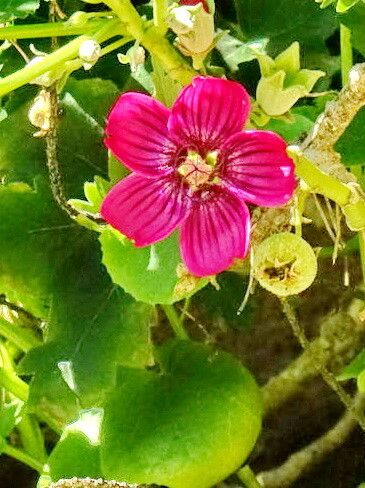
The Island Mallow (Malva assurgentiflora), with its showy pink blossoms and impressive height, is a true California beauty. Sadly, this striking plant is now considered endangered in the wild. But don’t despair! You can help conserve this species and grace your garden with its vibrant presence by learning how to propagate it at home.
Seed Starting: A Rewarding Challenge
Propagating Island Mallow from seed is a rewarding, albeit slightly more challenging, method. Here’s what you need to know:
- Seed Collection: Collect seeds from existing plants in late summer or fall. Look for brown, dried seed pods that easily split open.
- Scarification: To improve germination rates, lightly scarify the seeds. You can gently rub them between two pieces of sandpaper or nick them with a nail clipper.
- Cold Stratification: Like many California natives, Island Mallow seeds benefit from cold stratification, mimicking winter conditions. Mix the seeds with a bit of damp sand or vermiculite, store them in a sealed bag, and place them in the refrigerator for 4-6 weeks.
- Sowing: After stratification, sow the seeds in a well-draining seed starting mix. Barely cover the seeds with soil and keep the mix consistently moist but not waterlogged.
- Patience is Key: Germination can be erratic and take anywhere from a few weeks to a few months.
Cuttings: A Quicker Path to Success
For a quicker and often more successful method, try propagating Island Mallow from cuttings:
- Timing is Everything: The ideal time to take cuttings is in the spring or early summer when the plant is actively growing.
- Selecting the Right Cuttings: Look for healthy, non-flowering stems. Choose cuttings that are about 4-6 inches long and have at least two sets of leaves.
- Prepping the Cuttings: Remove the lower leaves from the cutting, leaving only the top two or three. Make a clean cut just below a leaf node (where the leaf joins the stem).
- Rooting Hormone (Optional): While not strictly necessary, dipping the cut end in rooting hormone can encourage faster root development.
- Planting the Cuttings: Plant the cuttings in a well-draining potting mix, burying the bottom node.
- Creating a Humid Environment: To increase humidity and encourage rooting, cover the pot with a clear plastic bag or use a humidity dome.
- Bright, Indirect Light: Place the cuttings in a location with bright, indirect light.
- Keep them Moist: Keep the potting mix consistently moist but avoid overwatering.
From Propagation to Garden Glory
Once your new Island Mallow plants have developed a strong root system (usually within 6-8 weeks), you can transplant them into larger pots or directly into your garden.
Choose a sunny or partially shaded location with well-drained soil. With proper care and attention, your propagated Island Mallows will thrive, adding vertical beauty and pollinator appeal to your outdoor space. You’ll not only enjoy their stunning blooms but also contribute to the preservation of this remarkable California native.