Unlocking the Secrets of Mammillaria glochidiata Propagation: A Beginner’s Guide
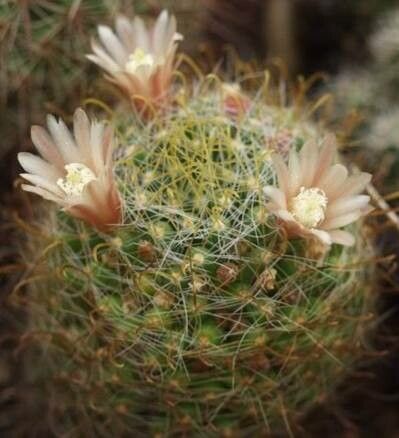
The charming world of cacti often captivates plant enthusiasts with their unique shapes, textures, and stunning blooms. Among these captivating succulents, the Mammillaria glochidiata, with its intriguing, densely packed tubercles and vibrant pink flowers, holds a special place. While relatively easy to care for, many wonder about the best way to propagate this beautiful cactus and expand their collection.
This guide unveils the secrets of Mammillaria glochidiata propagation, empowering you to multiply your cacti and share their beauty with friends and family.
Understanding Mammillaria glochidiata
Before diving into propagation, it’s helpful to understand the plant itself. Mammillaria glochidiata, sometimes called the “Nipple Cactus” due to its distinctive tubercles, hails from Mexico. It’s a relatively slow-growing cactus, typically forming clusters as it matures. Knowing this natural growth pattern gives you a head start in choosing the best propagation method.
Two Paths to Propagation
For Mammillaria glochidiata, you have two primary propagation methods:
- Offsets (Pups): This method utilizes the natural clustering habit of this cactus. As the plant matures, it produces smaller “pups” at its base. These pups are essentially miniature versions of the parent plant.
- Seeds: While less common, propagation from seeds is possible. This method, though rewarding, requires more patience and a bit more finesse.
Propagating from Offsets
This method is the most straightforward and yields faster results:
- Gather Your Tools: You’ll need a sharp, clean knife or pair of pruning shears, a pair of gloves (those spines are sharp!), and small pots filled with a well-draining cactus potting mix.
- Remove the Offset: Carefully detach the pup from the mother plant. Using a gentle twisting motion often does the trick. Ensure the offset has some roots attached for optimal success.
- Let it Callus: Leave the detached pup in a warm, dry place for a few days to allow the cut area to callus over. This prevents rot when planted.
- Potting Time: Plant the callused pup in your prepared pot, burying the base just enough to keep it upright.
- Watering Wisdom: Initially, water sparingly, only when the potting mix is thoroughly dry. Overwatering can lead to root rot.
Propagating from Seeds
While more challenging, seed propagation offers a unique sense of accomplishment:
- Seed Source: Acquire seeds from a reputable supplier or collect them from the dried seed pods of your own Mammillaria glochidiata.
- Sowing the Seeds: Fill seed trays or small pots with a well-draining seed starting mix. Sprinkle the seeds on the surface and lightly cover them with a thin layer of the mix.
- Creating a Humid Environment: To encourage germination, cover the trays with a plastic dome or wrap to create a humid environment. Place them in a brightly lit area, but avoid direct sunlight.
- Patience is Key: Germination can take several weeks. Once the seedlings are large enough to handle, carefully transplant them into individual pots.
Tips for Success:
- Regardless of the method, always use well-draining soil specifically formulated for cacti and succulents.
- Provide ample bright, indirect light.
- Be patient! Propagation takes time, and each plant grows at its own pace.
Propagating your Mammillaria glochidiata is a rewarding journey that allows you to witness the miracle of new life while expanding your cactus collection. With a bit of care and attention, you’ll soon be surrounded by these fascinating cacti, their vibrant blooms a testament to your successful propagation endeavor.