Unlock the Secrets to Growing More Meliosma donnellsmithii: A Guide to Propagation
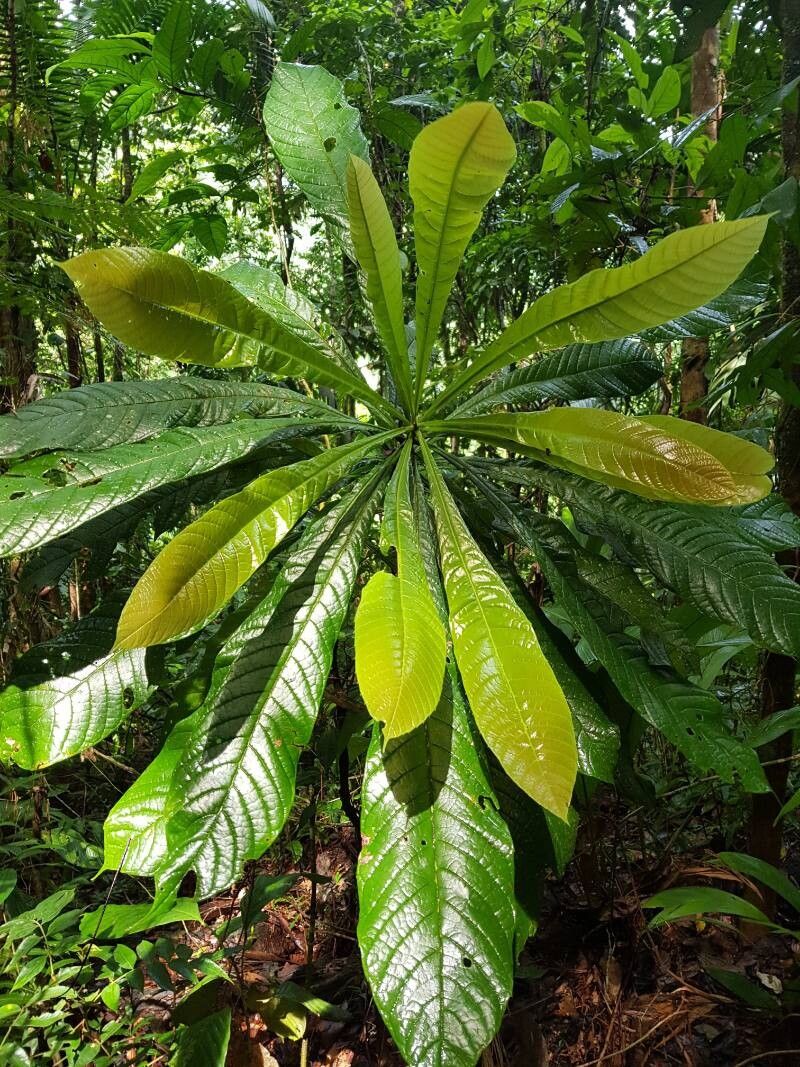
The Meliosma donnellsmithii, also known as the “Donnell Smith’s Meliosma,” is a stunning evergreen shrub with lush, deeply veined, dark green foliage. Its striking appearance makes it a popular choice for landscape design, particularly in shaded areas. But what if you could have even more of these beautiful plants?
The good news is that propagating Meliosma donnellsmithii is achievable, even for novice gardeners. This article will guide you through the intricacies of the process, giving you the tools to cultivate your own collection of these captivating shrubs.
Methods of Propagation
There are two primary methods for propagating Meliosma donnellsmithii:
Seed Propagation: While achievable, this method is often considered slow and less reliable. Seeds require specific conditions for germination, including a period of cold stratification. This involves exposing the seeds to low temperatures for several weeks before sowing them in a well-draining seed starting mix. You can expect seedlings to emerge within a few months, but it will take several years for them to develop into mature plants.
- Cuttings: This is the more common and generally faster method for propagating Meliosma donnellsmithii. It involves taking stem cuttings from healthy, mature plants and inducing them to develop roots. By taking cuttings in the late spring or early summer, you can capitalize on the plant’s active growth period.
Step-by-Step Guide to Propagation by Cuttings
Select a Cutting: Choose a 4-6 inch section from a non-flowering stem that is neither too young nor too old. Look for healthy, mature growth with several leaf nodes.
Prepare the Cutting: Using sharp, clean shears or a knife, make a clean cut just below a leaf node. Remove the leaves from the bottom 2-3 inches of the cutting to prevent decay.
Dip in Rooting Hormone: To encourage root development, dip the cut end of the stem cutting into a rooting hormone powder or solution.
Prepare the Growing Medium: Fill a pot or tray with a well-draining potting mix specifically designed for cuttings. Lightly moisten the mix before planting.
Plant the Cutting: Gently insert the cut end of the stem cutting into the potting mix, ensuring a firm stance.
Create a Humid Environment: Place a clear plastic dome or bag over the pot or tray to create a high-humidity environment. This helps to keep the cuttings from drying out.
Provide Proper Light: While Meliosma donnellsmithii prefers shaded environments, the cuttings will thrive in bright but indirect light. Avoid direct sunlight, which can scorch the leaves.
Maintain Soil Moisture: Keep the potting mix consistently moist but not soggy. Water sparingly and allow the top layer of the mix to dry out slightly between waterings.
Monitor for Roots: Within a few weeks, you should see signs of root growth.
- Acclimatize the Cutting: After rooting, gradually acclimate your new plant to its outdoor environment by removing the plastic dome or bag for short periods, gradually increasing the exposure time over several days.
Key Tips for Success
- Use sharp tools: Ensure your cutting tools are clean and sharp to minimize damage to the stems.
- Choose the right time: Spring and early summer are the ideal times for taking cuttings, when the plant is actively growing.
- Control the humidity: Maintaining a high humidity level is vital to prevent the cuttings from drying out.
- Be patient: While cuttings can take root within weeks, it may take months for them to develop a strong root system.
With the right technique, patience, and a bit of care, you can successfully propagate Meliosma donnellsmithii and enjoy the beauty of this striking plant in your garden for years to come.