Taming the Tiny Treasures: A Guide to Propagating the Elusive Nemacladus glandulifer
The world of plants is brimming with fascinating oddities, and for those with a penchant for the petite and peculiar, Nemacladus glandulifer is a treasure worth exploring. Don’t let its mouthful of a name deter you; this diminutive annual, also known as the Glandular Threadplant, holds a captivating charm for those willing to delve into its miniature world. While not commonly found in gardens, its delicate beauty and unique adaptations make it a rewarding challenge for plant enthusiasts. So, how does one go about welcoming this miniature marvel into their lives? Let’s unravel the secrets of propagating the Nemacladus glandulifer.
Understanding the Miniature Marvel:
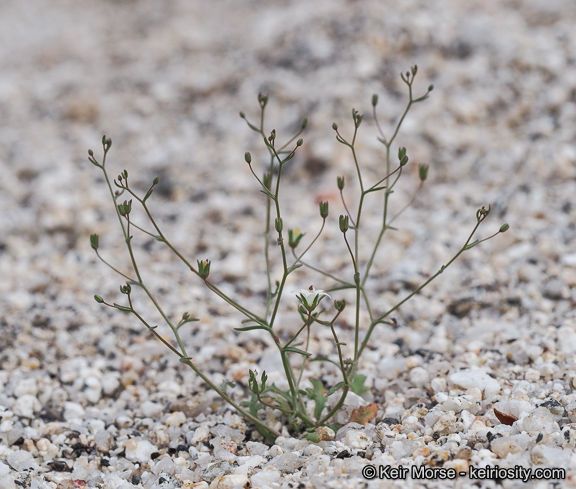
Hailing from the dry, rocky terrains of California, the Nemacladus glandulifer is a testament to nature’s artistry in miniature. This diminutive annual rarely surpasses a few inches in height, with hair-thin stems adorned with equally minuscule, glistening leaves. Its claim to fame, however, lies in its ethereal, bell-shaped flowers, barely perceptible to the naked eye, that bloom in a fleeting display of elegance.
Propagating the Elusive Beauty:
Seed Starting: The most reliable method for propagating Nemacladus glandulifer is through seeds.
- Source Your Seeds: Due to their rarity in cultivation, acquiring seeds might require some sleuthing. Specialist nurseries or online seed exchanges are your best bet.
- Timing is Everything: Aim to sow your seeds in late fall or early winter, mimicking their natural growing cycle.
- Prepare Your Seedbed: Use a well-draining seed starting mix or create your own by combining equal parts peat moss, perlite, and sand.
- Sowing the Seeds: Scatter the dust-like seeds on the surface of the soil, pressing them in gently but avoiding burying them.
- Patience is Key: Mist the soil regularly, keeping it consistently moist but not waterlogged. Germination can be erratic, ranging from a few weeks to a couple of months.
- Transplanting: Once your seedlings develop a couple of true leaves, it’s time to transplant them.
- Handle with Care: These seedlings are incredibly delicate, so use a small spoon or tweezers to gently lift and separate them.
- Individual Pots: Choose small pots or plug trays filled with the same well-draining mix used for starting your seeds.
- Acclimatization: Gradually acclimate your seedlings to outdoor conditions once the risk of frost has passed.
Creating a Suitable Habitat:
Recreating the Nemacladus glandulifer‘s native environment is vital for its success.
- Sun Seeker: Ensure your plants receive ample sunlight or partial shade.
- Well-Drained Soil: Remember, drainage is crucial. Plant them in containers or raised beds to avoid waterlogged conditions.
- Minimal Watering: Once established, these drought-tolerant plants prefer infrequent, deep waterings that mimic their arid origins.
Embracing the Challenge:
Cultivating the Nemacladus glandulifer is a rewarding endeavor for patient plant lovers with a fascination for the intricate details of nature. While its diminutive size might require a keen eye and a gentle touch, the satisfaction of nurturing this botanical gem from seed to bloom is a testament to the beauty found in even the smallest corners of the plant kingdom.