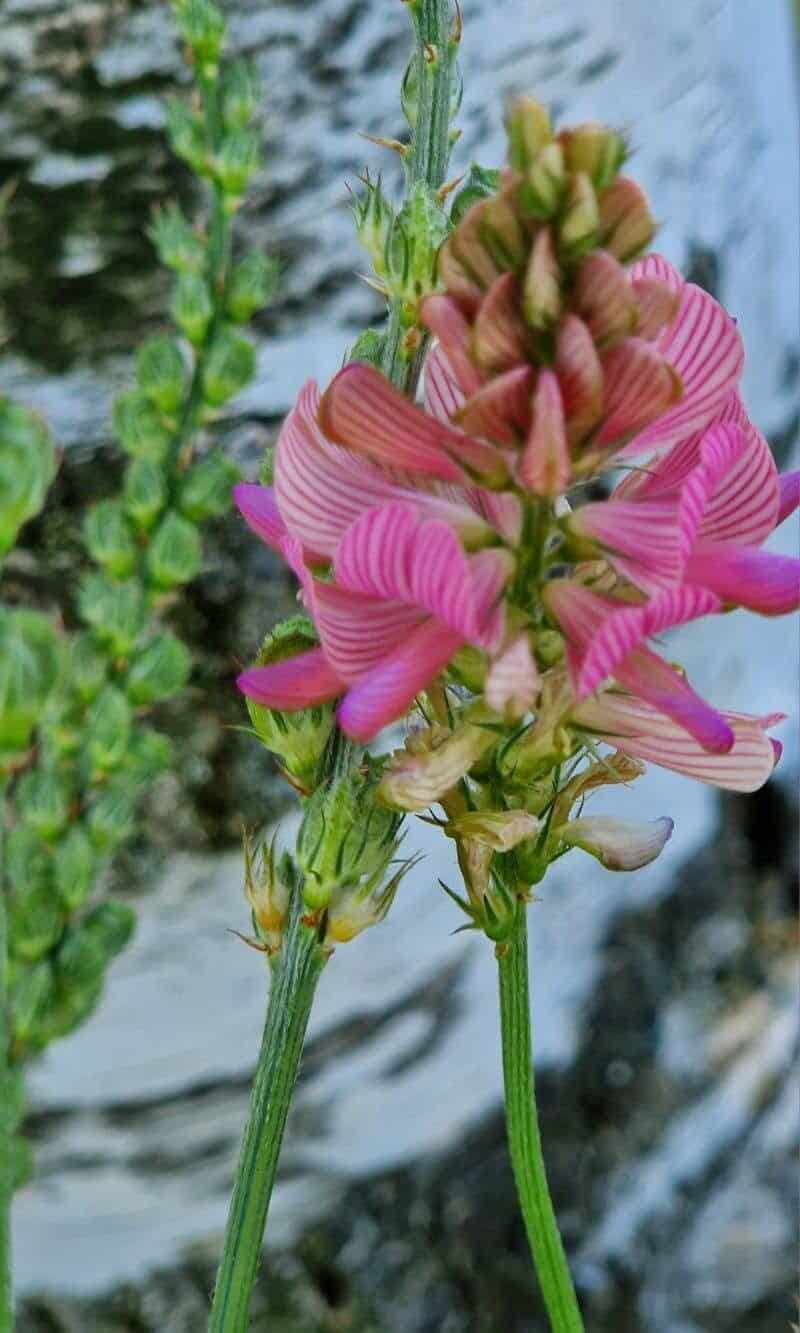
Taming the Sand Beauty: Propagating Onobrychis arenaria
The world of gardening is full of hidden gems, and Onobrychis arenaria, also known as the Sandy Sainfoin, is certainly one of them. This resilient perennial boasts delicate pink flowers, thrives in well-drained soil, and even offers nitrogen-fixing benefits for your garden. But how do you invite this sand-loving beauty into your own outdoor space? Let’s dive into the world of Onobrychis arenaria propagation and learn the secrets to its successful cultivation.
Two Paths to Plant Parenthood: Seeds vs. Cuttings
When it comes to propagating Onobrychis arenaria, you have two primary options: starting from seed or taking cuttings. Each method has its own advantages and challenges:
1. Seed Starting: A Journey of Patience and Reward
- The Pros: Starting from seed allows you to grow a larger number of plants, perfect if you’re looking to establish a substantial patch or attract pollinators to your garden en masse.
- The Cons: Seed germination can be a bit more unpredictable, requiring patience as you wait for those first green shoots to emerge.
Here’s how to propagate Onobrychis arenaria from seed:
- Timing is Key: Sow seeds in either the spring after the last frost or in early autumn.
- Prepare the Seedbed: Onobrychis arenaria prefers well-drained soil, ideally with a sandy texture. If your soil is heavy, consider amending it with sand or compost to improve drainage.
- Sow with Care: Scatter seeds thinly over the prepared soil, lightly pressing them into the surface. Aim for a depth of about ¼ inch.
- Water Wisely: Keep the soil consistently moist but not waterlogged.
- Patience, Young Gardener: Germination can take anywhere from 2 to 4 weeks.
- Thinning Out: Once seedlings have developed a few true leaves, thin them out to provide adequate space for growth. Aim for a spacing of about 12-18 inches.
2. Cuttings: Cloning Your Sandy Sainfoin
- The Pros: Taking cuttings offers a quicker route to established plants and ensures that the new plants will be genetically identical to the parent plant, preserving desired traits.
- The Cons: This method is limited by the number of healthy stems you can take from the parent plant.
Follow these steps to propagate Onobrychis arenaria from cuttings:
- Choose Wisely: Select healthy, non-flowering stems from the parent plant in late spring or early summer.
- The Cutting Edge: Using a sharp, clean knife or pair of shears, take cuttings that are about 4-6 inches long.
- Prepare the Cutting: Remove the lower leaves from the cutting, leaving only a few leaves at the top.
- Hormonal Help: Dip the cut end of the stem in rooting hormone powder to encourage root development (optional but recommended).
- Planting Time: Insert the cuttings into a pot filled with a well-draining potting mix.
- Greenhouse Effect: Cover the pot with a plastic bag or humidity dome to create a warm, humid environment.
- Monitor and Maintain: Keep the potting mix consistently moist and place the pot in a bright location, but out of direct sunlight.
- Root Check: After 4-6 weeks, gently tug on the cuttings. Resistance indicates root development.
- Transplant Time: Once roots have sufficiently developed, transplant the cuttings into individual pots or into your garden.
Welcoming Onobrychis arenaria into Your Garden
Regardless of your chosen propagation method, remember that Onobrychis arenaria thrives in sunny locations with well-drained soil. This beautiful and beneficial plant is relatively low-maintenance once established, rewarding your efforts with charming blooms and a touch of wildness in your garden. So why wait? Embark on your propagation journey today, and let the Onobrychis arenaria grace your garden with its captivating beauty.