Prickly Pears Made Easy: Propagating Your Own Opuntia camanchica
The “Opuntia camanchica,” also known as the plains prickly pear, is a captivating cactus with vibrant flowers and striking resilience. While admiring these beauties in the wild is a treat, why not cultivate your own prickly pear haven at home? Propagation, the process of creating new plants, is surprisingly simple with “Opuntia camanchica” and a rewarding experience for plant enthusiasts of all levels.
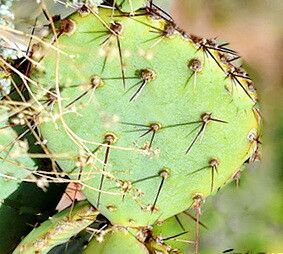
Before we delve into the methods, let’s understand this fascinating cactus. The “Opuntia camanchica” thrives in arid environments, showcasing its iconic flat, pad-like stems (cladodes) covered in spines. These very pads hold the key to successful propagation.
Two Paths to Prickly Pear Paradise:
1. Pad Cuttings: A Slice of Success
This method, using existing pads to grow new plants, offers the highest success rate.
Step-by-Step Guide:
- Choose your cutting: Select a healthy, mature pad from a thriving “Opuntia camanchica.” The ideal time for taking cuttings is during the growing season (spring or early summer).
- Make the cut: Use a sharp, sterilized knife or pruning shears to cleanly sever the pad at its base where it connects to the main plant.
- Callus over: Leave the cut pad in a dry, well-ventilated area for about a week. This allows the cut end to form a callus, protecting it from rot once planted.
- Ready to root: Prepare a pot with a well-draining soil mix specific for cacti and succulents. Plant the callused end about an inch deep, ensuring the pad is mostly above the soil line.
- Patience is key: Water sparingly, only when the soil is completely dry. Within a few weeks, you should start to see new growth, indicating successful rooting.
2. Seeds: From Tiny Specks to Spiny Wonders
While slightly more challenging and time-consuming, growing “Opuntia camanchica” from seeds offers a unique satisfaction.
Step-by-Step Guide:
- Seed collection: “Opuntia camanchica” produces fruits after flowering. Allow the fruit (prickly pear) to fully ripen and dry on the plant. Extract seeds from the fruit pulp, cleaning them thoroughly.
- Pre-sowing treatment: Lightly scarify the hard seed coat using fine sandpaper. This aids in water absorption and germination.
- Sowing the seeds: In a seed tray filled with a well-draining seed starting mix, sprinkle the seeds sparsely. Lightly cover them with a thin layer of the mix.
- Light and moisture: Place the tray in a bright location, but out of direct sunlight. Mist the soil regularly, keeping it consistently moist but not waterlogged.
- Germination and beyond: Be patient, germination can take several weeks. Once seedlings appear, ensure they receive adequate light and continue to water carefully.
Important Considerations:
- Handling with Care: Always wear protective gloves and use tongs when handling “Opuntia camanchica” to avoid its prickly spines.
- Sunlight is essential: Place your newly propagated plants in a location that receives ample sunlight for at least 6 hours a day.
- Less is more with watering: Overwatering is a common pitfall. Only water when the soil is completely dry.
Propagating your own “Opuntia camanchica” offers a fulfilling connection with nature’s resilient beauty. With these techniques and a little patience, you can cultivate a stunning display of prickly pear resilience that will thrive for years to come.