Multiply the Marvel: Propagating Your Orbea cooperi
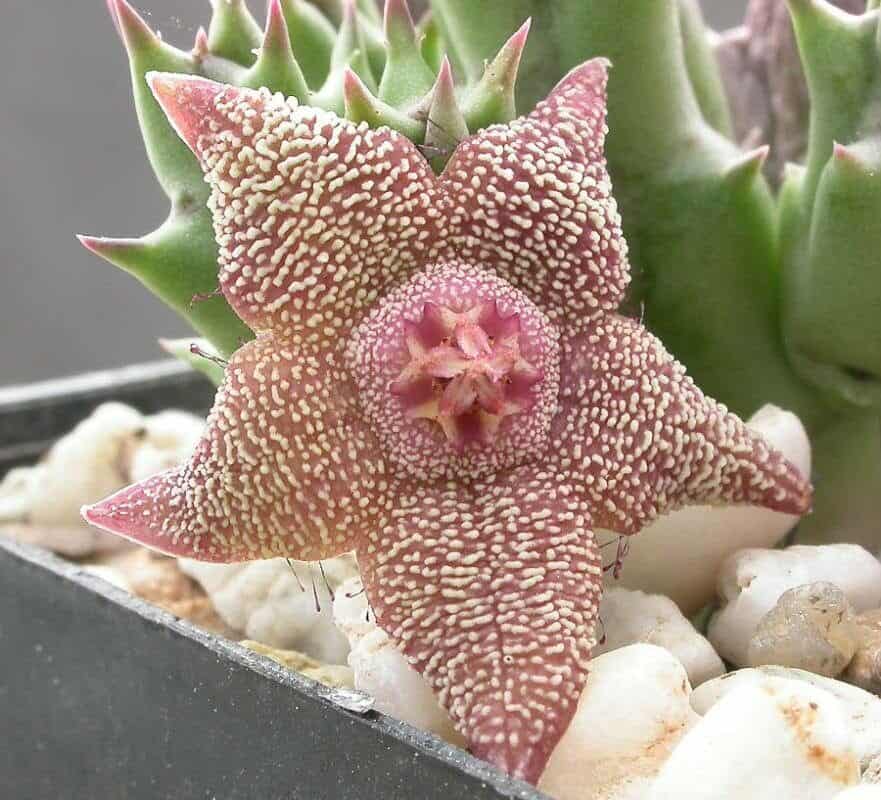
The Orbea cooperi, also known as the Starfish Plant, is a fascinating succulent with uniquely beautiful, star-shaped flowers that are, let’s be honest, a bit on the stinky side. That intriguing aroma is intentional, designed to attract flies for pollination! But scent aside, these low-maintenance beauties are relatively easy to propagate, meaning you can easily expand your collection or share the joy with friends. Today, we’ll explore the two most effective methods:
1. Stem Cuttings: A Slice of Success
Propagating Orbea cooperi from stem cuttings is the most common and straightforward method. Here’s what you need:
- Sharp, clean knife or shears: This ensures a clean cut and minimizes the risk of infection to your plant.
- Well-draining potting mix: A mix specifically formulated for succulents and cacti is ideal.
- Small pots (2-3 inches in diameter): Choose pots with drainage holes.
- Optional: Rooting hormone: While not essential, rooting hormone can encourage faster and more successful root development.
Step-by-Step Guide:
- Choose a healthy stem: Select a plump, firm stem from your Orbea cooperi. Ideally, it should be at least 3-4 inches long.
- Take the cutting: Using your sterilized knife or shears, make a clean cut at a 45-degree angle just below a node (the point where leaves or branches emerge).
- Let it callus: Allow the cutting to dry out and form a callus over the cut end. This can take anywhere from a few days to a week, depending on the humidity.
- (Optional) Apply rooting hormone: Dip the callused end of the cutting in rooting hormone, following the instructions on the product label.
- Plant the cutting: Fill your pot with the well-draining potting mix. Make a small indentation in the center and gently insert the callused end of the cutting, burying it about an inch deep.
- Water sparingly: Water the cutting lightly, just enough to moisten the soil. Avoid overwatering, as this can lead to rot.
- Patience is key: Place the pot in a bright location, but out of direct sunlight. Within a few weeks, your cutting should begin to develop roots. You’ll know it’s successful when you see new growth emerging.
2. Division: Sharing is Caring
If your Orbea cooperi is already well-established and forming clumps, division is an excellent way to propagate. This method involves separating the plant into smaller sections, each with its own roots.
What you’ll need:
- Similar materials as stem cuttings: Sharp knife/shears, well-draining potting mix, small pots.
Step-by-Step Guide:
- Remove the plant: Gently remove the Orbea cooperi from its pot.
- Identify division points: Examine the plant and look for natural divisions where sections can be easily separated.
- Separate with care: Using your clean knife or shears, carefully cut through the roots, separating the plant into smaller clumps.
- Potting the divisions: Choose a pot size suitable for each division. Plant them at the same depth they were growing in the original pot, using a well-draining potting mix.
- Water lightly: Moisten the soil, but avoid overwatering.
- Location and care: Place the newly potted divisions in a bright location, sheltered from direct sunlight. Continue with regular succulent care, allowing the soil to dry out completely between waterings.
Final Tips for Successful Orbea cooperi Propagation
- Timing is key: The best time to propagate Orbea cooperi is during its active growing season, which is typically spring and early summer.
- Less is more: Remember that these are succulents! Avoid overwatering at all costs. It’s better to err on the side of dryness.
- Be patient: Propagation takes time. Don’t be discouraged if you don’t see results immediately. Just provide consistent care, and your new Orbea cooperi plants will thrive in no time.
Propagating your Orbea cooperi is a rewarding experience that allows you to expand your succulent collection and share the unique beauty of this plant with others. With a little patience and the right techniques, you can enjoy these fascinating, stinky-yet-beautiful plants for years to come!