Taming the Wild Grain: Propagating Kodo Millet (Paspalum scrobiculatum) at Home
Kodo millet, also known as Paspalum scrobiculatum, is a resilient ancient grain experiencing a resurgence in popularity. This drought-tolerant crop boasts impressive nutrition and a unique earthy flavor. But did you know you can cultivate this ancient grain in your own backyard? Whether you’re a seasoned gardener or a curious beginner, this guide will unveil the secrets of propagating kodo millet successfully.
Two Paths to Propagation: Seed vs. Division
Kodo millet offers two primary methods of propagation:
Seed Starting: This method is ideal for beginners and allows you to start with a larger quantity of plants.
- Timing is Key: Sow seeds directly outdoors after the last frost when soil temperatures reach a consistent 65-70°F (18-21°C)
- Prepare the Bed: Choose a sunny location with well-drained soil. Lightly amend the soil with compost for optimal growth.
- Sowing the Seeds: Scatter seeds sparsely over the prepared soil, lightly raking them in to a depth of about ¼ inch (0.5 cm).
- Water Gently: Keep the soil consistently moist but not waterlogged until germination, which usually takes 7-14 days.
- Thinning Out: Once the seedlings reach 2 inches (5 cm) tall, thin them out to provide adequate spacing of 6-8 inches (15-20 cm) apart.
Division: This method is excellent for established plants and allows you to multiply your existing kodo millet quickly.
- Digging Deep: In early spring, carefully dig up a healthy, mature clump of kodo millet.
- Divide and Conquer: Use a sharp knife or garden shears to divide the clump into smaller sections, ensuring each section has a healthy root system.
- Replanting: Replant the divided sections immediately in prepared beds with the same soil and sunlight requirements as seedlings. Water thoroughly.
Nurturing Growth: Essential Care Tips
- Sunlight is King: Kodo millet thrives in full sun, ideally receiving at least 6 hours of direct sunlight daily.
- Water Wisely: While drought-tolerant, kodo millet benefits from regular watering, especially during its initial growth stages. Aim for deep, infrequent watering to encourage strong root development.
- Feed the Growth: A light application of balanced fertilizer during the growing season can enhance growth, but kodo millet is not a heavy feeder.
- Weed Control: Kodo millet prefers to grow without competition. Keep the area free from weeds consistently, especially during the early stages.
Reaping the Rewards: Harvest Time
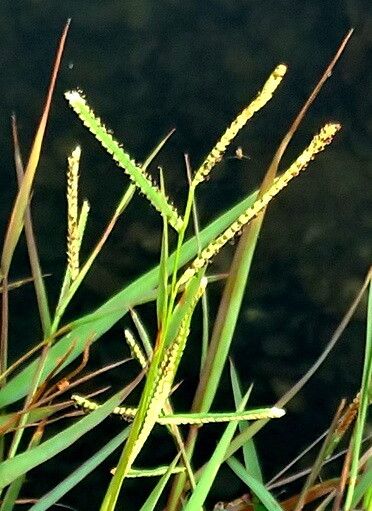
After approximately 3-4 months, the kodo millet will grace you with beautiful, reddish-brown seed heads. You’ll know it’s time to harvest when the seeds are firm and come off easily when rubbed between your fingers. Gently cut the seed heads and hang them upside down in a well-ventilated area to dry completely. Once entirely dry, you can easily thresh the seeds by hand or with a simple rolling pin.
Growing Your Own Ancient Grain
Propagating kodo millet is a rewarding endeavor for both novice and seasoned gardeners. Whether you select the seed starting or division method, nurturing this resilient grain will provide you with a bountiful harvest of a nutritious and delicious ancient grain. So why not embark on a journey to cultivate this fascinating crop and experience the satisfaction of growing your own food, steeped in history and packed with flavor?